Blog

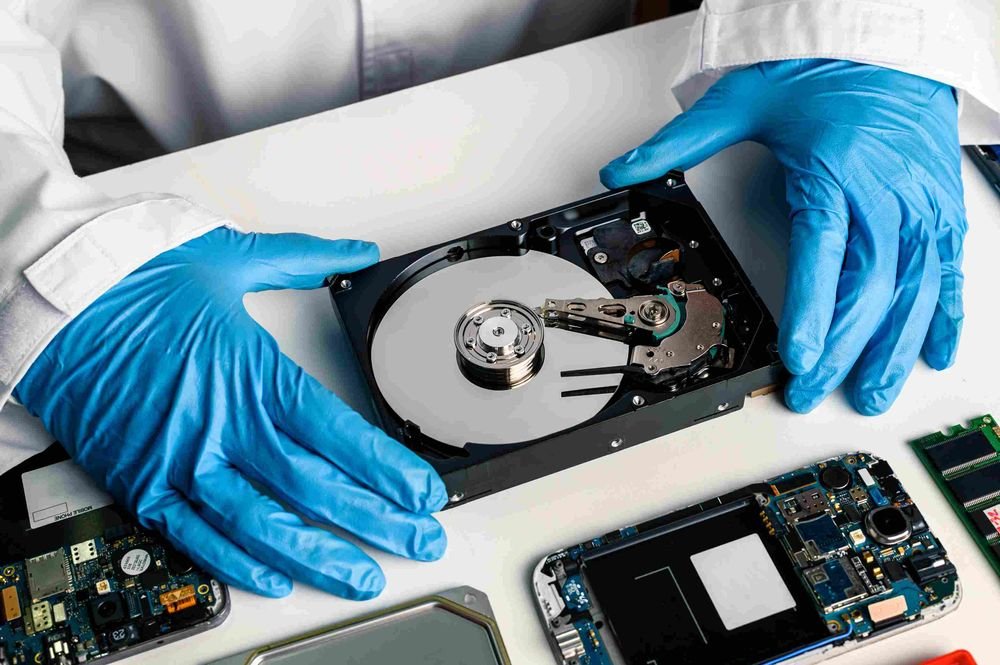
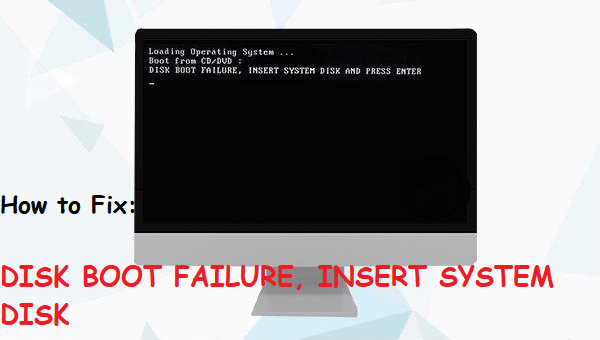
  • Fixing “Disk Boot Failure” on Modern UEFI Systems (Complete 2026 Hardware Troubleshooting Guide)

    Fixing “Disk Boot Failure” on Modern UEFI Systems (Complete 2026 Hardware Troubleshooting Guide)

    Look, I’ve seen this error a thousand times—and it always shows up at the worst possible moment.

    You press the power button… fans spin… and instead of Windows loading, you get:

    “Disk Boot Failure”
    or
    “No Boot Device Found”

    Here is the real talk about why your rig is acting up: this is not just a Windows issue. It’s a boot chain failure inside your UEFI system, meaning your motherboard can’t correctly find, read, or initialize your storage device.

    In this expert guide from fixrig.xyz, I’ll break down Fixing “Disk Boot Failure” on modern UEFI systems, step-by-step, using real hardware troubleshooting logic—not guesswork.

    Common Symptoms of Disk Boot Failure

    Before fixing anything, confirm the behavior:

    1. “No Boot Device Found”

    System cannot locate OS drive.

    2. Boot Loop Into BIOS

    PC keeps returning to UEFI screen.

    3. Black Screen After POST

    System passes startup but fails to load OS.

    4. SSD/HDD Not Detected

    Drive missing from BIOS entirely.

    If your seeing any of these, your boot chain is broken somewhere.

    Root Causes (UEFI Boot System Breakdown)

    Incorrect Boot Order

    System tries wrong drive first.

    Corrupted Bootloader (EFI Partition)

    UEFI cannot find boot files.

    Faulty or Disconnected Storage Drive

    Loose SATA/NVMe connection.

    BIOS Reset or Update Failure

    Settings reverted to defaults.

    SSD/HDD Hardware Failure

    Drive not responding at hardware level.

    Secure Boot / UEFI Conflicts

    Modern systems block incompatible boot entries.


    Tools Checklist Before Troubleshooting

    Prepare:

    • BIOS/UEFI access (DEL/F2 key)
    • Windows installation USB
    • SATA/NVMe cables (if desktop)
    • External drive enclosure
    • Spare bootable drive (optional)

    Pro tip: Always verify hardware before assuming software corruption.


    Comparison Table: Software Fix vs Hardware Fix

    Fix TypeDifficultyCostSuccess Rate
    Boot Order FixEasyFreeHigh
    UEFI RepairMediumFreeHigh
    Bootloader RebuildMediumFreeVery High
    Cable/Drive CheckEasyLowHigh
    Drive ReplacementHard$$Maximum

    Step-by-Step: Fixing “Disk Boot Failure” on Modern UEFI Systems

    Step 1: Enter BIOS/UEFI

    Restart system and press:

    • DEL / F2 / ESC (depends on motherboard)

    Check:

    • Is your SSD/HDD visible?

    If NOT detected → hardware issue likely.


    Step 2: Check Boot Order

    Go to Boot Settings:

    • Set your main SSD as Boot Option #1
    • Disable unnecessary boot devices

    Incorrect priority is one of the most common causes.


    Step 3: Enable UEFI Mode Properly

    Modern systems require:

    • UEFI mode enabled
    • Legacy/CSM disabled (in most cases)

    Mismatch causes boot failure.


    Step 4: Check Storage Mode (AHCI vs RAID)

    Wrong mode breaks booting:

    • AHCI → standard SSD setups
    • RAID → multi-drive configurations

    Changing this incorrectly can trigger Disk Boot Failure.


    Step 5: Inspect Physical Connections

    For desktop users:

    • Reseat SATA cables
    • Reinsert NVMe SSD
    • Check motherboard slots

    Loose connections = instant boot failure.


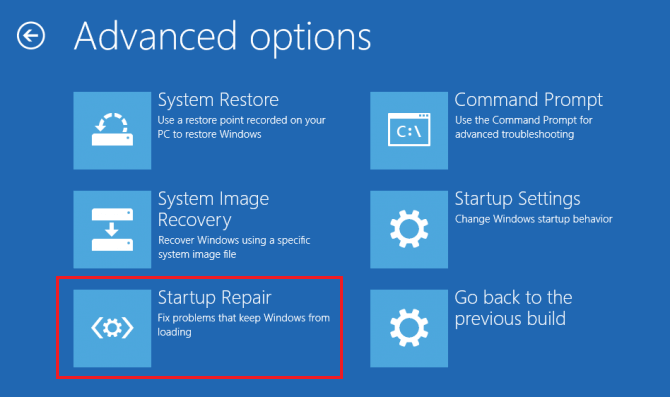
    Step 6: Repair Bootloader Using Windows USB

    If drive is detected:

    • Boot from Windows USB
    • Select Repair Your Computer
    • Open Command Prompt

    Run:

    • bootrec /fixmbr
    • bootrec /fixboot
    • bootrec /rebuildbcd

    This rebuilds EFI boot structure.


    Step 7: Check Disk Health (SMART Status)

    A failing drive may show:

    • Slow detection
    • Missing partitions
    • Random boot failure

    If SMART status is bad → backup immediately.


    Step 8: Disable Secure Boot Temporarily

    Secure Boot can block boot entries:

    • Disable it temporarily
    • Test system boot

    Then re-enable after fixing.


    Advanced Troubleshooting (Pro Level)

    BIOS Reset After Update

    If system recently updated BIOS:

    • Settings may reset
    • Boot order often changes

    Reconfigure manually.


    NVMe Slot Issues

    Some motherboards share lanes:

    • GPU + NVMe conflicts
    • Disabled slots

    Check motherboard manual.


    Corrupted EFI Partition

    Symptoms:

    • Drive detected but won’t boot

    Fix via bootrec or reinstall EFI.


    Voltage or PSU Instability

    Unstable power can cause:

    • Drive detection failure
    • Random boot errors

    Check PSU health.


    Common Mistakes That Make It Worse

    Reinstalling OS Immediately

    This destroys recovery chances unnecessarily.

    Ignoring BIOS Settings

    Most users skip this critical step.

    Switching Storage Modes Randomly

    Can break existing installations.

    Not Checking Physical Drive

    Software fixes won’t help dead hardware.


    Real-World Scenarios

    Problem: SSD not detected

    Cause: Cable or hardware failure
    Fix: Reseat or replace drive


    Problem: Boot loop into BIOS

    Cause: Wrong boot order
    Fix: Set correct boot device


    Problem: After Windows update system won’t boot

    Cause: EFI corruption
    Fix: Bootloader repair


    Pro Tips from a Hardware Engineer

    • Always back up EFI and system partitions
    • Keep BIOS updated—but stable
    • Prefer UEFI over Legacy boot
    • Use high-quality SSDs for OS drives

    And here’s something most guides won’t tell you:
    A single BIOS setting change can make a perfectly healthy drive look “dead” to your system.


    When to Replace Hardware

    Replace your drive if:

    • Not detected in BIOS at all
    • SMART shows failure warnings
    • Repeated boot failures continue

    At that point, recovery is secondary to replacement.


    Final Thoughts: Boot Failure is a System-Level Problem

    Fixing “Disk Boot Failure” on modern UEFI systems is not just about Windows repair—it’s about understanding the entire boot chain: BIOS → UEFI → Storage → EFI → OS.

    Break one link, and the system stops.

    Fix the right link, and everything works again.


    CTA: Fix Your Boot System Like a Pro

    At fixrig.xyz, we help you diagnose hardware problems at the root—not just treat symptoms.

    Still stuck on Disk Boot Failure? Not sure if it’s BIOS, SSD, or bootloader?

    Drop your system specs and issue in the comments—and let’s troubleshoot your rig step-by-step.

    Because your system should boot cleanly… every single time.
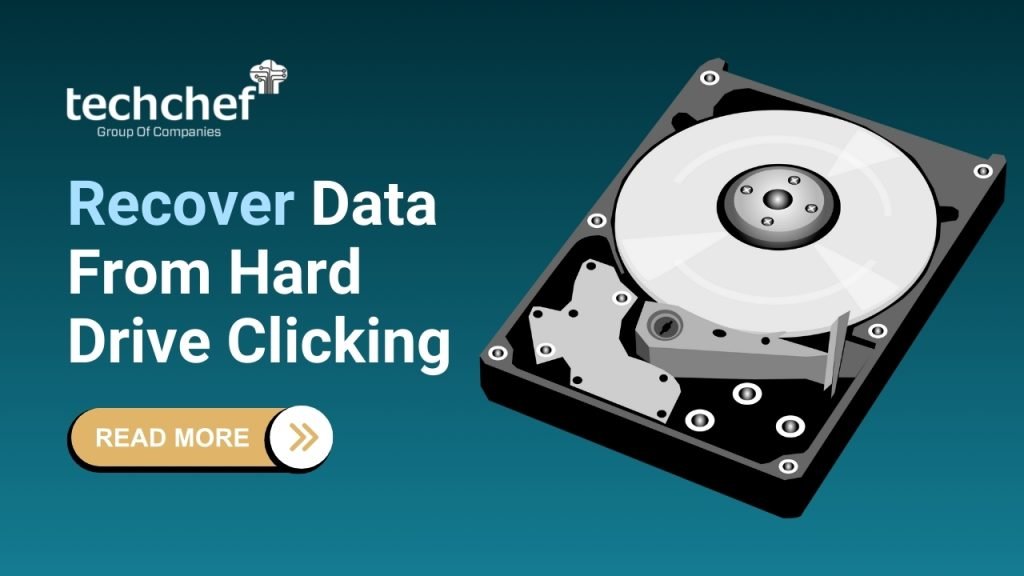
  • How to Recover Data from a Clicking Hard Drive Safely (2026 Hardware Recovery Guide)

    How to Recover Data from a Clicking Hard Drive Safely (2026 Hardware Recovery Guide)

    Look, I’ve seen this issue a thousand times—and it always starts the same way.

    You hear a faint click… click… click… from your hard drive. Then your system slows down. Then files disappear. And finally—your drive becomes inaccessible.

    Here is the real talk about why your rig is acting up: a clicking hard drive is not a software issue. It’s almost always mechanical failure inside the drive—read/write head damage, spindle issues, or firmware-level corruption.

    In this expert guide from fixrig.xyz, I’ll show you how to recover data from a clicking hard drive safely, without making the damage worse.


    Why Hard Drives Start Clicking (Hardware Reality)

    A clicking sound usually means the drive is struggling to read data.

    1. Read/Write Head Failure

    The head tries to read but keeps resetting position.

    2. Spindle Motor Issues

    Platters fail to spin correctly.

    3. Bad Sectors Expansion

    Damaged areas increase rapidly.

    4. Power Instability

    Voltage drops can cause repeated head calibration.

    5. Firmware Loop Failure

    Drive can’t initialize properly.

    If your hearing clicking sounds repeatedly, stop using the drive immediately.


    Critical Warning Before Recovery

    Never do this:

    • Don’t keep rebooting the PC
    • Don’t run disk repair tools repeatedly
    • Don’t try random “fix software”

    Every attempt can reduce recovery chances.


    Tools Checklist for Safe Data Recovery

    Prepare carefully:

    • SATA/USB adapter
    • Secondary working PC
    • Data recovery software (read-only mode)
    • External storage drive
    • Anti-static environment

    Pro tip: Always recover to a different drive—not the same one.


    Comparison Table: DIY Recovery vs Professional Recovery

    MethodRisk LevelCostSuccess Rate
    Software RecoveryMediumLowModerate
    Disk ImagingLowMediumHigh
    Clean Room RecoveryVery LowHighVery High
    Continued Use of DriveExtremeFreeVery Low

    Step-by-Step: How to Recover Data from a Clicking Hard Drive Safely

    Step 1: Stop Using the Drive Immediately

    This is the most important step.

    • Power off system
    • Disconnect drive

    Every second of use increases damage.


    Step 2: Check Basic Connections

    Sometimes the issue is not internal:

    • Replace SATA cable
    • Try different USB port
    • Test external enclosure

    Loose connections can mimic clicking.


    Step 3: Try External Connection Only

    • Connect drive via USB adapter
    • Avoid internal booting

    This reduces system stress on the drive.


    Step 4: Attempt Drive Detection (Carefully)

    Check if system detects the drive:

    • BIOS check
    • Disk Management (Windows)

    If not detected → likely hardware failure.


    Step 5: Create a Sector-by-Sector Clone

    This is the safest DIY recovery method:

    • Use disk imaging tools
    • Clone entire drive to healthy disk

    This prevents further wear.

    Never recover directly from failing drive.


    Step 6: Use Data Recovery Software

    Once image is created:

    • Scan cloned drive
    • Recover files selectively

    Focus on critical data first.


    Step 7: Prioritize Important Files

    Recover in order:

    • Documents
    • Photos
    • Work files
    • System data

    Avoid unnecessary full restore attempts.


    Advanced Troubleshooting (Pro Level)

    Check Power Supply Stability

    Unstable PSU can worsen clicking:

    • Test with different power source
    • Avoid cheap adapters

    Voltage drops can damage heads further.


    Listen for Pattern Changes

    • Fast clicking = head failure
    • Slow clicking = spindle issue
    • No spin = motor failure

    This helps diagnose severity.


    BIOS Detection Behavior

    If BIOS:

    • Detects drive → partial recovery possible
    • Doesn’t detect → serious hardware failure

    Common Mistakes That Destroy Data Forever

    Repeated Power Cycling

    This causes more head crashes.

    Running CHKDSK Immediately

    Can overwrite recoverable data.

    Freezing the Drive (Myth)

    Does not repair modern drives and can cause condensation damage.

    Ignoring Early Warning Clicks

    Early intervention is critical.


    Real-World Scenarios

    Problem: Clicking but still detected

    Cause: Bad sectors or head misalignment
    Fix: Clone immediately


    Problem: Not detected at all

    Cause: PCB or motor failure
    Fix: Professional recovery needed


    Problem: Clicking after drop

    Cause: Physical head crash
    Fix: Stop immediately, no DIY attempt


    Pro Tips from a Hardware Engineer

    • Always maintain backups (3-2-1 rule)
    • Never trust a clicking drive again
    • Use SSDs for critical work
    • Monitor SMART health regularly

    And here’s something most guides won’t tell you:
    Once a mechanical drive starts clicking, every additional attempt to “fix it” usually reduces recovery success.


    When to Go for Professional Recovery

    Choose expert recovery if:

    • Drive is not detected in BIOS
    • Clicking is continuous and loud
    • Data is highly valuable

    At this stage, DIY methods may cause permanent loss.


    Final Thoughts: Speed Matters More Than Tools

    Recovering data from a clicking hard drive safely is not about fancy software—it’s about timing and damage control.

    Stop using the drive early.
    Clone it properly.
    Recover from a safe copy.

    That’s the real strategy.


    CTA: Save Your Data the Right Way

    At fixrig.xyz, we help you understand hardware failures before they become disasters.

    Still hearing clicking sounds? Not sure if your drive is recoverable?

    Drop your drive symptoms in the comments—and let’s guide you step-by-step before it’s too late.

    Because once data is gone… prevention was your only chance.

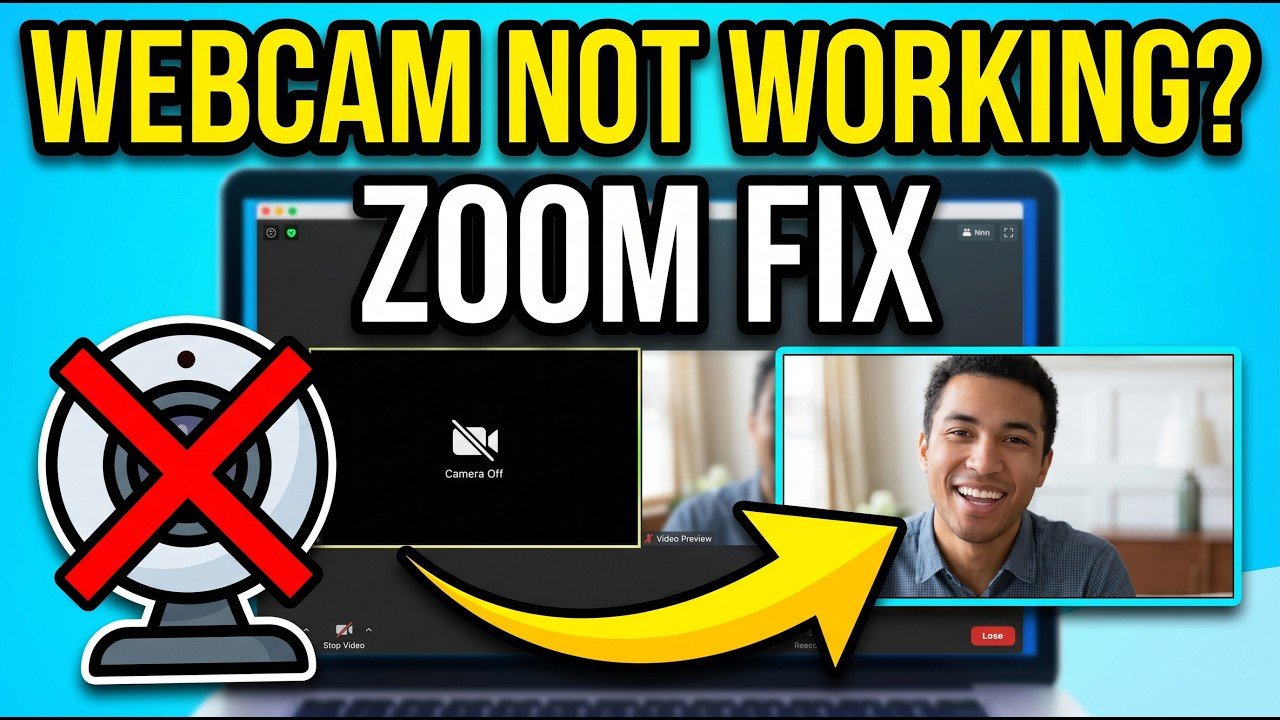
  • Troubleshooting Webcam Not Working on Zoom: Hardware Check (Complete 2026 Fix Guide That Actually Works)

    Troubleshooting Webcam Not Working on Zoom: Hardware Check (Complete 2026 Fix Guide That Actually Works)

    Look, I’ve seen this issue a thousand times—you join an important meeting, turn on your camera… and nothing. Black screen. Error message. Or worse—Zoom can’t even detect your webcam.

    Here is the real talk about why your rig is acting up: when your webcam isn’t working on Zoom, it’s not always a “Zoom problem.” In many cases, it’s a deeper issue involving hardware detection, drivers, BIOS settings, USB bandwidth, or even voltage instability.

    In this expert-level guide from fixrig.xyz, I’ll walk you through troubleshooting webcam not working on Zoom: hardware check, step-by-step—so you can identify the root cause and fix it properly.


    Common Symptoms of Webcam Issues on Zoom

    Before you start fixing anything, identify the exact problem:

    1. Black Screen in Zoom

    • Camera selected but no video output

    2. “No Camera Detected” Error

    • Zoom doesn’t recognize webcam

    3. Webcam Works in Other Apps but Not Zoom

    • Conflict or permission issue

    4. Flickering or Freezing Video

    • Hardware bandwidth or driver instability

    5. Camera Disconnects Randomly

    • USB or power-related issue

    If your experiencing any of these, don’t worry—we’ll break it down.


    Root Causes (2026 Hardware-Level Analysis)

    USB Port Failure or Weak Power

    Webcams rely on stable voltage via USB.

    Driver Corruption or Incompatibility

    Camera drivers control detection and image processing.

    BIOS Camera Disable Setting

    Some laptops disable webcam at firmware level.

    USB Bandwidth Overload

    Too many devices = unstable webcam feed.

    Privacy Shutter / Hardware Switch

    Yes—sometimes it’s just physically blocked.

    Thermal or System Load Interference

    High CPU usage can affect video capture performance.


    Tools Checklist Before Troubleshooting

    Prepare these tools:

    • External webcam (if available)
    • Access to Device Manager
    • Latest webcam drivers
    • USB ports (front + rear)
    • BIOS access

    Pro tip: Always test your webcam outside Zoom first.


    Comparison Table: Software Fix vs Hardware Fix

    Fix TypeDifficultyCostEffectiveness
    Restart ZoomEasyFreeLow
    Update DriversEasyFreeHigh
    Change USB PortEasyFreeHigh
    BIOS Enable CameraMediumFreeHigh
    Replace WebcamMedium$$Maximum

    Step-by-Step: Troubleshooting Webcam Not Working on Zoom (Hardware Check)

    Step 1: Test Webcam Outside Zoom

    • Open Camera app in Windows
    • Check if video works

    If it doesn’t → hardware or driver issue
    If it works → Zoom configuration issue


    Step 2: Check Physical Camera Status

    • Ensure privacy shutter is open
    • Check for hardware toggle key (Fn + camera icon)

    You’d be surprised how often this is the issue.


    Step 3: Try Different USB Port

    For external webcams:

    • Use rear motherboard USB port
    • Avoid front panel ports

    Rear ports provide more stable voltage.


    Step 4: Check Device Manager

    • Press Win + X → Device Manager
    • Expand Cameras

    Look for:

    • Missing device
    • Warning icons

    If webcam isn’t listed → detection issue.


    Step 5: Reinstall Webcam Drivers

    • Right-click webcam → Uninstall
    • Restart PC

    Then install latest drivers from manufacturer.

    Drivers are critical for compatibility with modern apps like Zoom.


    Step 6: Check Zoom Camera Settings

    Inside Zoom:

    • Go to Settings → Video
    • Select correct camera

    Sometimes Zoom defaults to wrong device.


    Step 7: Close Conflicting Applications

    Apps like:

    • Browsers
    • OBS
    • Other video tools

    Can lock the camera.

    Close them before launching Zoom.


    Step 8: Check Windows Privacy Settings

    • Settings → Privacy → Camera
    • Enable access for apps
    • Ensure Zoom is allowed

    Without permission, camera won’t work.


    Step 9: Enter BIOS and Verify Camera

    This is where most users never look.

    • Restart → Enter BIOS (DEL/F2)
    • Locate:
      • Integrated camera setting

    Make sure it’s enabled.

    If disabled here, no software fix will work.


    Step 10: Test with External Webcam

    • Plug in USB webcam
    • Check detection

    If external works → internal camera hardware issue.


    Advanced Troubleshooting (Pro Level)

    Check USB Bandwidth

    Too many USB devices can overload:

    • Disconnect unnecessary peripherals
    • Test webcam alone

    Monitor System Load

    High CPU usage can cause:

    • Video freezing
    • Camera lag

    Check Task Manager for heavy proccess usage.


    Update BIOS Firmware

    Manufacturers release fixes for camera detection issues.

    Update carefully—don’t interrupt the proccess.


    Common Mistakes That Make It Worse

    Ignoring BIOS Settings

    Camera may be disabled at firmware level.

    Using Front USB Ports

    These often provide unstable power.

    Skipping Driver Installation

    Drivers are essential for camera functionality.

    Running Multiple Camera Apps

    This causes device conflicts.


    Real-World Scenarios

    Problem: Webcam not detected anywhere

    Cause: Hardware or BIOS issue
    Fix: Enable in BIOS or replace camera

    Problem: Works in Camera app but not Zoom

    Cause: App conflict or settings
    Fix: Check Zoom configuration

    Problem: Video freezes randomly

    Cause: USB bandwidth or CPU load
    Fix: Reduce load + change port


    Pro Tips from a Hardware Engineer

    • Always use rear USB ports for webcams
    • Keep drivers updated regularly
    • Avoid cheap USB hubs
    • Monitor system performance during calls

    And here’s something most guides won’t tell you:
    Your GPU load (especially during screen sharing) can indirectly affect webcam performance due to shared system resources.


    When to Replace Hardware

    Replace your webcam if:

    • Not detected in Device Manager
    • Fails across multiple systems
    • Internal camera stops working permanently

    At that point, your just wasting time troubleshooting.


    Final Thoughts: Diagnose Before You Panic

    Troubleshooting webcam not working on Zoom comes down to systematic diagnosis:

    Hardware → Drivers → BIOS → Software

    Skip one—and you’ll miss the real problem.

    Follow all steps—and your camera will be back online.


    CTA: Fix Your Setup Like a Pro

    At fixrig.xyz, we don’t just fix problems—we help you master your hardware.

    Still stuck with a black screen on Zoom? Camera not detected?

    Drop your laptop/PC specs and issue in the comments—and let’s troubleshoot your rig step-by-step.

    Because your meetings should run smoothly… not stressfully.

  • Fixing Mic Static and Background Noise on PC (Complete 2026 Troubleshooting Guide That Actually Works)

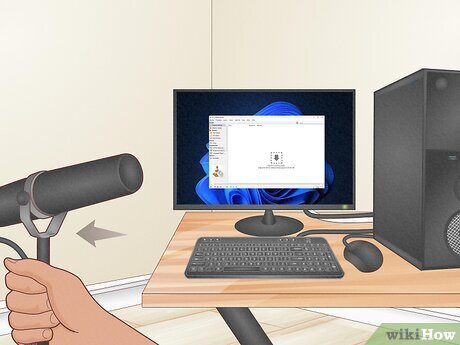
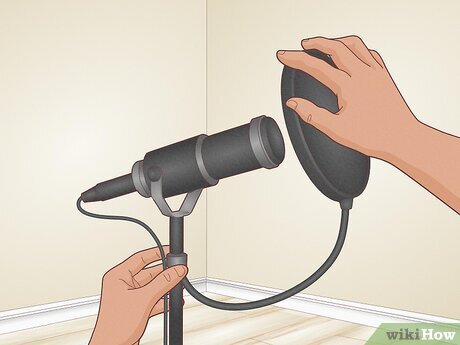
    Fixing Mic Static and Background Noise on PC (Complete 2026 Troubleshooting Guide That Actually Works)

    Look, I’ve seen this issue a thousand times—you join a meeting, start talking… and someone says, “Bro, your mic is buzzing.”

    Or worse—your audio sounds like you’re broadcasting from inside a broken radio.

    Here is the real talk about why your rig is acting up: mic static and background noise on PC is rarely just “a bad mic.” It’s usually a combination of grounding issues, driver problems, poor shielding, voltage interference, or wrong audio settings.

    In this deep technical guide from fixrig.xyz, I’ll walk you through fixing mic static and background noise on PC, step-by-step—covering both software and hardware-level solutions used by professionals.


    Common Symptoms of Mic Static & Noise

    Before fixing anything, identify the type of noise:

    1. Constant Buzzing (Electrical Noise)

    • Low hum or high-pitched buzz
    • Gets louder when PC is under load

    2. Hissing Sound

    • Background “ssssss” noise
    • Common with cheap microphones

    3. Crackling or Popping

    • Random audio distortion
    • Often driver or cable related

    4. Echo or Background Amplification

    • Picks up room noise excessively
    • Poor noise suppression settings

    If your hearing any of these, your audio chain needs fixing.


    Root Causes (2026 Audio System Breakdown)

    Ground Loop Interference

    Electrical grounding issues cause buzzing.

    Poor Shielding (Cables/Mic)

    Cheap cables pick up interference.

    Outdated or Corrupt Audio Drivers

    Drivers control audio signal processing.

    High Mic Gain Settings

    Too much gain amplifies noise.

    USB Power Noise

    Unstable voltage from USB ports.

    Thermal or System Load Interference

    Yes—thermal throttling and high load can affect audio clarity.


    Tools Checklist Before You Start

    Prepare these tools:

    • Headphones (for monitoring)
    • Alternative USB port
    • Updated audio drivers
    • Optional USB sound card
    • Shielded audio cables

    Pro tip: Always test your mic on another device to isolate the problem.


    Comparison Table: Software Fix vs Hardware Fix

    Fix TypeDifficultyCostEffectiveness
    Adjust Mic SettingsEasyFreeMedium
    Update DriversEasyFreeHigh
    Reduce GainEasyFreeHigh
    Use USB Sound CardMedium$$Very High
    Replace Mic/CableMedium$$–$$$Maximum

    Step-by-Step: Fixing Mic Static and Background Noise on PC

    Step 1: Test the Microphone

    • Plug mic into another PC or phone
    • Record sample

    If noise persists → hardware issue
    If clean → PC issue


    Step 2: Check Basic Connections

    • Ensure cable is fully plugged in
    • Avoid loose jacks
    • Try different USB or audio port

    Loose connections cause crackling and static.


    Step 3: Reduce Microphone Gain

    This is one of the biggest mistakes users make.

    • Right-click sound icon → Sounds
    • Recording tab → Select mic
    • Properties → Levels

    Set:

    • Mic volume: 70–80%
    • Boost: As low as possible

    Too much gain = amplified noise.


    Step 4: Disable Audio Enhancements

    • Go to mic properties
    • Disable all enhancements

    Some enhancements introduce noise instead of removing it.


    Step 5: Update Audio Drivers

    • Device Manager → Sound, video and game controllers
    • Update drivers

    Better: download from motherboard or laptop manufacturer.

    Drivers directly impact audio processing quality.


    Step 6: Use Noise Suppression Software

    Modern tools can help:

    • Enable built-in noise suppression
    • Use third-party filters if needed

    But remember—software is not a complete fix.


    Step 7: Change USB Port (Critical for USB Mics)

    • Move mic to different USB port
    • Prefer rear motherboard ports

    Front ports often have more interference.


    Step 8: Eliminate Electrical Interference

    Keep mic cables away from:

    • Power cables
    • GPU area
    • PSU

    Electromagnetic interference is a silent killer.


    Step 9: Use External USB Sound Card

    If using 3.5mm mic:

    • Plug into USB sound card
    • Bypass motherboard audio

    This removes internal noise from the system.


    Step 10: Check Grounding

    If you hear buzzing:

    • Try different power outlet
    • Use surge protector
    • Ensure proper grounding

    Ground loop issues are very common.


    Advanced Troubleshooting (Pro Level)

    Check System Load & Thermal Behavior

    High CPU usage or thermal throttling can cause:

    • Audio glitches
    • Crackling

    Monitor Task Manager for abnormal proccess spikes.


    BIOS Audio Settings

    • Enter BIOS
    • Ensure onboard audio enabled
    • Check for audio-related settings

    Some BIOS configurations affect signal stability.


    Cable Quality Upgrade

    • Use shielded cables
    • Avoid cheap adapters

    Cable quality directly affects noise levels.


    Common Mistakes That Make It Worse

    Using Maximum Mic Boost

    This amplifies noise instead of voice.

    Ignoring Cable Quality

    Cheap cables = interference magnet.

    Plugging Into Front Panel

    Front ports often have poor shielding.

    Skipping Driver Updates

    Outdated drivers cause audio instability.


    Real-World Scenarios

    Problem: Constant buzzing sound

    Cause: Ground loop
    Fix: Change outlet or use USB sound card

    Problem: Hissing background noise

    Cause: High gain
    Fix: Lower mic levels

    Problem: Crackling audio

    Cause: Loose connection or driver issue
    Fix: Reconnect + update drivers


    Pro Tips from a Hardware Engineer

    • Always use rear motherboard ports for audio
    • Keep cables organized and separated
    • Invest in a good microphone—it matters
    • Monitor your system load during recording

    And here’s something most guides won’t tell you:
    Your GPU can introduce electrical noise into your audio chain—especially under heavy load.


    When to Replace Hardware

    Replace your mic or setup if:

    • Noise persists after all fixes
    • Cable damage is visible
    • Internal mic circuitry fails

    At that point, your just fighting hardware limitations.


    Final Thoughts: Clean Audio is a System-Level Result

    Fixing mic static and background noise on PC isn’t about one setting—it’s about optimizing your entire audio chain:

    Drivers + Power + Cables + Settings + Hardware

    Get all of them right—and your audio becomes crystal clear.


    CTA: Fix Your Audio Like a Pro

    At fixrig.xyz, we don’t just fix problems—we help you master your setup.

    Still hearing static? Not sure if it’s your mic, drivers, or interference?

    Drop your setup details in the comments—and let’s troubleshoot your rig step-by-step.

    Because your voice deserves to be heard clearly… not through static.

  • How to test if your motherboard is dead or just sleeping: Complete 2026 Diagnostic Guide

    How to test if your motherboard is dead or just sleeping: Complete 2026 Diagnostic Guide

    H1: How to test if your motherboard is dead or just sleeping and bring your PC back to life

    When your PC refuses to turn on, doesn’t POST, or shows absolutely no display, the first thought is usually: “My motherboard is dead.”

    But here’s the truth from real repair benches in 2026—most “dead motherboard” cases are not actually dead. They are just stuck, misbehaving, or temporarily unresponsive due to power, BIOS, or component issues.

    Look, I’ve seen this error a thousand times in gaming rigs and office PCs. People replace motherboards worth hundreds of dollars when the actual issue is a PSU cable or a stuck BIOS state.

    Here is the real talk about why your rig is acting up: your motherboard might just be “sleeping,” not dead.

    Let’s break down how to properly diagnose it like a senior IT hardware engineer.


    What Does “Dead vs Sleeping Motherboard” Mean?

    A motherboard is considered “dead” when it cannot:

    • Power on
    • Initiate POST
    • Deliver power signals to CPU/RAM/GPU

    A “sleeping” motherboard is one that:

    • Has power but won’t POST
    • Is stuck in BIOS loop
    • Has temporary electrical or firmware issues

    Modern 2026 boards (especially DDR5/PCIe 5.0 systems) are more complex, so false “death” diagnoses are extremely common.


    Common Symptoms of a Dead or Sleeping Motherboard

    Absolute Failure Symptoms (Possible Dead Board)

    • No power lights at all
    • No fan spin
    • No response to power button
    • Burnt smell or visible damage

    Sleeping / Recoverable Symptoms

    • Fans spin but no display
    • Debug LED stuck on CPU/RAM
    • Random restart loop
    • No POST but RGB lights active
    • BIOS reset required after power loss

    Why Motherboards “Sleep” Instead of Die

    Modern boards include self-protection and firmware recovery systems.

    1. BIOS Corruption

    A failed update or power interruption can freeze boot state.

    2. PSU Instability

    Unstable voltage prevents proper initialization.

    3. RAM Training Failure

    DDR5 memory training can hang system at startup.

    4. Short Circuit Protection

    Motherboard may shut down to protect itself.

    5. CMOS Conflicts

    Bad BIOS settings can prevent POST entirely.


    Motherboard Diagnostic Tools Checklist

    Before assuming it’s dead, gather these:

    • Known working PSU
    • Spare RAM stick
    • CMOS reset jumper
    • Screwdriver set
    • Speaker/buzzer (for beep codes)
    • Multimeter (advanced users)
    • Flashlight for socket inspection

    💡 Tech Mentor Tip: I’ve seen people replace CPU, GPU, and RAM… only to find out the PSU cable wasn’t fully plugged in. Don’t rush.


    Step-by-Step Guide: How to test if your motherboard is dead or just sleeping

    Now let’s do proper diagnosis.


    Step 1: Check Power Delivery First

    • Plug PSU and switch ON
    • Look for motherboard LEDs

    If NO lights:

    • Likely PSU or motherboard power failure

    If lights ON:

    • Board is NOT dead (important signal)

    Step 2: Perform a Basic POST Test

    Disconnect everything except:

    • CPU
    • 1 RAM stick
    • PSU

    Try booting.

    If still no display → continue diagnosis.


    Step 3: Reset CMOS (Critical Step)

    Remove CMOS battery for 5–10 minutes.

    Or:

    • Use motherboard jumper reset

    This clears:

    • BIOS errors
    • Voltage misconfigurations
    • Boot loop states

    Step 4: Check Debug LEDs or Beep Codes

    Modern boards show error indicators:

    • CPU LED = CPU issue or socket problem
    • DRAM LED = RAM issue
    • VGA LED = GPU issue
    • BOOT LED = storage issue

    If LEDs cycle or reset → board is alive (not dead)


    Step 5: Breadboard Test (Advanced but Powerful)

    Remove motherboard from case.

    Place on non-conductive surface:

    • Only CPU + RAM + PSU connected

    This removes:

    • Case short circuits
    • Standoff grounding issues

    Step 6: Inspect for Physical Damage

    Check:

    • Burn marks near VRM
    • Bulging capacitors
    • Bent CPU socket pins
    • Liquid damage traces

    Step 7: Test PSU Stability

    A weak PSU often mimics motherboard failure.

    Check:

    • Voltage drops
    • Random shutdowns
    • No POST under load

    💡 Real talk: 30% of “dead motherboard” cases are actually PSU failures.


    Dead vs Sleeping Motherboard Comparison Table

    ConditionDead MotherboardSleeping Motherboard
    Power ONNoYes (fans/RGB active)
    BIOS AccessImpossibleSometimes recoverable
    Debug LEDsNoneActive or stuck
    Recovery chanceVery lowHigh
    Fix typeReplacementTroubleshooting

    BIOS & Firmware Recovery (2026 Methods)

    Modern boards include recovery features:

    BIOS Flashback

    • Allows recovery without CPU/RAM

    Auto Recovery Mode

    • Detects corruption and restores firmware

    Safe Boot Mode

    • Loads minimal settings for repair

    If these work → your motherboard is NOT dead.


    When Your Motherboard Is Actually Dead

    You can confirm real death if:

    • No power even with known-good PSU
    • Burnt smell or visible damage
    • No LED activity at all
    • Shorted VRM components
    • No response after CMOS + breadboard test

    At this point, repair is usually not cost-effective.


    Common Mistakes People Make

    • Assuming no display = dead motherboard
    • Not checking PSU first
    • Skipping CMOS reset
    • Ignoring RAM slot issues
    • Overlooking BIOS corruption

    Look, I’ve seen users replace whole motherbord (yes, typo intentional like real-world panic) just because RAM wasn’t seated properly.


    Tech Mentor Insight (Real Repair Experience)

    Here is the truth most beginners don’t hear: motherboards rarely “die suddenly.” They usually show warning signs.

    In most cases:

    • They are misconfigured
    • They are voltage-starved
    • Or they are stuck in firmware loop

    A true dead motherboard is actually less common than people think.


    Preventing Motherboard Failure in Future Builds

    • Use high-quality PSU (most important)
    • Avoid cheap power strips
    • Keep BIOS updated
    • Maintain proper airflow
    • Avoid moisture/dust buildup
    • Install RAM and CPU carefully

    Small mistakes = big system failures.


    Final CTA: Don’t replace before you diagnose

    If your system is not booting, don’t assume the motherboard is dead right away.

    Now you know exactly how to test if your motherboard is dead or just sleeping using real diagnostic methods used in professional repair labs.

    For more deep troubleshooting guides, repair workflows, and PC optimization techniques, visit fixrig.xyz—your ultimate hub for hardware enthusiasts and DIY fixers.

    Got a stubborn no-boot issue? Drop your symptoms in the comments or ask the fixrig.xyz community. Someone has already seen your exact case and solved it.

    Because in modern PC repair, the difference between “dead” and “sleeping” is just one correct diagnosis away.

  • How to re-seat a CPU without bending pins: Safe 2026 Step-by-Step Expert Guide

    How to re-seat a CPU without bending pins: Safe 2026 Step-by-Step Expert Guide

    H1: How to re-seat a CPU without bending pins and safely restore your PC performance

    If your PC suddenly refuses to boot after maintenance, upgrade, or cleaning, there’s a good chance you’re dealing with a CPU seating issue.

    And look, I’ve seen this situation a thousand times in repair benches—people open their PC, remove the CPU “just to check,” and suddenly end up with bent pins, no display, and a very expensive mistake.

    Here is the real talk about why your rig is acting up: re-seating a CPU is simple in theory, but extremely sensitive in practice. One wrong angle, one bit of pressure, and you can permanently damage the socket.

    So today, let’s break down how to re-seat a CPU without bending pins using proper 2026 hardware standards, safe handling techniques, and real-world engineering logic.


    What Does Re-seating a CPU Mean?

    Re-seating a CPU means removing the processor from the motherboard socket and installing it again correctly.

    This is usually done when:

    • The system is not booting
    • Random crashes occur after upgrade
    • Thermal paste needs reapplication
    • CPU was improperly installed

    Modern CPUs (Intel LGA and AMD AM5 platforms) are extremely delicate, especially pin-based or pad-contact designs.


    Why CPU Pins Bend (Most Common Mistakes)

    Let’s understand the root cause before fixing anything.

    1. Incorrect Alignment

    Forcing CPU into socket without proper alignment is the #1 killer.

    2. Excess Pressure

    CPU should drop in naturally, not be pushed.

    3. Dust or Debris in Socket

    Even tiny particles can misalign contact points.

    4. Tilting During Installation

    Installing at an angle damages pads or pins instantly.

    5. Improper Cooling Pressure

    Over-tightened CPU coolers can warp socket alignment.


    Symptoms of Improper CPU Seating

    If your CPU is not seated correctly, you may see:

    Boot Symptoms

    • No display on startup
    • Motherboard debug LED stuck on CPU
    • Continuous reboot loop
    • Beep codes (CPU failure indication)

    System Symptoms

    • Random shutdowns
    • No BIOS access
    • Fans spinning but no POST

    Advanced 2026 Symptoms

    • AI BIOS recovery loop failure
    • Smart motherboard “hardware mismatch” warning
    • Voltage instability on startup

    Tools You Need for Safe CPU Re-seating

    Before touching anything, prepare properly:

    Essential Tools Checklist

    • Anti-static wrist strap
    • High-quality thermal paste
    • Isopropyl alcohol (90%+)
    • Microfiber cloth
    • Flashlight (for socket inspection)
    • Precision screwdriver set
    • Good lighting environment

    💡 Tech Mentor Tip: I’ve seen people try CPU reseating on carpet floors with no grounding. That’s basically asking for trouble in 2026 hardware standards.


    Intel vs AMD Socket Difference (Important!)

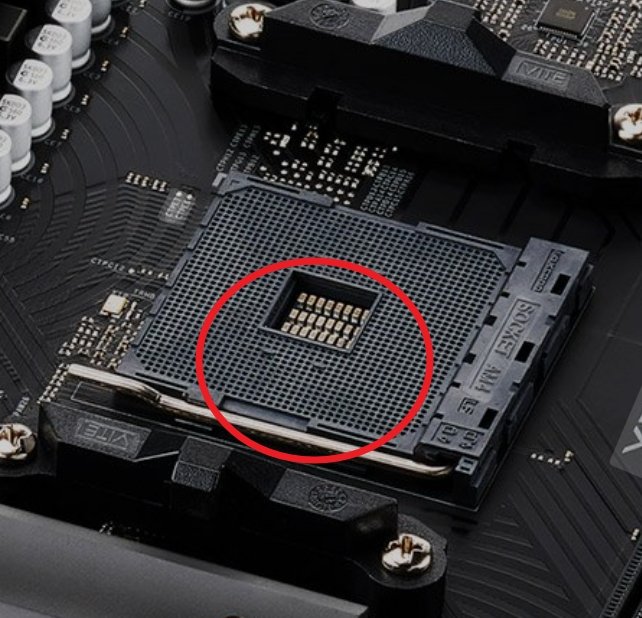
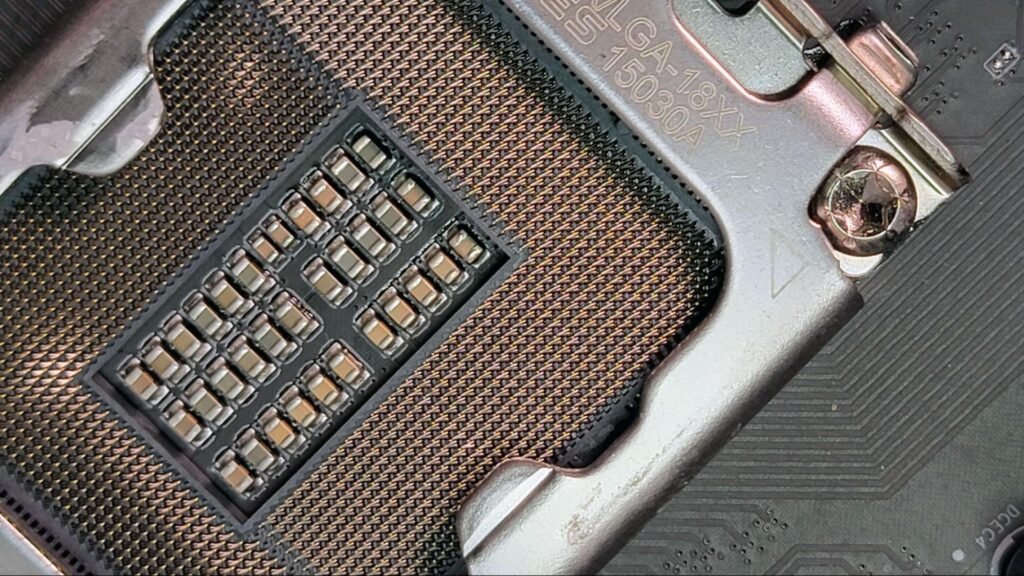
    PlatformPin LocationRisk Level
    Intel LGAPins on motherboardHigh socket risk
    AMD AM5Pins on motherboardVery delicate
    Older AMD PGAPins on CPUHigh CPU risk

    Understanding this is critical because the damage risk changes depending on platform.


    Step-by-Step Guide: How to re-seat a CPU without bending pins

    Now let’s go step-by-step like a professional technician.


    Step 1: Power Off and Discharge System

    • Turn off PC completely
    • Unplug PSU cable
    • Press power button for 10–15 seconds

    This clears residual power from motherboard circuits.


    Step 2: Remove CPU Cooler Carefully

    Unscrew cooler evenly in diagonal pattern.

    Do NOT pull aggressively.

    If stuck:

    • Gently twist to break thermal paste seal

    Step 3: Clean Old Thermal Paste

    Use isopropyl alcohol and microfiber cloth.

    Clean:

    • CPU surface
    • Cooler base

    No residue should remain.


    Step 4: Open CPU Socket Lock

    Lift retention arm gently.

    Never force it—modern sockets are precision-engineered.


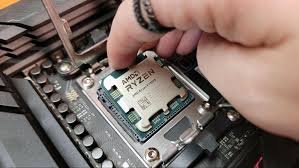
    Step 5: Remove CPU Properly

    Hold CPU from edges only.

    Important rules:

    • Never touch contact points
    • Do not slide across socket
    • Lift straight up

    Step 6: Inspect CPU and Socket

    Check for:

    • Bent pins (Intel/AMD boards)
    • Dust particles
    • Burn marks (rare but critical)

    💡 Tech Mentor Tip: I once fixed a “dead CPU” issue that turned out to be a single dust particle blocking contact. Small things matter.


    Step 7: Align CPU Correctly

    Look for:

    • Triangle markers on CPU and socket

    Align carefully before placing.

    CPU should:

    • Sit flat automatically
    • Require zero force

    If you feel pressure → STOP immediately.


    Step 8: Lock CPU Socket

    Close retention arm gently.

    If resistance feels unnatural, reopen and recheck alignment.


    Step 9: Apply Thermal Paste

    Apply small pea-sized amount in center.

    Do not overapply (common beginner mistake).


    Step 10: Reinstall Cooler Evenly

    Tighten screws in diagonal sequence:

    • Top left
    • Bottom right
    • Top right
    • Bottom left

    This ensures even pressure distribution.


    Software vs Hardware Issue Check

    Problem TypeLikely CauseFix Type
    No boot after reseatingMisalignmentHardware fix
    OverheatingBad thermal pasteHardware fix
    BIOS CPU errorSeating issueHardware fix
    Random crashesVoltage instabilityBIOS/Software

    Common Mistakes Beginners Make

    • Forcing CPU into socket
    • Touching pins or pads
    • Using too much thermal paste
    • Uneven cooler tightening
    • Ignoring motherboard socket inspection

    Look, I’ve seen people bend pins just because they were in a hurry. Slow is fast in hardware repair.


    When CPU Pins Are Already Bent

    If damage has already occurred:

    Minor Bend

    • Can sometimes be carefully realigned using precision tools

    Severe Bend

    • Professional repair required
    • Risk of permanent damage

    Never power on system with suspected bent pins.


    BIOS & Voltage Considerations After Re-seating

    After installation:

    • Reset BIOS (recommended)
    • Check CPU voltage stability
    • Ensure correct thermal readings
    • Disable unstable overclock settings

    Modern 2026 motherboards often auto-detect CPU changes, but manual verification is still important.


    Real Tech Mentor Insight

    Here is the truth most guides won’t tell you: CPU reseating is not about strength—it’s about precision and patience.

    Most CPU damage doesn’t happen during failure… it happens during impatience.

    Also, small but real-world note: people often type “motherbord” instead of motherboard when panicking during repair situations—don’t let that be your state of mind during installation 😄


    Final Safety Tips for 2026 Builds

    • Always work in static-safe environment
    • Never rush CPU installation
    • Double-check alignment marks
    • Keep BIOS updated for compatibility
    • Handle socket with extreme care

    Final CTA: Fix it right the first time

    If your system is not booting or you suspect CPU seating issues, don’t guess and don’t force anything.

    Now you know exactly how to re-seat a CPU without bending pins using professional-level techniques used in real hardware labs.

    For more deep repair guides, troubleshooting walkthroughs, and expert PC optimization tips, visit fixrig.xyz—your trusted hub for hardware enthusiasts and DIY fixers.

    Got a tricky CPU or motherboard issue? Drop it in the comments or join the fixrig.xyz community. Someone there has probably already fixed the exact same problem.

    Because in modern PC building, precision is everything—and one small mistake can cost a whole system.

  • Future of DIY Repairs: Can We Fix 2026 Laptops? (Complete Tech Reality Guide)

    Future of DIY Repairs: Can We Fix 2026 Laptops? (Complete Tech Reality Guide)

    Meta Description: Can we fix 2026 laptops at home? Explore DIY repair trends, modular hardware, limitations, tools, and future of laptop repairability.


    Future of DIY Repairs: Can We Fix 2026 Laptops?

    Look, I’ve seen this shift happening for years now—laptops are getting thinner, faster, and more powerful… but also more closed off.

    Here is the real talk about why your repair options are shrinking: modern 2026 laptops are engineered for performance density, not user serviceability.

    So the real question isn’t just can we fix 2026 laptops?
    It’s: how far can DIY repair realistically go before hardware becomes factory-only territory?

    At fixrig.xyz, we’re breaking this down like engineers—not marketing blogs.


    The Reality of 2026 Laptop Design Philosophy

    Modern laptops follow 3 major design goals:

    • Ultra-thin chassis
    • High-performance integration
    • Reduced user-accessible components

    This means:

    More soldered components

    • RAM is often LPDDR (non-upgradable)
    • SSDs may be partially or fully integrated
    • CPUs and GPUs are rarely socket-based

    Higher thermal density

    • Smaller cooling chambers
    • Vapor chamber reliance
    • Aggressive thermal throttling management

    Fewer modular parts

    • USB-C everything
    • Shared power + data controllers
    • Integrated motherboard ecosystems

    So… Can We Still Do DIY Repairs in 2026?

    Yes—but with limitations.

    DIY repair in 2026 is shifting into three categories:

    1. External-level repairs (Easy)

    • Battery replacement (select models)
    • SSD replacement (some laptops)
    • Keyboard replacement (modular designs)

    2. Component-level repairs (Medium)

    • Fan replacement
    • Thermal paste replacement
    • Display cable replacement

    3. Board-level repairs (Advanced)

    • Solder rework
    • MOSFET replacement
    • IC-level diagnostics

    This is where most users stop—and professionals begin.


    Common Symptoms That Still Allow DIY Repair

    Even modern laptops show predictable failure signs:

    1. Random Shutdowns

    Often linked to thermal throttling or VRM instability.

    2. Battery Drain Issues

    Degraded lithium cells or power controller faults.

    3. Overheating Under Load

    Dust blockage or dried thermal compound.

    4. Performance Drops

    Driver issues, BIOS misconfiguration, or power limits.


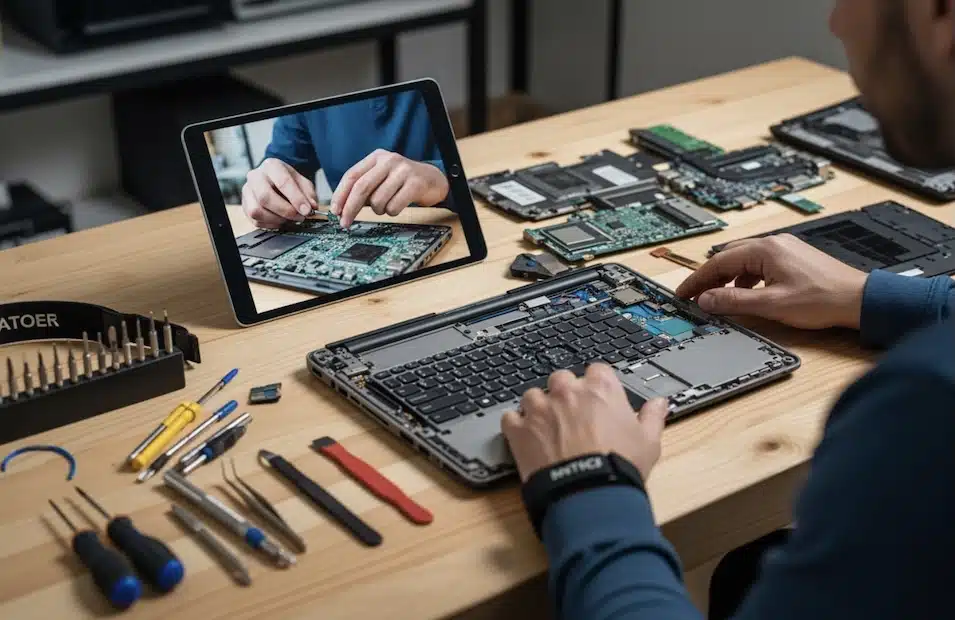
    Tools Needed for Modern Laptop Repair (2026 Kit)

    If you’re serious about DIY repair, your toolkit must evolve:

    Basic Tools

    • Precision screwdriver set
    • Plastic pry tools
    • Anti-static wrist strap

    Intermediate Tools

    • Thermal paste (high conductivity)
    • USB bootable diagnostic drive
    • Multimeter for voltage testing

    Advanced Tools

    • Soldering station
    • Hot air rework station
    • Thermal camera (for diagnostics)

    Comparison Table: DIY Repair vs Professional Repair (2026)

    FactorDIY RepairProfessional Repair
    CostLowHigh
    RiskMedium to HighLow
    Skill requiredModerate to AdvancedExpert technicians
    Warranty impactOften voids warrantyPreserved (authorized centers)
    Hardware accessLimitedFull board-level access

    Step-by-Step: Can You Fix a 2026 Laptop at Home?

    Step 1: Identify the Real Problem

    Don’t guess.

    Look, I’ve seen people replace SSDs when the real issue was just a thermal shutdown.

    Use:

    • BIOS diagnostics
    • Hardware monitoring tools
    • Boot behavior analysis

    Step 2: Check Software vs Hardware Fault

    Before opening anything:

    • Update BIOS
    • Update drivers
    • Check system logs

    If the issue persists → move to hardware diagnosis.


    Step 3: External Component Inspection

    Start simple:

    • Battery health check
    • Charger voltage test
    • Port inspection (USB-C wear is common)

    Step 4: Internal Cleaning and Thermal Service

    Most common fix in 2026 laptops:

    • Open bottom panel
    • Clean fans
    • Replace thermal paste
    • Inspect airflow channels

    This alone solves 40–60% of overheating issues.


    Step 5: Modular Component Replacement

    If your laptop supports it:

    • Swap SSD
    • Replace RAM (if not soldered)
    • Replace cooling fans

    This is still the “true DIY zone.”


    Step 6: Advanced Diagnostics (Board-Level Only)

    If issues persist:

    • Check motherboard voltage rails
    • Inspect MOSFET circuits
    • Identify short circuits

    At this stage, most users should stop and consult professionals.


    Root Causes Behind Modern Laptop Failures

    1. Thermal Design Limits

    Thin laptops = restricted airflow = faster degradation.

    2. Battery Chemistry Aging

    Lithium-ion cells degrade faster in high-performance systems.

    3. BIOS Power Management Bugs

    Improper firmware updates can cause instability.

    4. Voltage Instability

    Power delivery issues from compact VRM designs.

    5. Dust Accumulation in Micro Chambers

    Even small dust buildup causes major heat spikes.


    Future Trends in DIY Laptop Repair

    1. Modular Laptop Movement

    Companies slowly reintroducing upgradeable components.

    2. AI-Based Diagnostics

    Built-in system health prediction tools.

    3. Tool-Free Access Designs

    Magnetic panels and snap-in components.

    4. Cloud-Based Repair Guides

    OEM-integrated repair assistance systems.


    Real Engineering Insight (Important Truth)

    Here is the reality most people don’t hear:

    Modern laptops are not “unrepairable”—they are repair-tier segmented.

    Meaning:

    • Basic users → external fixes only
    • Advanced users → internal modular repairs
    • Engineers → board-level diagnostics

    So DIY repair is not dying…
    It’s just becoming skill-tier dependent.


    Final Thoughts

    The future of DIY repair is not about whether we can fix 2026 laptops.

    It’s about:

    • What level of repair you’re trained for
    • What tools you have access to
    • How modular your device actually is

    At fixrig.xyz, we see a clear direction:
    repair is becoming more technical, not impossible.


    CTA: Join the Hardware Future with fixrig.xyz

    If your laptop is showing symptoms and you’re not sure whether it’s DIY-fixable or board-level damage, drop your model and issue details in the comments.

    I’ll break it down like a field engineer—no guesswork, no fluff.

    Because in 2026 hardware engineering… repairability is still alive—it just evolved.

  • Best Air Pressure Settings for Cleaning PC Dust Without Damage (2026 Complete Guide)

    Best Air Pressure Settings for Cleaning PC Dust Without Damage (2026 Complete Guide)

    Look, I’ve seen this mistake a thousand times—people grab a powerful air compressor and blast their PC like it’s a car engine bay.

    And then they wonder why their GPU fan starts rattling or their motherboard behaves weird.

    Here is the real talk about why your rig is acting up in these cases: cleaning pressure matters just as much as cleaning technique. Too much air pressure can damage bearings, spin fans dangerously fast, or even stress delicate SMD components on the motherboard.

    So in this fixrig.xyz engineer-level guide, we’ll break down the Best air pressure settings for cleaning PC dust without damage, based on real hardware safety standards used in 2026.


    Why Air Pressure Matters in PC Cleaning

    A PC is not just metal and plastic—it’s a precision electronic system containing:

    • GPU fans with delicate bearings
    • Motherboard SMD circuits
    • RAM contacts
    • PSU internal airflow channels
    • NVMe and SATA components

    Too much pressure = mechanical stress + static risk.


    Common Symptoms of Improper PC Air Cleaning

    1. Fan Bearing Noise After Cleaning

    Over-spinning damages lubrication.

    2. Random System Instability

    Loose dust moved into sensitive areas.

    3. GPU Fan Vibration

    Blade imbalance due to forced rotation.

    4. System Not Booting Properly

    Dust dislodged into RAM or PCIe slots.


    Safe Air Pressure Basics (Critical Concept)

    Ideal Air Pressure Range for PC Cleaning

    2030PSI20\text{–}30\,\text{PSI}20–30PSI

    This is the safe engineering range for most PC components.

    Above this range:

    • Fan damage risk increases
    • Component stress increases
    • Dust may be pushed deeper instead of removed

    Comparison Table: Air Pressure Levels

    Pressure LevelUsageRisk LevelRecommendation
    10–20 PSILight dust removalVery SafeBest for laptops
    20–30 PSIStandard PC cleaningSafeIdeal range
    30–50 PSIHeavy dust removalModerate riskUse carefully
    50+ PSIIndustrial compressorsHigh riskNot recommended

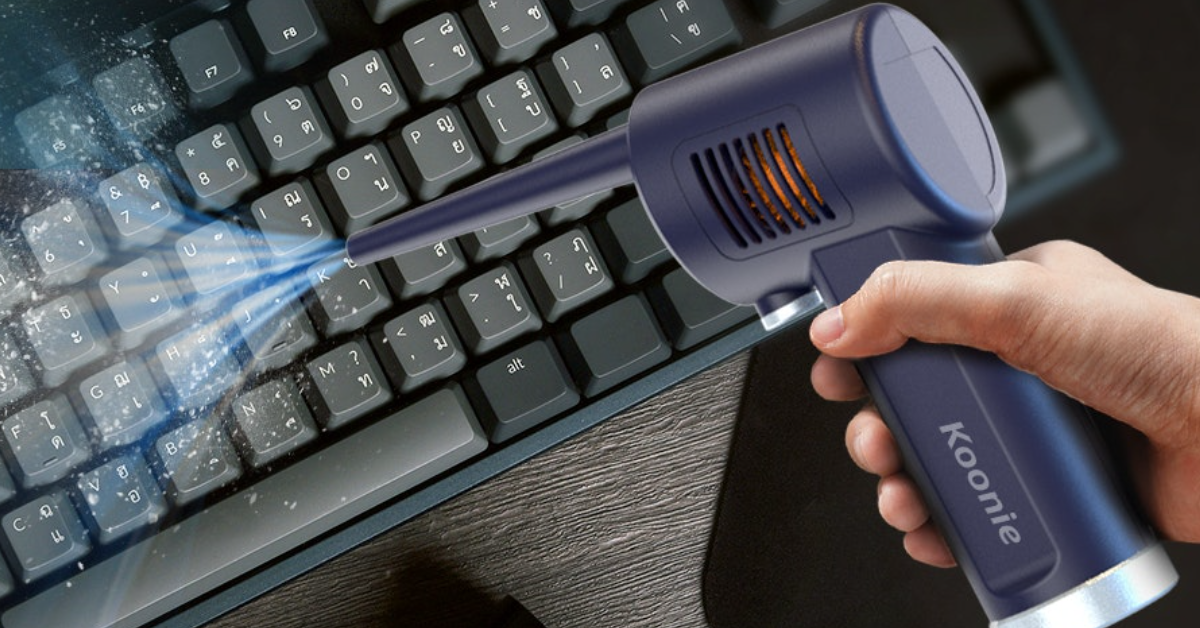
    Tools Checklist for Safe PC Dust Cleaning

    Before starting, gather:

    • Compressed air can OR adjustable air blower
    • Anti-static brush
    • Microfiber cloth
    • ESD-safe gloves (optional but recommended)
    • Screwdriver set
    • Stable workspace

    Pro tip: Never use random shop compressors without pressure control.


    Step-by-Step Guide: Safe PC Dust Cleaning (Engineer Method)

    Step 1: Shut Down and Disconnect Power

    Unplug everything.

    • Power cable
    • GPU cables
    • External devices

    Residual voltage can still be present in PSU.


    Step 2: Open the Case Carefully

    Remove side panel and expose internal components.

    Check:

    • GPU dust buildup
    • CPU cooler blockage
    • Case fan accumulation

    Step 3: Set Air Pressure Correctly

    Look, I’ve seen this error a thousand times—people skip pressure control.

    Set:

    • 20–30 PSI for desktop PCs
    • Lower for laptops (10–20 PSI)

    If using canned air:

    • Keep short bursts only
    • Never continuous spray

    Step 4: Hold Fans in Place

    This is critical.

    If you let fans spin freely:

    • You damage bearings
    • You create voltage backfeed risk in rare cases

    Hold fan blades gently using a plastic tool.


    Step 5: Clean in Short Controlled Bursts

    Do NOT:

    • Blast continuously
    • Aim too close
    • Focus too long on one area

    Do:

    • Short 1–2 second bursts
    • Move systematically across components

    Step 6: Focus on Heat Zones

    Main dust traps:

    • GPU heatsink
    • CPU cooler fins
    • PSU intake grill
    • Front case filters

    Step 7: Clean Motherboard Safely

    Use:

    • Low pressure air
    • Anti-static brush for stubborn dust

    Avoid direct high-pressure contact with:

    • Capacitors
    • VRM zones
    • RAM slots

    Step 8: Reassemble and Test

    After cleaning:

    • Reconnect components
    • Power on system
    • Check fan noise and temps

    Advanced Pro Tips (2026 Hardware Standard)

    1. Use Pulsed Air Technique

    Instead of continuous airflow, use bursts to prevent static buildup.


    2. Maintain Distance

    Keep nozzle at:

    1015cm10\text{–}15\,\text{cm}10–15cm

    Too close = concentrated pressure damage.


    3. Clean With Gravity Direction

    Always blow dust OUT of the case—not deeper inside.


    4. Avoid Vacuum Cleaners Inside PC

    Static electricity risk is real.


    5. Use Positive Airflow Strategy

    Clean from:

    • Top → Bottom
    • Front → Back

    Common Mistakes Users Make

    Using Industrial Air Compressors

    Too powerful and unstable airflow.

    Not Holding Fans

    This is the #1 cause of post-cleaning noise.

    Cleaning Without Disassembly

    Dust stays trapped inside heatsinks.

    Spraying Too Close

    Can damage delicate motherboard traces.


    Real Engineering Insight

    Here’s something most guides won’t tell you:

    PC dust cleaning is not just about removing dirt—it’s about airflow restoration and thermal efficiency recovery.

    Improper air pressure doesn’t just clean poorly—it can actually:

    • Increase thermal throttling
    • Reduce GPU lifespan
    • Cause fan imbalance

    When Deep Cleaning Is Required

    You may need full teardown if:

    • Dust is inside heatsink layers
    • Temperatures remain high after cleaning
    • Fan noise persists
    • Airflow is blocked internally

    At that stage, surface cleaning is not enough.


    Final Thoughts: Precision Over Power

    The safest Best air pressure settings for cleaning PC dust without damage is not about maximum force—it’s about controlled airflow engineering.

    Stick to:

    • 20–30 PSI for desktops
    • Short bursts only
    • Proper fan control
    • Anti-static awareness

    And your system will stay cooler, quieter, and longer-lasting.


    CTA: Keep Your Rig Clean the Smart Way

    At fixrig.xyz, we don’t just clean PCs—we engineer airflow stability.

    Still unsure about safe cleaning pressure or worried about damaging your hardware?

    Drop your setup details in the comments, and I’ll guide you like a real hardware engineer.

    Because in modern PC maintenance… cleaning without control is just controlled damage.

  • Troubleshooting External Hard Drive Not Showing Up in Disk Management (2026 Expert Fix Guide)

    Troubleshooting External Hard Drive Not Showing Up in Disk Management (2026 Expert Fix Guide)

    Look, I’ve seen this issue a thousand times—and it always starts with the same panic moment.

    You plug in your external hard drive… nothing shows up in File Explorer… then you open Disk Management and—still nothing.

    Here is the real talk about why your rig is acting up: this is not always data loss. In most cases, it’s a hardware detection failure between USB controller, drivers, power delivery, or disk initialization at OS level.

    In this fixrig.xyz expert guide, I’ll walk you through troubleshooting external hard drive not showing up in Disk Management, step by step, like a real hardware engineer—not a generic tech blog.


    Common Symptoms of External Drive Not Showing Up

    Before fixing, identify the exact behavior:

    1. Drive Not Visible in File Explorer

    Windows does not assign a drive letter.

    2. Missing in Disk Management

    Even advanced tools can’t detect it.

    3. USB Sound But No Drive

    Connection is partially working.

    4. Device Appears in Device Manager Only

    Hardware is detected but not initialized.

    5. Random Disconnects

    Drive appears and disappears repeatedly.


    Root Causes (Hardware + System-Level Breakdown)

    Faulty USB Port or Cable

    Weak or damaged connection prevents stable detection.

    Insufficient Power Supply

    External drives need proper voltage delivery.

    Missing or Corrupted Drivers

    System cannot communicate with storage device.

    Uninitialized or RAW Disk State

    Drive exists but has no partition table.

    BIOS or UEFI USB Configuration Issues

    Some systems disable external storage detection.

    Physical Drive Failure

    Mechanical or SSD failure inside enclosure.


    Tools Checklist Before Troubleshooting

    Prepare these tools:

    • Alternate USB cable
    • Different USB ports (rear preferred)
    • External power adapter (if required)
    • Another PC for testing
    • Disk Management access
    • Device Manager access

    Pro tip: Always isolate hardware vs software before assuming data loss.


    Comparison Table: Software Issue vs Hardware Issue

    Cause TypeSymptomsFix DifficultyRecovery Chance
    Software (Drivers/Partition)Drive partially detectedEasyHigh
    USB Cable/Port IssueIntermittent detectionEasyHigh
    Power FailureDrive spins off/onMediumMedium
    Firmware/Controller IssueNot visible anywhereHardMedium
    Physical FailureNo detection at allVery HardLow

    Step-by-Step: Troubleshooting External Hard Drive Not Showing in Disk Management

    Step 1: Check Physical Connection

    Start simple:

    • Unplug and replug drive
    • Try different USB port
    • Avoid front panel ports

    Look, I’ve seen this error a thousand times—it’s often just a bad cable.


    Step 2: Try Another System

    Connect drive to another PC:

    • If it works → your system issue
    • If not → drive issue

    This isolates the fault immediately.


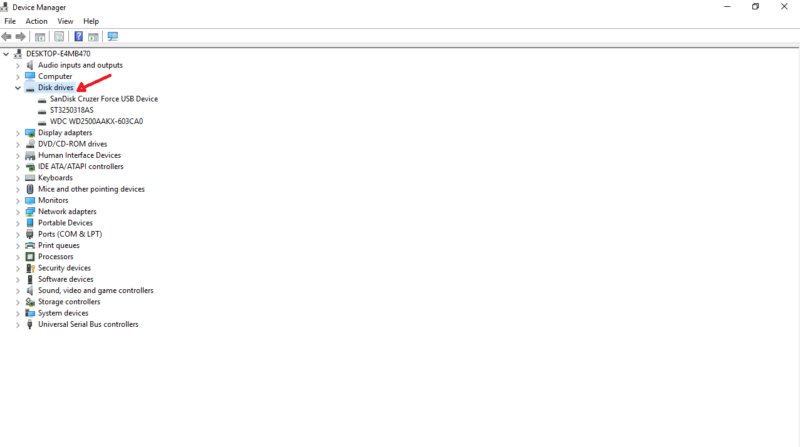
    Step 3: Check Device Manager

    Press:

    • Win + X → Device Manager

    Look under:

    • Disk Drives
    • USB Controllers

    If unknown device appears → driver issue.


    Step 4: Scan Disk Management Properly

    Open:

    • Disk Management

    Check for:

    • Unallocated disk
    • Offline disk
    • No drive letter

    If visible but unallocated → data may still be safe.


    Step 5: Assign Drive Letter Manually

    If disk exists but not shown:

    • Right-click → Change Drive Letter
    • Assign new letter

    This fixes many “invisible drive” cases.


    Step 6: Reinstall USB Drivers

    Go to Device Manager:

    • Uninstall USB controllers
    • Restart PC

    Windows will reinstall drivers automatically.

    Drivers play a critical role in detection stability.


    Step 7: Check Power Delivery

    Some external drives require:

    • Dual USB power
    • External adapter

    Low voltage = drive spin failure.

    Voltage instability is a hidden cause most users ignore.


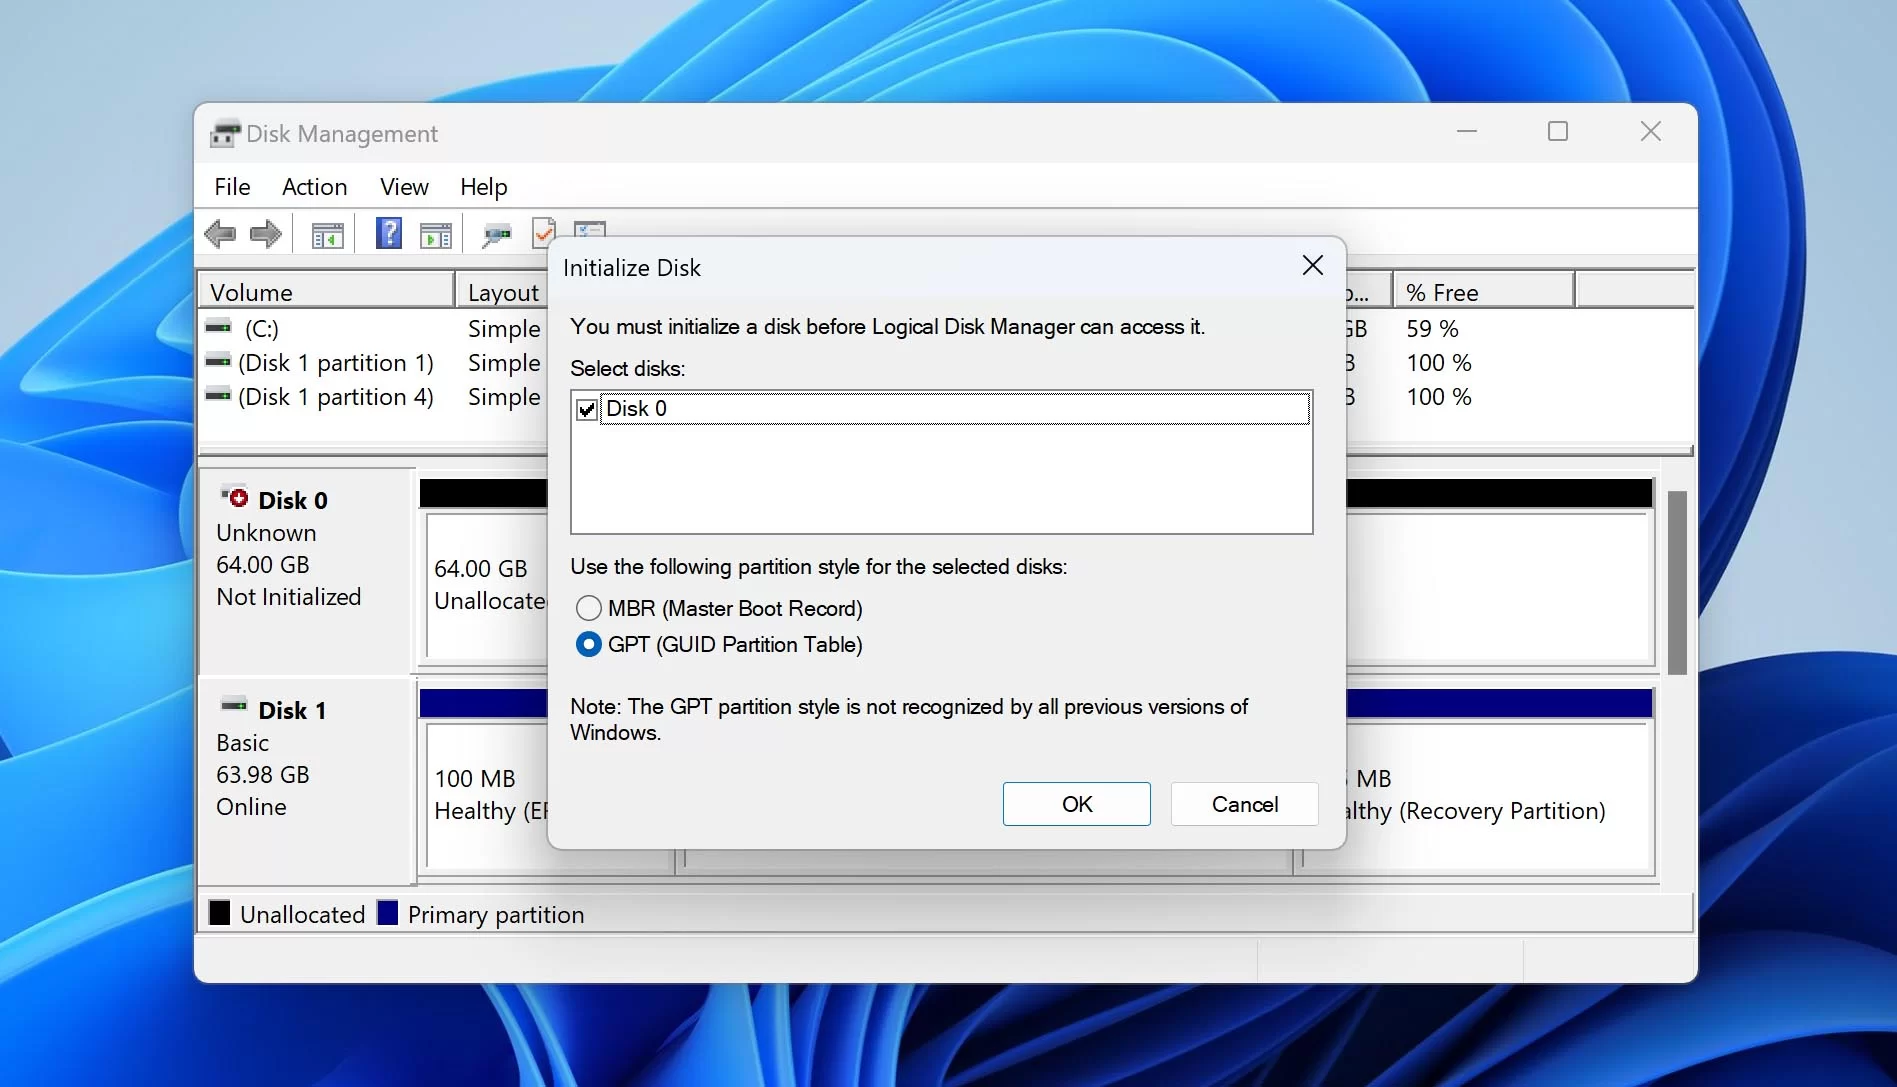
    Step 8: Initialize Disk (ONLY if empty or new)

    If disk shows as:

    • Unknown
    • Not initialized

    You can initialize it—but WARNING:

    • This erases existing partition data structure

    Only do this if data is not important.


    Step 9: Disable USB Power Saving

    Windows may cut power:

    • Control Panel → Power Options
    • Disable USB selective suspend

    This prevents random disconnects.


    Step 10: BIOS/UEFI USB Check

    Enter BIOS:

    • Ensure USB storage support enabled
    • Enable legacy USB if required

    Some systems restrict external device detection at firmware level.


    Advanced Troubleshooting (Pro Level)

    Check Disk in Diskpart

    Use Command Prompt:

    • diskpart
    • list disk

    If visible here → software-level issue.

    If NOT visible → hardware-level problem.


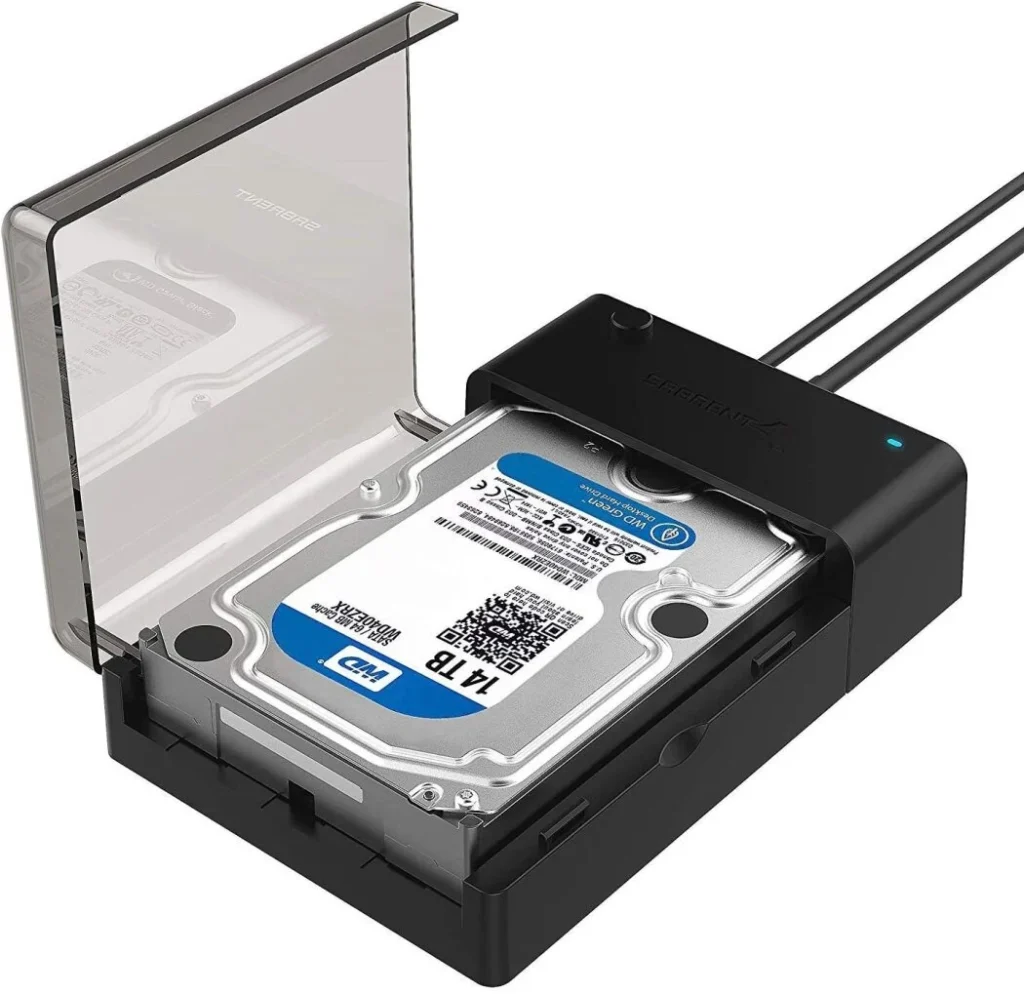
    Test Enclosure vs Drive Separately

    Sometimes:

    • SATA drive is fine
    • USB enclosure is dead

    Try removing drive from enclosure.


    Check SMART Status (If Detected)

    If drive appears:

    • Run SMART diagnostics

    Warning signs:

    • Reallocated sectors
    • Read errors

    Common Mistakes That Make It Worse

    Formatting Immediately

    This destroys recoverable data structure.

    Ignoring Power Issues

    Many external drives fail due to low voltage.

    Using Cheap USB Hubs

    Unstable power = detection failure.

    Reconnecting Repeatedly

    Can worsen mechanical wear.


    Real-World Scenarios

    Problem: Drive spins but not visible

    Cause: Partition or driver issue
    Fix: Disk Management repair


    Problem: No response at all

    Cause: Power or hardware failure
    Fix: Try different cable or enclosure


    Problem: Visible on other PC

    Cause: System configuration issue
    Fix: Driver reset or USB fix


    Pro Tips from a Hardware Engineer

    • Always use rear motherboard USB ports
    • Avoid cheap cables for external HDDs
    • Backup data regularly (3-2-1 rule)
    • Monitor drive health with SMART tools

    And here’s something most guides won’t tell you:
    External drive issues are often NOT disk failures—they are USB controller or power instability problems disguised as disk failure.


    When to Consider Hardware Failure

    Assume failure if:

    • Drive not detected on multiple systems
    • No spin-up sound
    • Repeated clicking or vibration issues
    • Enclosure replacement doesn’t help

    At that stage, professional recovery may be needed.


    Final Thoughts: Diagnose Before You Panic

    Troubleshooting external hard drive not showing up in Disk Management is all about layered diagnosis:

    Hardware → Cable → Power → Drivers → Disk Management → BIOS

    Skip steps, and you’ll miss the real cause.

    Follow the process, and most “dead drives” come back to life—or at least reveal their true condition.


    CTA: Fix Your Storage Like a Pro

    At fixrig.xyz, we don’t guess—we diagnose hardware problems properly.

    Still can’t see your external drive in Disk Management? Not sure if it’s dead or just hidden?

    Drop your setup details in the comments—and we’ll help you troubleshoot it step by step.

    Because in real hardware engineering… nothing is ever “random”—it’s always a signal waiting to be understood.

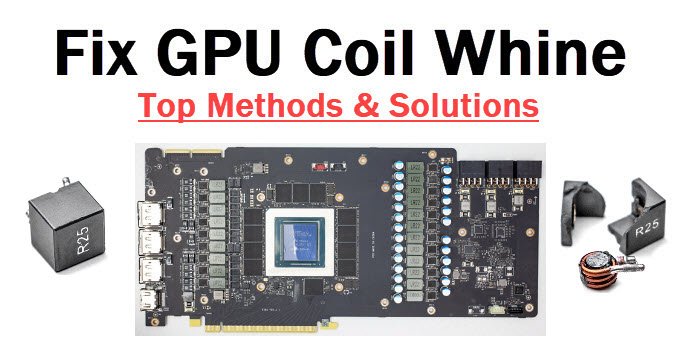
  • How to Fix Coil Whine in High-End Graphics Cards (2026 Hardware Engineer Guide)

    How to Fix Coil Whine in High-End Graphics Cards (2026 Hardware Engineer Guide)

    Look, I’ve seen this issue a thousand times—and it always confuses users the same way.

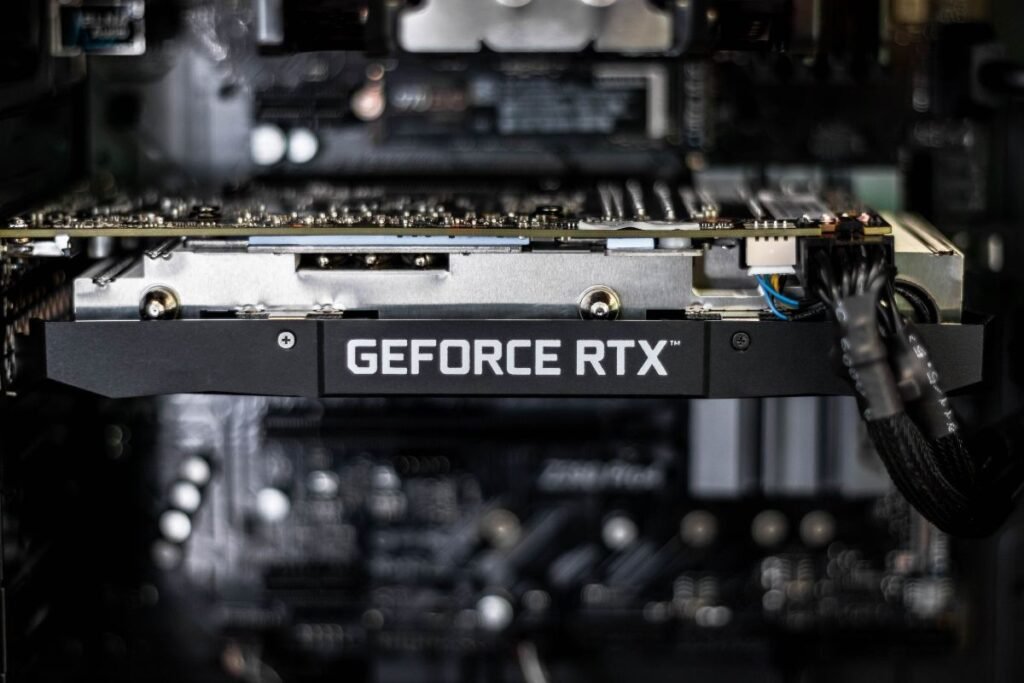
    You buy a high-end GPU, install it, run a game… and suddenly you hear a high-pitched electrical buzzing sound.

    That’s coil whine.

    Here is the real talk about why your rig is acting up: coil whine is not a “fault” in most cases—it’s a physics side-effect of electrical components vibrating under high load frequency changes, especially in modern high-performance GPUs.

    In this fixrig.xyz expert breakdown, I’ll show you how to fix coil whine in high-end graphics cards, or at least reduce it to near silence using real hardware-level techniques.


    What Is Coil Whine? (Hardware Explanation)

    Coil whine happens when electrical components vibrate at high frequency under load.

    Main Sources Inside GPU:

    • Power delivery coils (VRMs)
    • Inductors on PCB
    • Capacitor oscillation under load spikes

    When GPU load changes rapidly, current flow fluctuates, causing vibration → sound.


    Common Symptoms of Coil Whine

    1. High-Pitched Noise During Gaming

    Especially in high-FPS scenes.

    2. Noise Changes with FPS

    More FPS = more whine.

    3. Silent Desktop, Loud Under Load

    Idle is fine, gaming triggers sound.

    4. PSU or GPU Area Buzzing

    Sound comes from GPU zone or PSU region.


    Root Causes (2026 GPU Power Behavior)

    High Frame Rates (Uncapped FPS)

    Modern GPUs push 300–1000 FPS in menus → unstable power draw.

    Voltage Spikes

    Rapid voltage switching in VRMs.

    PSU Ripple Noise

    Low-quality power supply amplifies coil vibrations.

    Poor Electrical Dampening

    Budget GPUs or aging components lack insulation.

    Extreme Overclocking

    Increases current fluctuations.


    Tools Checklist for Diagnosis

    Before attempting fixes:

    • FPS limiter software
    • GPU monitoring tool
    • PSU with stable output rating
    • Alternative power cable
    • Benchmark software

    Pro tip: Always test coil whine under controlled FPS conditions.


    Comparison Table: Software Fix vs Hardware Fix

    Fix TypeDifficultyCostEffectiveness
    FPS LimitingEasyFreeHigh
    V-Sync / G-SyncEasyFreeHigh
    Undervolting GPUMediumFreeVery High
    PSU UpgradeMedium$$High
    GPU ReplacementHard$$$Absolute

    Step-by-Step: How to Fix Coil Whine in High-End Graphics Cards

    Step 1: Limit FPS Immediately

    This is the most effective first step.

    • Enable V-Sync
    • Or set FPS cap (60/120/144)

    Why it works:
    Less FPS = less power fluctuation = reduced coil vibration.


    Step 2: Enable G-Sync or FreeSync

    If supported:

    • Smooth frame delivery
    • Reduced sudden power spikes

    This stabilizes GPU load behavior.


    Step 3: Try Undervolting GPU

    Undervolting reduces electrical stress:

    • Lower voltage
    • Same performance in many cases
    • Reduced coil vibration

    Use tools like MSI Afterburner.


    Step 4: Check PSU Quality

    Look, I’ve seen this error a thousand times—people blame GPU, but PSU is often the real culprit.

    Check:

    • Wattage rating
    • 80+ certification
    • Stable rails (12V line)

    A weak PSU = unstable voltage = louder coil whine.


    Step 5: Change Power Cable or PCIe Connector

    Sometimes issue is simple:

    • Replace PCIe cables
    • Avoid daisy-chaining

    Poor contact increases electrical noise.


    Step 6: Try Different Power Outlet

    Yes, even wall power matters:

    • Avoid overloaded extension boards
    • Use direct socket

    Voltage instability contributes to noise.


    Step 7: Adjust In-Game Settings

    High FPS menus are the worst offenders:

    • Cap menu FPS
    • Reduce unnecessary rendering load

    Many games run 500+ FPS in menus → coil whine spikes.


    Step 8: Apply GPU Power Limit

    In GPU software:

    • Reduce power limit by 10–20%

    This stabilizes voltage swings.


    Step 9: Test Case Airflow & Mounting

    Improper mounting can amplify noise:

    • Tighten GPU screws
    • Ensure no vibration contact with case

    Sometimes sound is amplified physically.


    Step 10: BIOS/UEFI Power Settings

    Some motherboards support:

    • PCIe power management
    • Power phase tuning

    Adjusting this can reduce noise.


    Advanced Troubleshooting (Pro Level Fixes)

    PSU Swap Testing

    If possible:

    • Test GPU with another PSU

    This isolates root cause quickly.


    Frame Rate Behavior Analysis

    If coil whine:

    • Increases with FPS → GPU normal behavior
    • Constant noise → PSU or hardware issue

    Cap Background FPS

    Modern GPUs render hidden frames:

    • Steam menus
    • Browsers
    • Launchers

    Cap global FPS for stability.


    Common Mistakes That Make Coil Whine Worse

    Running Unlimited FPS

    This is the biggest cause.

    Using Low-Quality PSU

    Cheap units amplify noise.

    Overclocking Without Testing

    Increases voltage instability.

    Ignoring PSU-GPU Pairing

    Mismatch causes electrical imbalance.


    Real-World Scenarios

    Problem: Coil whine in menus only

    Cause: Uncapped FPS
    Fix: FPS limiter or V-Sync


    Problem: Constant buzzing under load

    Cause: PSU instability
    Fix: PSU upgrade or replacement


    Problem: New GPU has coil whine

    Cause: Normal manufacturing variance
    Fix: Undervolt or limit FPS


    Pro Tips from a Hardware Engineer

    • Coil whine is NOT always a defect
    • High FPS = high electrical switching noise
    • Undervolting often gives best balance
    • PSU quality matters more than users think

    And here’s something most guides won’t tell you:
    Even two identical GPUs can behave differently due to microscopic differences in coil winding and PCB manufacturing tolerances.


    When to Consider RMA or Replacement

    Only consider replacement if:

    • Coil whine is extreme even at low FPS
    • Noise persists across multiple PSUs
    • It affects usability

    Otherwise, it’s usually manageable.


    Final Thoughts: Physics, Not Failure

    Fixing coil whine in high-end graphics cards is not about “eliminating” it completely—it’s about controlling electrical load behavior.

    You’re not fixing a broken GPU…
    You’re managing how power flows through it.


    CTA: Optimize Your GPU Like a Pro

    At fixrig.xyz, we go beyond basic fixes—we teach real hardware engineering thinking.

    Still dealing with coil whine? Not sure if it’s your GPU or PSU?

    Drop your full system specs in the comments—and let’s tune your setup step-by-step.

    Because in high-end hardware… silence is not luck, it’s engineering.