Look, I’ve seen this mistake a thousand times—people grab a powerful air compressor and blast their PC like it’s a car engine bay.
And then they wonder why their GPU fan starts rattling or their motherboard behaves weird.
Here is the real talk about why your rig is acting up in these cases: cleaning pressure matters just as much as cleaning technique. Too much air pressure can damage bearings, spin fans dangerously fast, or even stress delicate SMD components on the motherboard.
So in this fixrig.xyz engineer-level guide, we’ll break down the Best air pressure settings for cleaning PC dust without damage, based on real hardware safety standards used in 2026.
Why Air Pressure Matters in PC Cleaning
A PC is not just metal and plastic—it’s a precision electronic system containing:
- GPU fans with delicate bearings
- Motherboard SMD circuits
- RAM contacts
- PSU internal airflow channels
- NVMe and SATA components
Too much pressure = mechanical stress + static risk.
Common Symptoms of Improper PC Air Cleaning
1. Fan Bearing Noise After Cleaning
Over-spinning damages lubrication.
2. Random System Instability
Loose dust moved into sensitive areas.
3. GPU Fan Vibration
Blade imbalance due to forced rotation.
4. System Not Booting Properly
Dust dislodged into RAM or PCIe slots.
Safe Air Pressure Basics (Critical Concept)
Ideal Air Pressure Range for PC Cleaning
20–30PSI
This is the safe engineering range for most PC components.
Above this range:
- Fan damage risk increases
- Component stress increases
- Dust may be pushed deeper instead of removed
Comparison Table: Air Pressure Levels
| Pressure Level | Usage | Risk Level | Recommendation |
|---|---|---|---|
| 10–20 PSI | Light dust removal | Very Safe | Best for laptops |
| 20–30 PSI | Standard PC cleaning | Safe | Ideal range |
| 30–50 PSI | Heavy dust removal | Moderate risk | Use carefully |
| 50+ PSI | Industrial compressors | High risk | Not recommended |
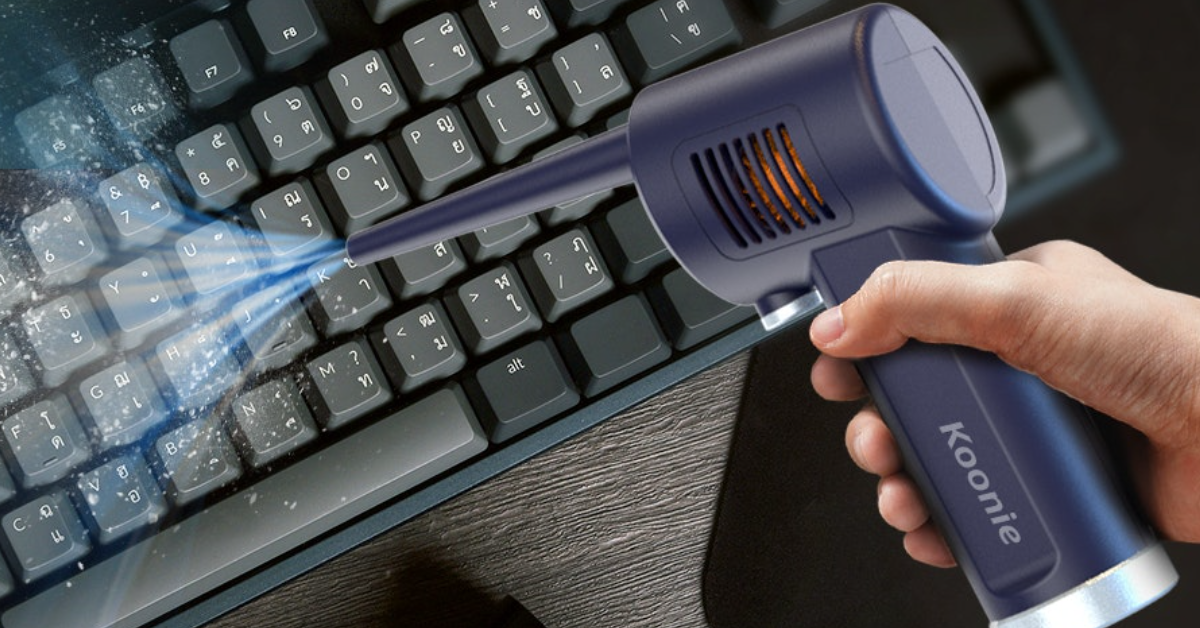
Tools Checklist for Safe PC Dust Cleaning
Before starting, gather:
- Compressed air can OR adjustable air blower
- Anti-static brush
- Microfiber cloth
- ESD-safe gloves (optional but recommended)
- Screwdriver set
- Stable workspace
Pro tip: Never use random shop compressors without pressure control.
Step-by-Step Guide: Safe PC Dust Cleaning (Engineer Method)
Step 1: Shut Down and Disconnect Power
Unplug everything.
- Power cable
- GPU cables
- External devices
Residual voltage can still be present in PSU.
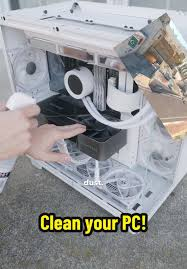
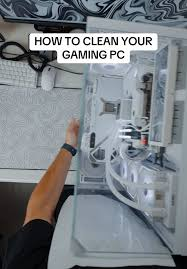
Step 2: Open the Case Carefully
Remove side panel and expose internal components.
Check:
- GPU dust buildup
- CPU cooler blockage
- Case fan accumulation
Step 3: Set Air Pressure Correctly
Look, I’ve seen this error a thousand times—people skip pressure control.
Set:
- 20–30 PSI for desktop PCs
- Lower for laptops (10–20 PSI)
If using canned air:
- Keep short bursts only
- Never continuous spray
Step 4: Hold Fans in Place
This is critical.
If you let fans spin freely:
- You damage bearings
- You create voltage backfeed risk in rare cases
Hold fan blades gently using a plastic tool.
Step 5: Clean in Short Controlled Bursts
Do NOT:
- Blast continuously
- Aim too close
- Focus too long on one area
Do:
- Short 1–2 second bursts
- Move systematically across components
Step 6: Focus on Heat Zones
Main dust traps:
- GPU heatsink
- CPU cooler fins
- PSU intake grill
- Front case filters
Step 7: Clean Motherboard Safely
Use:
- Low pressure air
- Anti-static brush for stubborn dust
Avoid direct high-pressure contact with:
- Capacitors
- VRM zones
- RAM slots
Step 8: Reassemble and Test
After cleaning:
- Reconnect components
- Power on system
- Check fan noise and temps
Advanced Pro Tips (2026 Hardware Standard)
1. Use Pulsed Air Technique
Instead of continuous airflow, use bursts to prevent static buildup.
2. Maintain Distance
Keep nozzle at:
10–15cm
Too close = concentrated pressure damage.
3. Clean With Gravity Direction
Always blow dust OUT of the case—not deeper inside.
4. Avoid Vacuum Cleaners Inside PC
Static electricity risk is real.
5. Use Positive Airflow Strategy
Clean from:
- Top → Bottom
- Front → Back
Common Mistakes Users Make
Using Industrial Air Compressors
Too powerful and unstable airflow.
Not Holding Fans
This is the #1 cause of post-cleaning noise.
Cleaning Without Disassembly
Dust stays trapped inside heatsinks.
Spraying Too Close
Can damage delicate motherboard traces.
Real Engineering Insight
Here’s something most guides won’t tell you:
PC dust cleaning is not just about removing dirt—it’s about airflow restoration and thermal efficiency recovery.
Improper air pressure doesn’t just clean poorly—it can actually:
- Increase thermal throttling
- Reduce GPU lifespan
- Cause fan imbalance
When Deep Cleaning Is Required
You may need full teardown if:
- Dust is inside heatsink layers
- Temperatures remain high after cleaning
- Fan noise persists
- Airflow is blocked internally
At that stage, surface cleaning is not enough.
Final Thoughts: Precision Over Power
The safest Best air pressure settings for cleaning PC dust without damage is not about maximum force—it’s about controlled airflow engineering.
Stick to:
- 20–30 PSI for desktops
- Short bursts only
- Proper fan control
- Anti-static awareness
And your system will stay cooler, quieter, and longer-lasting.
CTA: Keep Your Rig Clean the Smart Way
At fixrig.xyz, we don’t just clean PCs—we engineer airflow stability.
Still unsure about safe cleaning pressure or worried about damaging your hardware?
Drop your setup details in the comments, and I’ll guide you like a real hardware engineer.
Because in modern PC maintenance… cleaning without control is just controlled damage.
Leave a Reply