Blog

  • Troubleshooting “System Thread Exception Not Handled” BSOD (Complete 2026 Fix Guide)

    Troubleshooting “System Thread Exception Not Handled” BSOD (Complete 2026 Fix Guide)

    Look, I’ve seen this BSOD a thousand times—and it almost always hits users at the worst possible moment.

    You’re working, gaming, or just booting your PC… and suddenly the system crashes with a blue screen:

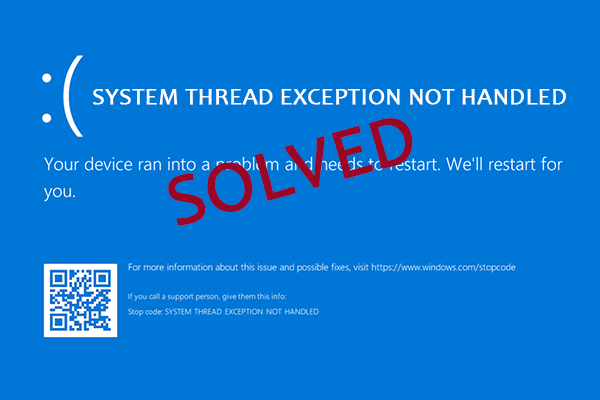
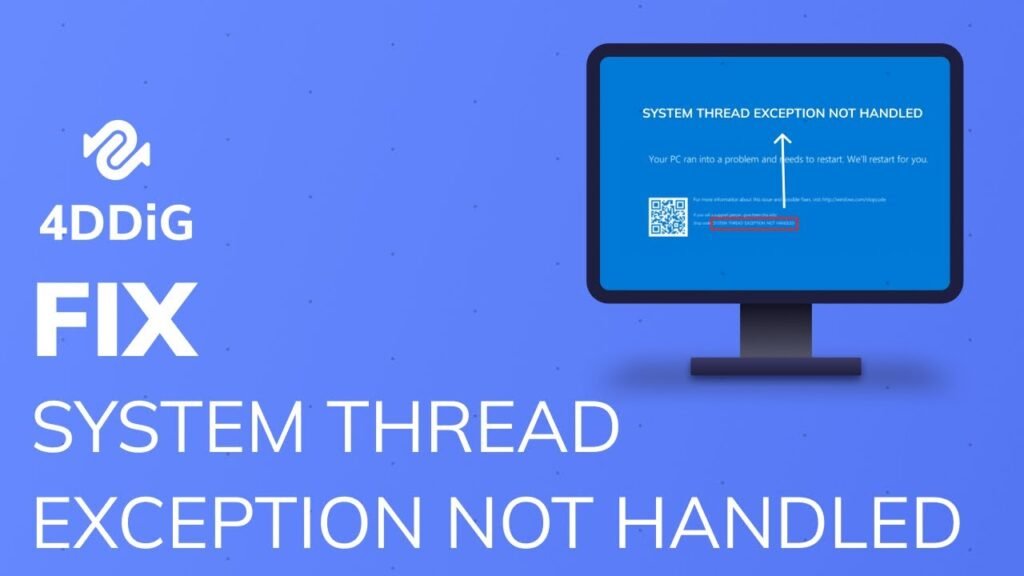
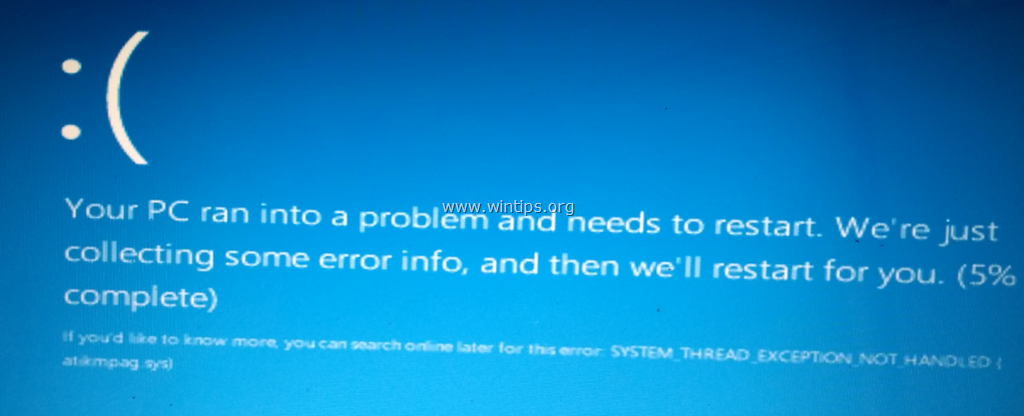
    “SYSTEM_THREAD_EXCEPTION_NOT_HANDLED”

    Here is the real talk about why your rig is acting up: this error is almost always caused by faulty drivers, corrupted system files, GPU instability, or low-level hardware conflicts inside Windows kernel operations.

    In this fixrig.xyz expert guide, I’ll walk you through Troubleshooting “System Thread Exception Not Handled” BSOD step-by-step like a real hardware engineer—not generic Windows advice.

    Common Symptoms of This BSOD Error

    Before fixing it, confirm what you’re seeing:

    1. Sudden Blue Screen on Startup

    System crashes before login screen.

    2. Looping Restart Cycle

    PC keeps restarting repeatedly.

    3. Error Points to a File (e.g., nvlddmkm.sys)

    Indicates driver-level failure.

    4. Random Crashes During Gaming or Load

    Usually GPU or RAM instability.

    5. Safe Mode Works, Normal Mode Doesn’t

    Strong indicator of driver issue.

    Root Causes (Deep Hardware + Software Breakdown)

    Corrupt or Faulty GPU Drivers

    Most common cause in modern systems.

    Incompatible Windows Update

    Driver mismatch after update.

    RAM Instability or XMP Issues

    Overclocked memory causing kernel faults.

    Faulty System Files

    Windows kernel corruption.

    Overheating or Thermal Throttling

    Unstable hardware behavior under load.

    BIOS Misconfiguration

    Incorrect memory or CPU settings.


    Tools Checklist Before Troubleshooting

    Prepare these tools:

    • Windows Safe Mode access
    • Driver update/uninstaller tool (DDU recommended)
    • USB recovery drive
    • BIOS access
    • RAM testing tool (Windows Memory Diagnostic / MemTest)

    Pro tip: Always isolate software vs hardware before making changes.


    Comparison Table: Software Fix vs Hardware Fix

    Fix TypeDifficultyCostEffectiveness
    Driver RepairEasyFreeVery High
    System RestoreEasyFreeHigh
    BIOS ResetMediumFreeHigh
    RAM TestingMediumFreeMedium-High
    Hardware ReplacementHard$$Permanent Fix

    Step-by-Step Fix for “System Thread Exception Not Handled”

    Step 1: Boot into Safe Mode

    If system crashes:

    • Force shutdown 3 times
    • Enter Recovery Mode
    • Select Safe Mode

    Safe Mode disables problematic drivers.


    Step 2: Identify Faulty Driver File

    If BSOD shows file like:

    • nvlddmkm.sys (GPU driver)
    • ntfs.sys (storage)

    This gives direct clue.


    Step 3: Clean Reinstall GPU Drivers

    Look, I’ve seen this error a thousand times—GPU drivers are usually the real culprit.

    Use:

    • Display Driver Uninstaller (DDU)
    • Reinstall latest stable driver

    Avoid beta drivers unless necessary.


    Step 4: Run System File Checker

    Open CMD (Admin):

    • sfc /scannow
    • DISM /Online /Cleanup-Image /RestoreHealth

    This repairs corrupted Windows files.


    Step 5: Check RAM Stability

    Faulty RAM = kernel crash.

    Test using:

    • Windows Memory Diagnostic
    • MemTest86

    If errors appear → RAM issue confirmed.


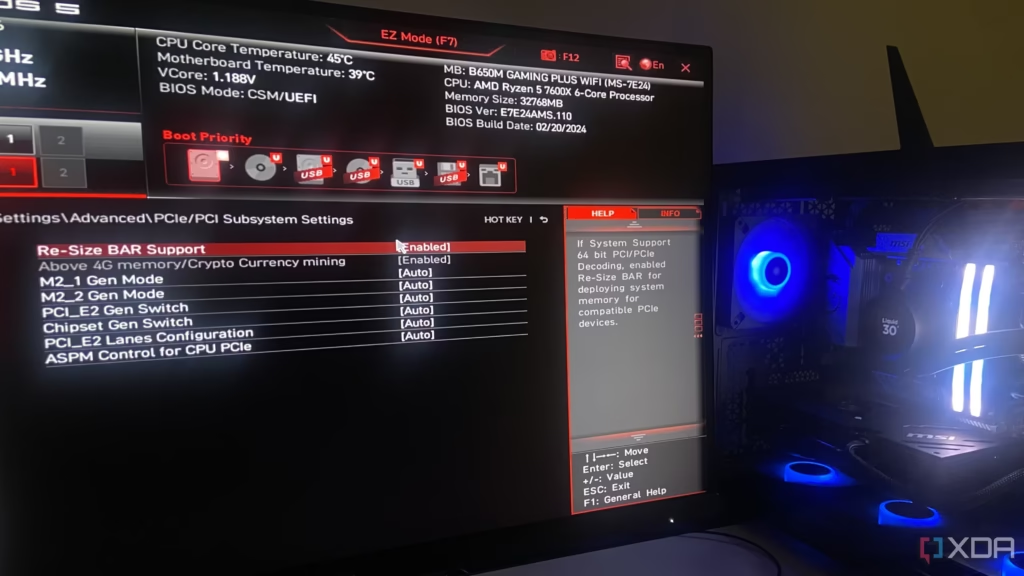
    Step 6: Reset BIOS Settings

    Enter BIOS:

    • Load default settings
    • Disable unstable XMP profiles temporarily

    Incorrect RAM timing can trigger BSOD.


    Step 7: Check Temperature & Voltage

    Overheating causes instability:

    • Monitor CPU/GPU temps
    • Check voltage fluctuations

    Thermal throttling can indirectly cause system crashes.


    Step 8: Uninstall Recent Windows Updates

    If issue started recently:

    • Roll back latest update
    • Or use System Restore point

    Some updates break driver compatibility.


    Step 9: Update Chipset & Motherboard Drivers

    Many users ignore this step:

    • Install latest chipset drivers
    • Update motherboard firmware

    This improves system stability.


    Advanced Troubleshooting (Pro Level Fixes)

    GPU Underclocking Test

    If crash happens under load:

    • Reduce GPU clock speed
    • Test stability

    RAM XMP Disable Test

    XMP profiles can be unstable:

    • Disable XMP
    • Run system at default speed

    Check Storage Health

    Corrupt system files may come from failing SSD/HDD:

    • Run SMART test
    • Check disk errors

    BIOS Update (Careful)

    If motherboard firmware is outdated:

    • Update BIOS safely
    • Avoid power interruption

    This fixes deep compatibility issues.


    Common Mistakes That Make It Worse

    Reinstalling Windows Immediately

    Often unnecessary and time-consuming.

    Ignoring Driver Conflicts

    Most BSODs are driver-related.

    Keeping Overclock Enabled

    Unstable OC = random kernel crashes.

    Installing Random Drivers from Websites

    Always use official sources.


    Real-World Scenarios

    Problem: BSOD after GPU driver update

    Cause: Driver corruption
    Fix: Clean reinstall using DDU


    Problem: BSOD during gaming

    Cause: GPU instability or heat
    Fix: Lower clocks + check temps


    Problem: BSOD after RAM upgrade

    Cause: XMP mismatch
    Fix: Disable XMP or retune RAM


    Pro Tips from a Hardware Engineer

    • Always use stable GPU drivers, not latest experimental ones
    • Keep BIOS settings simple unless you understand tuning
    • Monitor RAM stability after upgrades
    • Maintain clean driver environment

    And here’s something most guides won’t tell you:
    This BSOD is rarely random—it’s almost always a driver-hardware communication failure inside Windows kernel execution threads.


    When to Consider Hardware Failure

    You may have hardware issues if:

    • BSOD persists after clean reinstall
    • RAM tests fail
    • GPU crashes across multiple systems
    • System corrupts repeatedly

    At that stage, replacement or deep diagnostics is needed.


    Final Thoughts: Stability is Engineering, Not Luck

    Troubleshooting “System Thread Exception Not Handled” BSOD is about systematic isolation:

    Drivers → RAM → BIOS → GPU → Storage → OS

    Skip steps, and you miss the real problem.

    Follow the process, and most systems recover completely.


    CTA: Fix Your System Like a Pro

    At fixrig.xyz, we don’t guess—we diagnose hardware at engineering level.

    Still stuck on BSOD errors? Not sure if it’s RAM, GPU, or drivers?

    Drop your full system details in the comments—and let’s debug it step-by-step.

    Because in real hardware troubleshooting… every crash is just a clue waiting to be decoded.
  • Troubleshooting “Display Driver Stopped Responding” During Gaming (2026 Complete Fix Guide)

    Troubleshooting “Display Driver Stopped Responding” During Gaming (2026 Complete Fix Guide)

    Look, I’ve seen this error a thousand times—and it always shows up right in the middle of intense gameplay.

    Your screen freezes… goes black… then recovers with a message like:

    “Display driver stopped responding and has recovered.”

    Here is the real talk about why your rig is acting up: this is almost never a single issue. It’s usually a GPU driver timeout caused by instability in graphics processing, voltage spikes, overheating, or memory pressure under gaming load.

    In this fixrig.xyz expert guide, I’ll break down Troubleshooting “Display Driver Stopped Responding” during gaming step-by-step like a real hardware engineer—not generic Windows advice.


    Common Symptoms of Display Driver Crash

    1. Screen Freeze During Gaming

    Game pauses suddenly for a few seconds.

    2. Black Screen Recovery

    Display goes black, then returns.

    3. Error Notification Popup

    Windows reports driver recovery.

    4. Game Crashes to Desktop

    Especially in high-GPU-load scenes.

    5. Stuttering Before Crash

    Performance drops before failure.


    Root Causes (GPU + System-Level Analysis)

    Outdated or Corrupted GPU Drivers

    Most common trigger in modern systems.

    GPU Overheating (Thermal Throttling)

    High temperatures cause driver reset.

    Power Supply Instability (Voltage Drops)

    Unstable PSU leads to GPU timeout.

    Overclocking Instability

    Too high GPU/VRAM clocks.

    Memory Pressure in Games

    VRAM exhaustion causes reset.

    Windows TDR (Timeout Detection Recovery)

    GPU not responding within system timeout window.


    Tools Checklist Before Troubleshooting

    Prepare:

    • GPU monitoring tool (MSI Afterburner)
    • Driver cleanup tool (DDU)
    • Temperature monitoring software
    • PSU wattage checker
    • Stable internet for driver download

    Pro tip: Always isolate software vs hardware instability first.


    Comparison Table: Software Fix vs Hardware Fix

    Fix TypeDifficultyCostEffectiveness
    Driver ReinstallEasyFreeVery High
    GPU Settings ResetEasyFreeHigh
    Cooling ImprovementMediumLowHigh
    PSU UpgradeMedium$$Very High
    GPU ReplacementHard$$$Permanent Fix

    Step-by-Step Fix for “Display Driver Stopped Responding” During Gaming

    Step 1: Clean Reinstall GPU Drivers

    Look, I’ve seen this error a thousand times—drivers are the main culprit.

    Steps:

    • Boot into Safe Mode
    • Use DDU (Display Driver Uninstaller)
    • Remove all GPU drivers completely
    • Install latest stable driver

    Avoid beta drivers unless required.


    Step 2: Monitor GPU Temperature

    Check during gameplay:

    • Idle: 35–50°C
    • Gaming: 65–85°C

    If above 85°C → thermal throttling likely.

    Fix:

    • Clean dust
    • Improve airflow
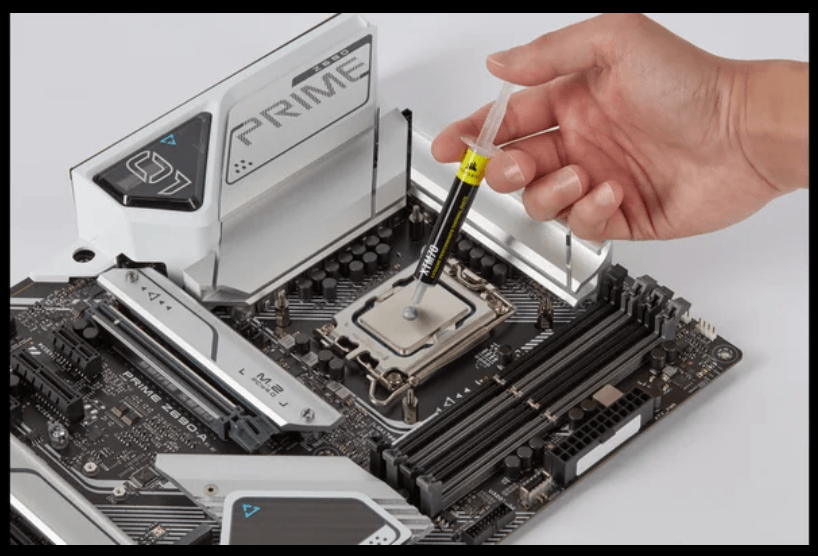
    • Reapply thermal paste if needed

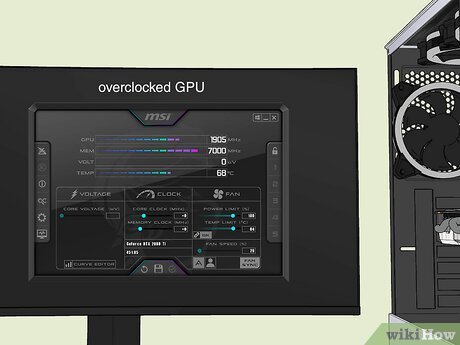
    Step 3: Disable GPU Overclocking

    Overclock instability is a silent killer.

    • Reset GPU to default clocks
    • Disable factory OC temporarily

    Test stability again.


    Step 4: Adjust Power Settings

    Windows and GPU settings:

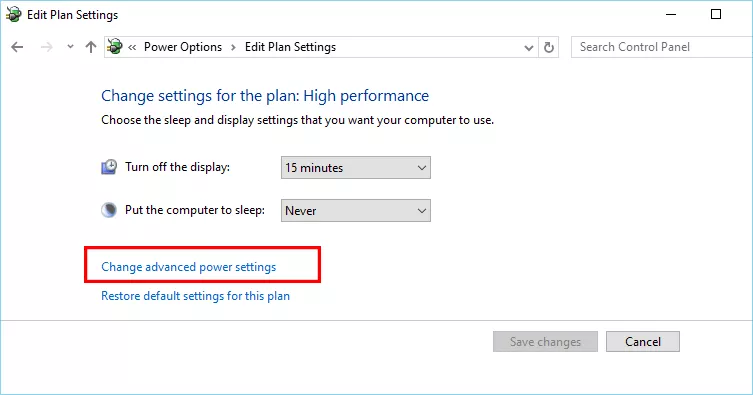
    • Set Power Mode to “High Performance”
    • Disable aggressive power saving

    This stabilizes GPU response timing.


    Step 5: Increase TDR Timeout (Advanced Fix)

    Windows may reset GPU too quickly.

    Registry tweak:

    • TdrDelay = 10–15 seconds

    This prevents premature driver reset.


    Step 6: Check PSU Stability

    Here is the real deal—many users ignore this.

    Weak PSU = unstable GPU behavior.

    Check:

    • Wattage capacity
    • 80+ certification
    • Rail stability (12V line)

    Voltage drops = driver crash loop.


    Step 7: Lower In-Game Graphics Load

    Reduce stress:

    • Lower texture quality
    • Disable ray tracing
    • Cap FPS (important)

    Uncapped FPS = unstable GPU spikes.


    Step 8: Test VRAM Usage

    If VRAM is full:

    • Reduce resolution
    • Close background apps

    Memory overflow can trigger driver reset.


    Advanced Troubleshooting (Pro Level Fixes)

    BIOS Update for GPU Stability

    Some motherboards improve PCIe compatibility via BIOS updates.


    PCIe Slot Change

    Move GPU to another slot if available:

    • Fixes lane instability
    • Improves signal integrity

    Undervolting GPU

    Undervolting can stabilize:

    • Power spikes
    • Temperature
    • Driver response timing

    Often better than overclocking.


    Check Background GPU Load

    Apps like:

    • Browsers
    • Streaming software
    • Recording tools

    Can overload GPU unexpectedly.


    Common Mistakes That Make It Worse

    Installing Random GPU Drivers

    Always use official NVIDIA/AMD sources.

    Ignoring PSU Quality

    Cheap PSU = unstable GPU behavior.

    Overclocking Without Testing

    Even small OC can break stability.

    Running Max Settings on Weak Hardware

    Not all rigs are built for ultra settings.


    Real-World Scenarios

    Problem: Crash only in AAA games

    Cause: GPU load spike
    Fix: FPS cap + driver clean install


    Problem: Crash after driver update

    Cause: corrupted install
    Fix: rollback or DDU reinstall


    Problem: Random desktop recovery errors

    Cause: PSU or overheating
    Fix: check thermals + voltage


    Pro Tips from a Hardware Engineer

    • Always prefer stable drivers over newest ones
    • Keep GPU temps below 80°C for long-term stability
    • FPS cap is underrated stability tool
    • PSU quality matters more than most users realize

    And here’s something most guides won’t tell you:
    This error is not just a “driver problem”—it’s a GPU response timeout triggered by unstable hardware conditions under real-time rendering pressure.


    When to Consider Hardware Replacement

    Replace or upgrade if:

    • Crashes persist after clean driver install
    • GPU overheats despite cooling fixes
    • PSU cannot handle load spikes
    • VRAM is consistently maxed out

    At that point, software fixes won’t help.


    Final Thoughts: Stability is Engineering, Not Luck

    Troubleshooting “Display Driver Stopped Responding” during gaming is all about system stability tuning:

    Drivers → Thermals → Power → Memory → Load → BIOS

    Fix the weakest link, and your system stabilizes.


    CTA: Fix Your GPU Like a Pro

    At fixrig.xyz, we don’t guess—we diagnose hardware at engineering level.

    Still getting display driver crashes during gaming? Not sure if it’s GPU, PSU, or thermals?

    Drop your full system specs in the comments—and let’s tune your rig step-by-step.

    Because in real gaming performance… stability wins over power every single time.

  • Best Remote Hardware Troubleshooting Tools for IT Support in 2026 (Complete Engineer Guide)

    Best Remote Hardware Troubleshooting Tools for IT Support in 2026 (Complete Engineer Guide)

    If you’re doing IT support in 2026, one thing is clear—remote troubleshooting is no longer optional, it’s the standard.

    Look, I’ve seen this shift happen across companies: laptops, workstations, and even high-end gaming rigs are now diagnosed without ever touching the device physically.

    Here is the real talk about why your IT workflow matters now more than ever: modern systems are complex mixes of BIOS-level firmware, cloud-connected drivers, GPU acceleration layers, and power-managed hardware states.

    So in this fixrig.xyz expert guide, we’ll break down the Best remote hardware troubleshooting tools for IT support in 2026, and how professionals actually use them in real-world environments.


    Why Remote Hardware Troubleshooting Matters in 2026

    Modern systems are:

    • Hybrid cloud-connected devices
    • Driver-dependent ecosystems
    • BIOS + firmware integrated platforms
    • Power-managed intelligent hardware

    This means IT support is no longer just “restart your PC” level work.

    Now you diagnose:

    • GPU instability
    • RAM timing issues
    • BIOS misconfigurations
    • Thermal throttling
    • Driver conflicts

    All remotely.


    Common Symptoms IT Teams Diagnose Remotely

    1. System Random Freezing

    Often GPU or RAM instability.

    2. High CPU/GPU Usage with No Load

    Background driver or malware issue.

    3. Boot Failures or BIOS Loop

    Firmware corruption or hardware mismatch.

    4. Peripheral Not Responding

    USB controller or driver-level failure.

    5. Thermal Shutdowns

    Overheating detected via sensors.


    Core Categories of Remote Hardware Troubleshooting Tools

    To understand the ecosystem, break tools into categories:

    1. Remote Access Tools

    Used to control systems directly.

    2. Hardware Diagnostic Tools

    Check system health, sensors, and components.

    3. Network-Level Monitoring Tools

    Ensure connectivity and packet stability.

    4. BIOS & Firmware Tools

    Low-level system configuration access.

    5. Performance Monitoring Tools

    Track voltage, temperature, and load.


    Comparison Table: Popular Remote IT Support Tools

    Tool TypeExample ToolsUse CaseEfficiency
    Remote AccessAnyDesk, TeamViewerFull system controlVery High
    DiagnosticsHWMonitor, AIDA64Hardware health checkHigh
    Network ToolsWireshark, PingPlotterNetwork debuggingHigh
    BIOS ToolsVendor utilitiesFirmware updatesMedium
    MonitoringMSI AfterburnerGPU/CPU trackingVery High

    Best Remote Hardware Troubleshooting Tools for IT Support in 2026

    Now let’s go deep into actual tools used by professionals.


    1. AnyDesk (Fast Remote Hardware Access)

    AnyDesk is still a top-tier solution in 2026.

    Why IT engineers use it:

    • Low latency control
    • Lightweight architecture
    • Cross-platform support

    Best for:

    • Driver fixes
    • System configuration
    • Software-level diagnostics

    2. TeamViewer (Enterprise Remote Support)

    Still widely used in corporate environments.

    Strengths:

    • Secure encrypted sessions
    • File transfer support
    • Multi-device control

    IT use case:

    • Remote BIOS troubleshooting support
    • Enterprise workstation repair

    3. AIDA64 (Hardware Diagnostic King)

    Look, this is where real hardware engineers live.

    What it does:

    • CPU stress testing
    • GPU monitoring
    • RAM latency tracking
    • Temperature sensors

    Why it matters:

    It reveals hidden instability in hardware before crashes happen.


    4. HWMonitor (Thermal + Voltage Tracking)

    This tool is essential for modern troubleshooting.

    Tracks:

    • CPU temperature
    • GPU temperature
    • Voltage fluctuations
    • Fan speed

    If voltage is unstable, systems behave unpredictably.


    5. MSI Afterburner (GPU-Level Control Tool)

    Not just for gamers—it’s an IT diagnostic weapon.

    Features:

    • GPU clock monitoring
    • VRAM usage tracking
    • Fan curve adjustment

    Pro tip:

    Thermal throttling issues are often solved here first.


    6. Wireshark (Network-Level Debugging Tool)

    Used when systems appear “slow” remotely.

    Detects:

    • Packet loss
    • Network delays
    • DNS issues

    Because sometimes the “hardware issue” is actually network lag.


    7. Vendor BIOS Utilities (Low-Level Fix Tools)

    Motherboard manufacturers provide firmware tools:

    • ASUS Armoury Crate
    • MSI Dragon Center
    • Gigabyte Control Center

    Use cases:

    • BIOS updates
    • Fan curve control
    • Hardware compatibility fixes

    Step-by-Step Remote Troubleshooting Workflow

    Step 1: Establish Remote Session

    Use AnyDesk or TeamViewer to access system.


    Step 2: Check System Performance

    Open:

    • Task Manager
    • Resource Monitor

    Look for abnormal CPU or RAM usage.


    Step 3: Run Hardware Diagnostics

    Launch AIDA64 or similar tool:

    • Check CPU temps
    • Stress test GPU
    • Monitor RAM stability

    Step 4: Inspect Drivers

    Look, I’ve seen this error a thousand times—drivers are often the root cause.

    • Update GPU drivers
    • Reinstall chipset drivers
    • Remove corrupted drivers

    Step 5: Check BIOS Configuration

    Remote BIOS checks:

    • Boot priority
    • XMP status
    • CPU voltage settings

    Incorrect BIOS settings = unstable system.


    Step 6: Monitor Thermals and Voltage

    Use HWMonitor:

    • If voltage drops → PSU issue
    • If temps high → cooling issue

    Step 7: Network Verification (If System Feels Slow)

    Use Wireshark or ping tests:

    • Packet loss detection
    • Latency spikes

    Advanced IT Support Techniques (Pro Level)

    Remote Safe Mode Boot

    Used to isolate driver issues.


    Registry-Level Fixes

    Used for persistent OS corruption.


    BIOS Firmware Flashing (Carefully)

    Fixes deep compatibility issues.


    Virtual Hardware Simulation Testing

    Used in enterprise environments for prediction.


    Common Mistakes IT Technicians Make

    Ignoring Thermal Data

    Temperature tells the real story.

    Updating Everything at Once

    Breaks system stability.

    Not Checking Power Supply Health

    Voltage instability causes random crashes.

    Assuming Software Issue Only

    Hardware is often the real culprit.


    Real-World IT Scenario Examples

    Case 1: Remote PC keeps freezing

    Cause: GPU overheating
    Fix: fan curve + thermal paste


    Case 2: System slow but internet fine

    Cause: background driver failure
    Fix: clean reinstall drivers


    Case 3: Random reboot during workload

    Cause: PSU voltage instability
    Fix: hardware replacement


    Pro Tips from Hardware Engineers

    • Always monitor voltage, not just temperature
    • Use multiple tools, not just one
    • Remote diagnosis requires pattern recognition
    • BIOS misconfiguration causes 30%+ of “ghost issues”

    And here’s the real engineering truth:
    Remote troubleshooting is not about tools—it’s about interpreting hardware behavior through software signals.


    Final Thoughts: The Future of IT Support

    In 2026, IT support is evolving into:

    • AI-assisted diagnostics
    • Remote firmware control
    • Predictive hardware failure detection

    And professionals using the best remote hardware troubleshooting tools for IT support in 2026 are already ahead of the curve.


    CTA: Join the fixrig.xyz Hardware Engineering Community

    At fixrig.xyz, we break down real hardware problems like engineers—not guesswork tutorials.

    Got a stubborn PC issue or remote system failure?

    Drop your case in the comments and get real diagnostic guidance.

    Because in modern IT support… the right tool doesn’t just fix problems—it predicts them before they happen.

  • How to Update BIOS Safely Without a UPS (2026 Complete Risk-Control Guide)

    How to Update BIOS Safely Without a UPS (2026 Complete Risk-Control Guide)

    Look, I’ve seen this situation go wrong more times than I can count—someone tries a BIOS update, power flickers for one second, and suddenly the motherboard is a very expensive paperweight.

    Here is the real talk about why your rig is acting up when BIOS updates fail: BIOS flashing is one of the most sensitive operations in modern hardware because it directly modifies firmware at the motherboard level.

    And doing it without a UPS (Uninterruptible Power Supply) increases the risk of interruption—so the goal is not “zero risk” (that doesn’t exist), but controlled risk management.

    In this fixrig.xyz expert guide, we’ll break down How to update BIOS safely without a UPS using real engineering practices used by technicians in 2026.


    Why BIOS Updates Are High-Risk Operations

    BIOS is the foundation firmware of your system. It controls:

    • CPU initialization
    • RAM training
    • Storage detection
    • Power sequencing
    • PCIe device handshake

    If something interrupts this process, the system may fail to boot.


    Common Risks When Updating BIOS Without UPS

    1. Sudden Power Loss

    The biggest danger—can corrupt firmware mid-write.

    2. System Freeze During Flashing

    Often caused by unstable drivers or background processes.

    3. Incorrect BIOS File

    Wrong version = incompatibility or boot failure.

    4. Overheating During Update

    Rare, but possible on poorly cooled systems.

    5. Motherboard Recovery Failure

    Older boards may not support dual BIOS recovery.


    Safe Conditions Before Updating BIOS (Critical Checklist)

    Before you even think about flashing BIOS, ensure:

    • Stable power outlet (no loose wiring)
    • Fully charged laptop battery (if laptop)
    • No background heavy processes
    • Correct BIOS version downloaded
    • USB drive properly formatted (FAT32)

    Comparison Table: BIOS Update With vs Without UPS

    ScenarioRisk LevelStabilityRecommendation
    With UPSVery LowHighIdeal method
    Without UPSModerateDepends on environmentAcceptable with precautions
    Low-quality power supplyHighUnstableNot recommended

    Tools Checklist for Safe BIOS Update Without UPS

    You will need:

    • Stable USB flash drive (FAT32 formatted)
    • Official motherboard BIOS file
    • BIOS flash utility (EZ Flash / Q-Flash)
    • Laptop charger or stable PSU
    • Optional: multimeter (advanced users)

    Step-by-Step Guide: How to Update BIOS Safely Without a UPS

    Step 1: Verify Motherboard Model

    Look, I’ve seen this error a thousand times—people download wrong BIOS versions.

    Check:

    • Exact motherboard model
    • Revision number
    • Manufacturer website

    Never guess BIOS files.


    Step 2: Download Official BIOS Only

    Go to:

    • ASUS / MSI / Gigabyte official site

    Avoid:

    • Third-party BIOS files
    • Modified firmware

    One wrong file = dead board.


    Step 3: Prepare USB Drive Properly

    Format USB as:

    • FAT32
    • Clean partition
    • Single BIOS file only

    Rename file if required by manufacturer.


    Step 4: Ensure Stable Power Environment

    Since you are not using a UPS, do this:

    • Avoid peak electricity hours
    • Do not plug into loose sockets
    • Disconnect unnecessary devices

    If on laptop:

    • Plug in charger
    • Ensure battery is above 70%

    Step 5: Enter BIOS Flash Utility

    Most boards use:

    • ASUS EZ Flash
    • MSI M-Flash
    • Gigabyte Q-Flash

    Navigate carefully—do not change unrelated settings.


    Step 6: Start BIOS Update Process

    Now comes the critical moment.

    • Select BIOS file from USB
    • Confirm update
    • Do NOT touch system

    This process may take 2–10 minutes.


    Step 7: Do Not Interrupt Under Any Condition

    This is where most failures happen.

    Rules:

    • Do NOT restart
    • Do NOT press keys
    • Do NOT power off system

    Even small interruptions can corrupt firmware.


    Step 8: Wait for Automatic Reboot

    System will restart itself after update.

    First boot may take longer than usual—this is normal.


    Advanced Safety Techniques (Pro-Level Engineering Tips)

    1. Disable Overclocking Before BIOS Update

    Overclock instability can cause flashing errors.


    2. Close All Background Applications

    Reduces system interference.


    3. Use BIOS Flashback Feature (If Available)

    Some modern boards allow flashing without booting OS.


    4. Avoid Storm or Voltage-Unstable Conditions

    Even without UPS, environmental stability matters.


    5. Keep BIOS File on Root of USB

    Avoid folder path confusion during selection.


    What Happens If Power Fails Mid-Update?

    Here’s the engineering reality:

    • BIOS chip may become corrupted
    • System may fail POST
    • Recovery mode may be required
    • In worst case: motherboard replacement

    Some modern boards have:

    • Dual BIOS recovery
    • USB BIOS Flashback recovery

    But not all systems are protected.


    Recovery Options If BIOS Update Fails

    1. CMOS Reset

    • Remove battery
    • Clear CMOS jumper

    2. BIOS Flashback Recovery

    • Use dedicated recovery USB port

    3. Manufacturer Recovery Mode

    Some boards auto-enter recovery BIOS.


    Common Mistakes Users Make

    Using Wrong BIOS Version

    Even slightly wrong version can break compatibility.

    Updating During Unstable Power Conditions

    Biggest risk without UPS.

    Interrupting Update Process

    Never touch system during flashing.

    Ignoring Motherboard Instructions

    Each board has specific update rules.


    Real Engineering Insight

    BIOS update is not just a “software upgrade”—it is a firmware-level rewrite of your system’s hardware control logic.

    That’s why:

    • Stability matters more than speed
    • Environment matters more than convenience
    • Precision matters more than assumptions

    Final Thoughts: Risk Control is the Real Skill

    Learning How to update BIOS safely without a UPS is not about avoiding risk completely—it’s about minimizing failure probability through preparation and discipline.

    If you follow correct steps:

    • Stable environment
    • Correct BIOS file
    • No interruptions
    • Proper USB preparation

    Then even without UPS, success rate remains high.


    CTA: Upgrade Your System Safely with fixrig.xyz

    At fixrig.xyz, we don’t just explain BIOS updates—we engineer safe hardware workflows.

    Still unsure about your BIOS version or worried about flashing risk?

    Drop your motherboard model in the comments, and I’ll guide you step-by-step like a real hardware engineer.

    Because in firmware engineering… the smallest mistake can become the biggest failure.

  • Best Software for Stress Testing Your PC After a Repair (2026 Complete Stability Guide)

    Best Software for Stress Testing Your PC After a Repair (2026 Complete Stability Guide)

    Look, I’ve seen this situation a thousand times in the field—someone finishes a repair, boots the system, everything looks fine… and then two days later, random crashes start showing up.

    Here is the real talk about why your rig is acting up after a repair: most hardware issues don’t fail immediately—they fail under load.

    That’s exactly why stress testing exists.

    At fixrig.xyz, this guide will break down the best software for stress testing your PC after a repair, along with a real technician-level workflow used in 2026 hardware diagnostics.


    Why Stress Testing After Repair Is Absolutely Critical

    After any hardware repair—whether it’s:

    • CPU replacement
    • GPU reinstallation
    • RAM upgrade
    • Thermal paste reapplication
    • PSU swap

    …the system is technically “working,” but not necessarily “stable.”

    Stress testing validates:

    • Thermal stability
    • Power delivery consistency
    • Memory integrity
    • GPU load handling
    • CPU boost behavior

    Without it, you’re basically guessing.


    Common Symptoms That Require Stress Testing

    If you notice any of these after repair, stop and test immediately:

    1. Random System Freezes

    Often caused by unstable RAM or VRM issues.

    2. Sudden FPS Drops in Games

    Could indicate GPU thermal throttling or driver instability.

    3. Unexpected Restarts

    Usually PSU or voltage regulation problems.

    4. BSOD Errors

    Driver conflicts or memory instability.

    5. High Idle Temperatures

    Cooling or thermal paste application issues.


    Best Software for Stress Testing Your PC After Repair (2026 Edition)

    Here are the industry-standard tools used by technicians and engineers.


    1. AIDA64 Extreme (Full System Stress Test)

    AIDA64 Extreme

    This is a complete hardware diagnostic suite.

    What it tests:

    • CPU stability
    • GPU load
    • RAM performance
    • Sensor monitoring

    Why it’s powerful:

    It stresses multiple components simultaneously, simulating real-world workloads.


    2. Prime95 (CPU Stability King)

    Prime95

    A classic tool that still dominates CPU stress testing.

    What it does:

    • Maximum CPU load
    • FPU stress
    • Heat generation testing

    Tech insight:

    If your CPU survives Prime95 for 30–60 minutes without errors, it’s highly stable.


    3. FurMark (GPU Stress Testing)

    FurMark

    A brutal GPU stress tester used for thermal validation.

    Tests:

    • GPU core stability
    • Thermal performance
    • Power delivery spikes

    Warning:

    This tool pushes GPUs beyond normal gaming loads.


    4. MemTest86 (RAM Diagnostic Tool)

    MemTest86

    One of the most trusted memory testing tools in the industry.

    What it detects:

    • Faulty RAM sticks
    • Memory timing issues
    • Corrupt memory sectors

    Pro tip:

    Run at least 2–4 full passes for accurate results.


    5. OCCT (All-in-One Stress Testing Suite)

    OCCT

    A modern tool that combines CPU, GPU, PSU, and RAM testing.

    Features:

    • Real-time monitoring
    • Power supply stress mode
    • Error logging system

    Comparison Table: Stress Testing Tools

    ToolComponentStrengthDifficulty
    AIDA64Full systemAdvanced diagnosticsMedium
    Prime95CPUExtreme load testingMedium
    FurMarkGPUThermal stress testingEasy
    MemTest86RAMDeep memory testingMedium
    OCCTAll-in-oneBalanced testing suiteEasy

    Step-by-Step Stress Testing Guide After Repair

    Step 1: Baseline Monitoring First

    Before any stress test:

    • Install monitoring tools
    • Check idle temperatures
    • Verify BIOS settings

    Look, I’ve seen people skip this step and misdiagnose perfectly fine hardware.


    Step 2: Start with CPU Stress Test

    Run Prime95 or AIDA64 CPU test:

    • Duration: 30–60 minutes
    • Monitor temperature spikes
    • Watch for throttling

    If temperatures exceed safe limits, stop immediately.


    Step 3: Test GPU Stability

    Run FurMark:

    • Monitor GPU temperature
    • Watch fan curves
    • Check for artifacts

    If you see visual glitches, that’s a hardware warning.


    Step 4: Run Memory Diagnostics

    Use MemTest86:

    • Boot from USB
    • Run multiple passes
    • Look for red error lines

    Even a single error = unstable RAM.


    Step 5: Full System Stress Test

    Now combine everything using OCCT:

    • CPU + GPU load together
    • PSU stability test
    • Watch voltage fluctuations

    This simulates real gaming and rendering workloads.


    Step 6: Long-Term Stability Check

    After initial tests:

    • Use system normally for 24–48 hours
    • Play games
    • Run productivity tasks

    If no crashes occur, system is stable.


    Root Causes Found During Stress Testing

    1. Improper Thermal Paste Application

    Common after CPU or GPU reinstallation.

    2. Loose Power Connectors

    Even slightly loose GPU cables can cause instability.

    3. BIOS Misconfiguration

    Incorrect voltage or RAM settings.

    4. Driver Conflicts

    Especially after GPU or chipset changes.

    5. Weak PSU Performance

    Voltage drops under heavy load.


    Advanced Technician Tips (2026 Standards)

    1. Always Monitor Voltage Stability

    Tools like HWInfo help track real-time voltage drops.

    2. Watch Thermal Throttling Behavior

    If CPU drops frequency under load, cooling is insufficient.

    3. Don’t Ignore Small Errors

    Even a single crash during stress test = warning sign.


    Real Talk: Why Stress Testing Saves You Money

    Skipping stress testing is like repairing a car and never test-driving it.

    Without it:

    • Hidden hardware faults remain
    • System crashes appear later
    • Data loss risk increases

    With it:

    • Stable system confirmation
    • Predictable performance
    • Long-term reliability

    Final Thoughts

    The best software for stress testing your PC after a repair isn’t just one tool—it’s a combination of CPU, GPU, RAM, and full-system diagnostics.

    If you follow this workflow:

    • AIDA64 or OCCT for system
    • Prime95 for CPU
    • FurMark for GPU
    • MemTest86 for RAM

    …you essentially replicate a professional hardware validation lab.


    CTA: Join the fixrig.xyz Hardware Lab

    At fixrig.xyz, we break down real-world hardware diagnostics like this every day.

    If your PC is still unstable after repair, drop your specs in the comments—CPU, GPU, RAM, PSU—and I’ll help you diagnose it like a field engineer.

    Because in hardware troubleshooting… testing is not optional, it’s the final repair step.

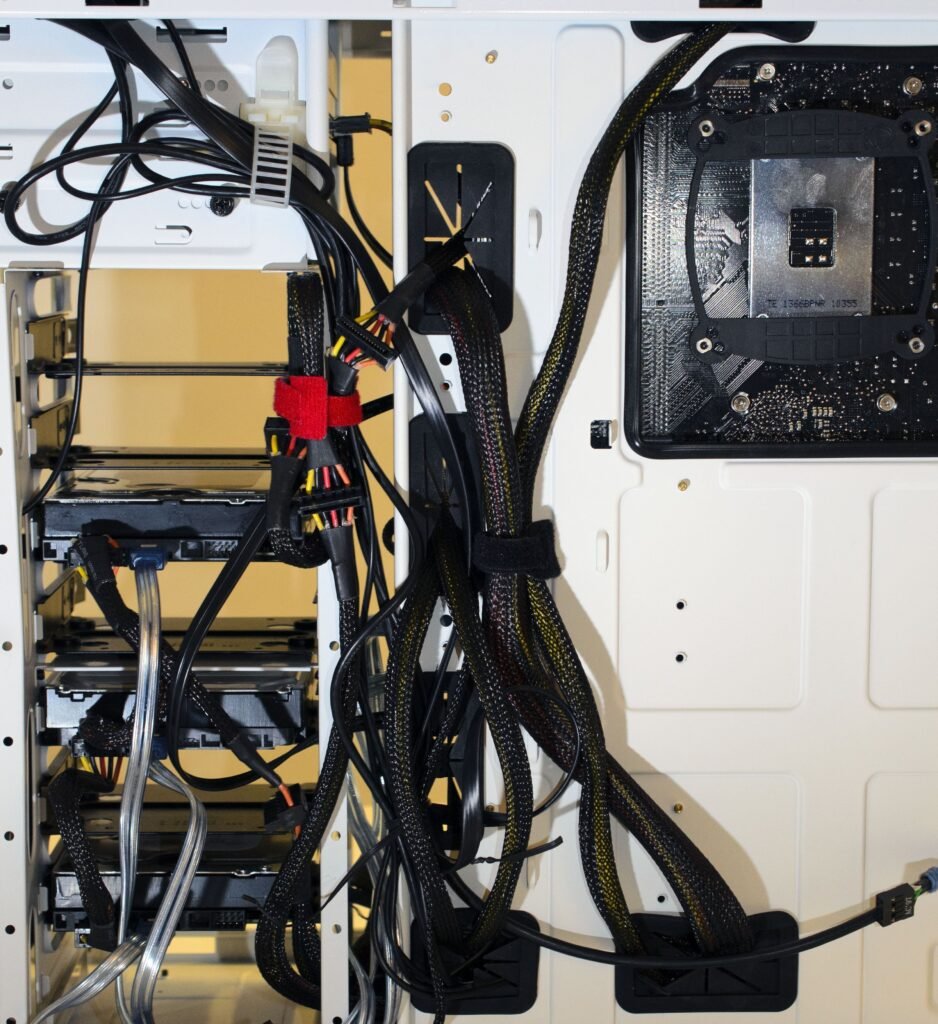
  • How to Manage Cables Inside a PC for Better Airflow (2026 Complete Guide)

    How to Manage Cables Inside a PC for Better Airflow (2026 Complete Guide)

    Look, I’ve seen this mistake in so many builds—it doesn’t matter how powerful your GPU is or how expensive your cooling system looks. If your cables are blocking airflow, your PC will still run hotter than it should.

    Here is the real talk about why your rig is acting up in thermals: bad cable management creates airflow turbulence, heat pockets, and inconsistent cooling pressure inside the case.

    At fixrig.xyz, we’re going to break down how to manage cables inside a PC for better airflow using real-world engineering logic—not just “make it look clean” advice.


    Why Cable Management Directly Affects Airflow

    Airflow inside a PC case works like a controlled tunnel system:

    • Front intake pulls cool air
    • Rear/top exhaust pushes hot air out
    • Fans create directional pressure flow

    When cables block this path:

    • Air loses direction
    • Heat gets trapped near GPU/CPU
    • Fans work harder (more noise + more wear)
    • Thermal throttling becomes more likely

    In modern 2026 hardware, even a 3–5°C temperature difference can impact boost clocks.


    Common Symptoms of Poor Cable Management

    1. High GPU Temperatures

    Cables blocking front-to-back airflow path.

    2. CPU Thermal Spikes

    Airflow turbulence near cooler intake zone.

    3. Loud Fan Noise

    Fans overcompensating for poor airflow efficiency.

    4. Dust Accumulation Hotspots

    Stagnant airflow zones attract more dust.

    5. Inconsistent Performance

    Thermal throttling under gaming or rendering loads.


    Core Principles of Cable Management for Airflow

    Before touching cables, understand this:

    Principle 1: Airflow Must Be Linear

    Air should move in a straight front-to-back or bottom-to-top direction.

    Principle 2: Obstruction-Free Zones Matter More Than Clean Looks

    Clean aesthetics are secondary—air paths are priority.

    Principle 3: Pressure Balance Is Critical

    Positive vs negative pressure affects dust and cooling efficiency.


    Tools You Need for Proper Cable Management

    Here’s a professional-level toolkit:

    Basic Tools

    • Zip ties
    • Velcro straps
    • Cable combs

    Advanced Tools

    • Modular PSU cables
    • Extension sleeved cables
    • Cable routing clips

    Optional Pro Tools

    • Thermal sensor software
    • Case airflow diagram reference
    • Magnetic cable organizers

    Step-by-Step Guide: How to Manage Cables Inside a PC for Better Airflow

    Step 1: Disconnect and Plan Layout First

    Don’t rush.

    Look, I’ve seen people unplug everything and randomly start stuffing cables back—this is where mistakes happen.

    Instead:

    • Remove both side panels
    • Identify airflow direction
    • Mark cable routing paths

    Think like an airflow engineer, not just a builder.


    Step 2: Separate Cables by Priority

    Divide cables into groups:

    • Power cables (24-pin, CPU EPS, GPU power)
    • Data cables (SATA, NVMe connectors if visible)
    • Fan/RGB cables

    High-power cables should NEVER cross airflow paths.


    Step 3: Route Cables Behind the Motherboard Tray

    Modern cases in 2026 are designed with cable channels.

    Do this:

    • Push excess cable length behind tray
    • Use built-in routing holes
    • Avoid sharp bends on PSU cables

    A messy back panel is fine—front airflow must stay clean.


    Step 4: Secure Cables Using Tie Points

    Use:

    • Velcro straps for reusable setup
    • Zip ties for permanent builds

    Anchor cables to:

    • Case frame edges
    • PSU shroud
    • Drive cage mounts

    This prevents vibration and movement during operation.


    Step 5: Clear Front Intake Area Completely

    This is critical.

    Front intake should be:

    • 100% unobstructed
    • No hanging SATA or fan cables
    • No PSU cable loops near intake fans

    Even a single cable crossing airflow path reduces efficiency.


    Step 6: Optimize GPU Cable Routing

    GPU cables are often the biggest airflow blockers.

    Fix it by:

    • Routing GPU power cables from bottom side
    • Creating smooth curves instead of sharp bends
    • Avoiding fan-facing cable exposure

    A clean GPU zone improves both thermals and aesthetics.


    Step 7: Manage Fan and RGB Cables Smartly

    Fan cables should:

    • Follow case edges
    • Be grouped using splitters if needed
    • Avoid hanging in center airflow column

    RGB cables should never be left loose inside main chamber.


    Step 8: Final Airflow Test

    After management:

    • Power on system
    • Check fan behavior
    • Monitor temperatures under load

    If airflow is correct:

    • GPU temps drop
    • CPU boost stabilizes
    • Fans run quieter

    Comparison Table: Poor vs Optimized Cable Management

    FactorPoor Cable ManagementOptimized Cable Management
    AirflowBlocked & turbulentSmooth & directional
    TemperaturesHigherLower & stable
    NoiseLoud fansQuiet operation
    Dust buildupHighReduced
    PerformanceInconsistentStable

    Advanced Cable Management Techniques (Pro-Level)

    1. PSU Cable Modularity Advantage

    Use modular PSUs to remove unused cables completely.


    2. Custom-Length Cables

    Reduces excess slack inside case.


    3. Vertical GPU Mounting Consideration

    Requires special routing but improves internal airflow visibility.


    4. Negative Cable Pressure Strategy

    Keep more empty space in front intake zone.


    Common Mistakes Beginners Make

    Ignoring Airflow Path Priority

    They focus on looks instead of function.

    Over-Tightening Zip Ties

    Can damage cable insulation over time.

    Blocking Intake Fans Accidentally

    Loose cables near front panel.

    Leaving PSU Cables Unused Inside Case

    These should always be removed if modular PSU is used.


    Real Engineering Insight

    Cable management is not just “clean building”—it is fluid dynamics control inside a constrained airflow chamber.

    Every cable:

    • Disrupts laminar airflow
    • Creates micro turbulence zones
    • Impacts thermal efficiency

    That’s why professional system builders treat cable routing like airflow engineering, not decoration.


    Final Thoughts

    Mastering how to manage cables inside a PC for better airflow is one of the highest ROI upgrades you can do without spending money.

    You’re not just cleaning cables—you’re improving:

    • Cooling efficiency
    • System stability
    • Hardware lifespan
    • Noise levels

    A clean airflow path is basically a free performance boost.


    CTA: Optimize Your Build with fixrig.xyz

    At fixrig.xyz, we don’t just build PCs—we engineer airflow and stability.

    If you want, drop your PC case model and GPU setup in the comments, and I’ll suggest a custom airflow + cable routing plan for your exact build.

    Because in real hardware engineering… airflow is performance.

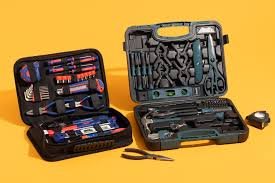
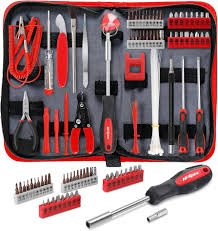
  • Best Tools for a DIY Home Computer Repair Kit (2026 Complete Guide)

    Best Tools for a DIY Home Computer Repair Kit (2026 Complete Guide)

    Look, I’ve seen this mistake a thousand times—people think a “DIY PC repair kit” is just a screwdriver and maybe some thermal paste.

    Here is the real talk about why your rig is acting up when repairs go wrong: most PC damage happens not from the fault itself, but from using the wrong tools or poor handling techniques.

    In this fixrig.xyz expert guide, we’ll break down the Best tools for a DIY home computer repair kit, built with modern 2026 hardware standards so you can safely repair, upgrade, and troubleshoot PCs like a real technician.


    Why You Need a Proper DIY Computer Repair Kit

    Modern PCs are no longer simple machines. They include:

    • High-density motherboards
    • Precision GPU assemblies
    • NVMe SSDs with fragile connectors
    • Sensitive BIOS and firmware systems
    • Static-sensitive RAM and circuits

    Using random tools = risk of permanent damage.


    Essential Categories of a DIY PC Repair Kit

    1. Basic Hand Tools (Mechanical Work)

    Used for assembly and disassembly.

    2. ESD Protection Tools (Safety Layer)

    Prevents static damage.

    3. Diagnostic Tools (Hardware Testing)

    Used for troubleshooting.

    4. Thermal Management Tools

    For cooling and paste application.

    5. Advanced Diagnostic Equipment

    For deep-level hardware analysis.


    Tools Checklist: Best Tools for a DIY Home Computer Repair Kit

    Here’s a complete professional-grade checklist:

    Basic Tools

    • Precision screwdriver set (magnetic tips)
    • Plastic pry tools
    • Tweezers (anti-static)
    • Cable ties

    Safety Tools

    • Anti-static wrist strap
    • ESD mat
    • Insulated gloves (optional)

    Cleaning Tools

    • Compressed air blower
    • Soft anti-static brush
    • Microfiber cloth

    Thermal Tools

    • High-quality thermal paste
    • Thermal paste applicator
    • Isopropyl alcohol (90%+)

    Diagnostic Tools

    • USB bootable drive
    • Multimeter
    • External storage device

    Comparison Table: Budget vs Professional Repair Kit

    Kit TypeCostTools IncludedSuitability
    Basic KitLowScrewdrivers, brushHome users
    Intermediate KitMediumESD tools + cleaning toolsEnthusiasts
    Professional KitHighFull diagnostic + thermal toolsTechnicians

    Step-by-Step: Building Your DIY Computer Repair Kit

    Step 1: Start with Precision Screwdrivers

    This is your foundation tool.

    You’ll need:

    • Phillips heads
    • Torx bits
    • Flat heads

    Look, I’ve seen this error a thousand times—people use household screwdrivers and strip motherboard screws.

    Don’t do that.


    Step 2: Add ESD Protection (Critical Safety Layer)

    Static electricity can silently kill components.

    Add:

    • Anti-static wrist strap
    • ESD mat for workspace

    This protects:

    • RAM
    • GPU
    • Motherboard circuits

    Step 3: Include Plastic Pry Tools

    Never use metal tools for:

    • Laptop opening
    • Case separation
    • Connector removal

    Plastic tools prevent scratches and circuit damage.


    Step 4: Install Cleaning Equipment

    Dust is a silent performance killer.

    Include:

    • Compressed air blower
    • Soft brush
    • Microfiber cloth

    Use for:

    • GPU cleaning
    • CPU heatsink dust removal
    • PSU intake cleaning

    Step 5: Add Thermal Maintenance Kit

    Thermal performance = system stability.

    Include:

    • High-grade thermal paste
    • Alcohol wipes (90%+)
    • Applicator tool

    Overheating causes:

    • Thermal throttling
    • BSOD
    • Random shutdowns

    Step 6: Add Diagnostic Tools

    This is where real technicians separate from beginners.

    Include:

    • Multimeter (voltage testing)
    • USB boot tools (Windows/Linux recovery)
    • External SSD/HDD

    Use cases:

    • PSU voltage checks
    • Boot failure diagnosis
    • Data recovery

    Step 7: Organize Your Toolkit Properly

    Use:

    • Tool organizer box
    • Magnetic trays
    • Labelled compartments

    Messy tools = lost screws = hardware damage risk.


    Advanced Tools for 2026-Level Repairs

    1. USB POST Diagnostic Cards

    Used for motherboard boot diagnostics.


    2. Thermal Camera (Optional but Powerful)

    Detects:

    • overheating VRMs
    • GPU hotspots

    3. BIOS Flash Drive

    Used for:

    • firmware recovery
    • motherboard updates

    4. External GPU/SSD Enclosures

    Used for:

    • data recovery
    • hardware isolation testing

    Common Mistakes in DIY Repair Kits

    Buying Cheap Screwdriver Sets

    They strip screws easily.

    Ignoring ESD Protection

    One static shock = dead motherboard.

    Using Too Much Thermal Paste

    More is not better—it reduces efficiency.

    Not Organizing Tools

    Leads to accidental damage and lost parts.


    Pro Tips from a Hardware Engineer

    • Always work in a clean, dry environment
    • Never force components into slots
    • Label screws during disassembly
    • Keep BIOS tools ready for emergencies

    And here’s something most guides won’t tell you:
    A good technician is not defined by repair skills—but by how safely they avoid causing new damage during repair.


    When to Upgrade Your Toolkit

    Upgrade if:

    • You start repairing multiple PCs
    • You deal with laptops frequently
    • You handle GPU/CPU replacements
    • You perform BIOS-level troubleshooting

    At that stage, basic kits are no longer enough.


    Final Thoughts: Tools Define Your Repair Quality

    The Best tools for a DIY home computer repair kit are not just accessories—they are your safety system, precision system, and diagnostic system combined.

    If you invest in the right tools:

    • Repairs become safer
    • Diagnostics become accurate
    • Hardware lifespan increases

    CTA: Build Your Pro Repair Setup with fixrig.xyz

    At fixrig.xyz, we don’t just fix PCs—we engineer reliable systems.

    Want help choosing your first repair kit or upgrading to pro-level tools?

    Drop your setup or budget in the comments, and I’ll design a custom toolkit for you.

    Because in real hardware repair… the right tool is the difference between fixing a system and destroying it.

  • How to identify hardware bottlenecks in your gaming rig and fix performance issues (2026 Expert Guide)

    How to identify hardware bottlenecks in your gaming rig and fix performance issues (2026 Expert Guide)

    o identify hardware bottlene

    H

    If your gaming rig feels like it’s “holding back” even after upgrading parts, you’re probably dealing with a hardware bottleneck.

    And look, I’ve seen this situation a thousand times in custom gaming PCs—RTX GPUs paired with weak CPUs, fast CPUs stuck behind slow storage, or RAM holding back everything else. The frustrating part? Most users don’t even realize where the actual limit is.

    Here’s the real talk about why your rig is acting up: a bottleneck isn’t always obvious, but once you learn how to identify hardware bottlenecks in your gaming rig, you can instantly unlock hidden performance.

    Let’s break it down like a senior IT hardware engineer in 2026 would—clear, practical, and no nonsense.


    What is a Hardware Bottleneck?

    A hardware bottleneck happens when one component in your system limits the performance of the others.

    Think of it like a water pipe system:

    • GPU = water pump
    • CPU = controller
    • RAM = buffer tank
    • Storage = water source

    If one part is weak, the whole system slows down.


    Common Symptoms of Hardware Bottlenecks

    Before jumping into tools, recognize the signs:

    Performance Symptoms

    • FPS stuck at low levels even with a powerful GPU
    • Sudden frame drops in heavy scenes
    • CPU usage at 100% while GPU is underused
    • GPU usage stuck below 70–80%

    System Behavior

    • Game stuttering despite high FPS average
    • Long loading times
    • Background apps causing lag spikes
    • Thermal throttling during gaming

    Advanced 2026 Symptoms

    • AI-based game engines lagging in open-world titles
    • VRAM overflow in high-resolution textures
    • Dynamic resolution scaling constantly triggering

    Types of Hardware Bottlenecks

    Understanding the type is key before fixing anything.

    1. CPU Bottleneck

    Your processor can’t process game logic fast enough.

    Signs:

    • CPU usage 90–100%
    • GPU underutilized
    • Low FPS in CPU-heavy games (strategy, simulation)

    2. GPU Bottleneck

    Your graphics card is the limiting factor.

    Signs:

    • GPU usage 95–100%
    • CPU sitting idle
    • FPS improves when lowering resolution

    3. RAM Bottleneck

    Insufficient memory or slow RAM causes system delays.

    Signs:

    • High memory usage
    • Stuttering during multitasking
    • Games freezing during asset loading

    4. Storage Bottleneck

    Slow HDD or saturated SSD slows down asset streaming.

    Signs:

    • Long loading screens
    • Texture pop-ins
    • Delayed map loading in open-world games

    5. Thermal Bottleneck

    Overheating causes automatic performance reduction.

    Signs:

    • FPS drops after 10–20 minutes
    • Fans running at full speed
    • CPU/GPU throttling

    Tools You Need to Identify Bottlenecks

    Here’s a practical checklist:

    Monitoring Tools

    • MSI Afterburner
    • HWInfo64
    • Task Manager (basic but useful)
    • Windows Game Bar (2026 updated version)

    Benchmark Tools

    • Cinebench (CPU)
    • 3DMark (GPU)
    • CrystalDiskMark (Storage)

    Optional Advanced Tools

    • AI-based performance analyzers (used in modern rigs)
    • BIOS-level hardware monitoring dashboards

    Step-by-Step Guide: How to identify hardware bottlenecks in your gaming rig

    Now let’s diagnose it properly.

    Step 1: Monitor CPU and GPU Usage in Game

    Open MSI Afterburner and run your game.

    Check:

    • If CPU = 100% and GPU = low → CPU bottleneck
    • If GPU = 100% and CPU = low → GPU bottleneck

    Simple but powerful.


    Step 2: Check RAM Usage

    While gaming:

    • If RAM usage is above 85–90%, your system is struggling
    • Background apps may be eating memory

    💡 Tech Mentor Tip: I once saw a “weak GPU issue” that was actually Chrome eating 12GB RAM in the background. No joke.


    Step 3: Monitor Temperatures

    Check:

    • CPU temps above 90°C = thermal bottleneck
    • GPU temps above 85°C = throttling risk

    Thermal throttling silently kills performance.


    Step 4: Test Storage Speed

    Run CrystalDiskMark:

    • HDD = potential bottleneck
    • Slow SSD = loading delays

    Modern 2026 games rely heavily on fast NVMe storage.


    Step 5: Isolate Components

    Try:

    • Lower resolution (tests GPU load)
    • Lower graphics settings (tests CPU load)
    • Close background apps (tests RAM load)

    This helps you isolate the weak link.


    CPU vs GPU Bottleneck Comparison Table

    ScenarioCPU BottleneckGPU Bottleneck
    Low resolution FPSLowHigh
    High resolution FPSNormalDrops
    CPU usage100%50–70%
    GPU usage50–70%100%
    FixUpgrade CPUUpgrade GPU

    Common Bottleneck Mistakes (2026 Users Still Make)

    • Pairing high-end GPU with old CPU
    • Using single-channel RAM (huge mistake)
    • Ignoring BIOS updates
    • Running background apps during gaming
    • Not checking thermal paste condition

    Look, I’ve seen rigs with RTX cards performing like budget GPUs just because of poor balancing.


    Fixing Hardware Bottlenecks

    CPU Bottleneck Fixes

    • Upgrade CPU
    • Optimize game settings (reduce draw distance, physics)
    • Enable performance mode in BIOS

    GPU Bottleneck Fixes

    • Lower resolution scaling
    • Upgrade GPU
    • Update drivers properly (clean install)

    RAM Bottleneck Fixes

    • Upgrade to dual-channel setup
    • Increase RAM capacity (16GB → 32GB recommended in 2026)
    • Close background proccess-heavy apps

    Storage Bottleneck Fixes

    • Upgrade to NVMe SSD
    • Free up storage space
    • Avoid HDD for modern gaming

    Thermal Fixes

    • Clean dust from fans
    • Replace thermal paste
    • Improve airflow in case

    Real-World Tech Mentor Insight

    Here is the real truth most people miss: bottlenecks are not always about weak hardware—they are about imbalance.

    A 2026 gaming rig is a system, not individual parts. If one component is slightly off, the whole experience feels broken.

    And yes, sometimes your system is not broken at all—it’s just misconfigured. I’ve seen users spend thousands upgrading the wrong component when the actual issue was BIOS settings or thermal throttling.

    Also, small reminder from real-world repair experience: people often write “motherbord” instead of motherboard when frustrated during troubleshooting 😄


    Final Optimization Tips for Gaming Rigs (2026 Standard)

    • Balance CPU and GPU tiers properly
    • Use NVMe Gen4/Gen5 SSDs
    • Keep BIOS updated
    • Avoid unnecessary background apps
    • Monitor temps regularly
    • Use performance mode profiles in Windows

    Final CTA: Fix your bottlenecks like a pro

    If your gaming rig feels slow, inconsistent, or unbalanced, don’t guess—diagnose it properly.

    Now you know exactly how to identify hardware bottlenecks in your gaming rig using real engineering methods, not random fixes.

    For more deep troubleshooting guides, optimization tutorials, and DIY repair solutions, visit fixrig.xyz—the ultimate hub for gamers, builders, and hardware enthusiasts.

    Got a confusing performance issue? Drop your specs and problem in the comments or ask the fixrig.xyz community. Someone has already solved your exact bottleneck before—you just need the right eyes on it.

    Because in modern PC gaming, performance isn’t just power… it’s balance.

  • How to troubleshoot RAM issues using beep codes: Complete 2026 Fix Guide for PC & Laptop Users

    How to troubleshoot RAM issues using beep codes: Complete 2026 Fix Guide for PC & Laptop Users

    H1: How to troubleshoot RAM issues using beep codes and fix memory errors like a pro

    When your PC refuses to boot and instead starts making those annoying beep sounds, it’s not random noise—it’s your motherboard trying to talk to you.

    And look, I’ve seen this situation a thousand times in gaming rigs, office PCs, and even high-end workstation builds. Most users panic and assume the system is dead. But in reality, those beep codes are one of the most useful diagnostic tools you have.

    If you understand how to troubleshoot RAM issues using beep codes, you can save yourself from unnecessary repairs, data loss, and expensive replacements.

    Let’s break it down like a senior IT hardware engineer would—simple, real, and based on modern 2026 troubleshooting standards.


    What Are Beep Codes in RAM Troubleshooting?

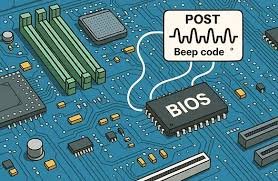
    Beep codes are audio signals produced by your motherboard during POST (Power-On Self Test). When your system detects a hardware issue—especially with RAM—it uses a specific beep pattern to report the error.

    Instead of showing a display error, the system says:
    “Hey, something is wrong with memory initialization.”

    Different BIOS manufacturers (AMI, Award, Phoenix, UEFI-based systems) use different beep patterns.


    Common RAM-Related Beep Code Symptoms

    Before jumping into fixes, identify the signs:

    Typical Symptoms

    • Continuous long beeps on startup
    • 1 long + 2 short beeps (common RAM error pattern)
    • No display but system powers on
    • System restarts repeatedly before BIOS screen
    • Fans spin but no boot signal

    Advanced Symptoms (2026 systems)

    • RGB lights on RAM but no POST
    • Debug LED stuck on “DRAM”
    • Intermittent boot failure (works sometimes, fails sometimes)

    Look, if your system is doing any of these, RAM or memory channel is your first suspect.


    Why RAM Errors Trigger Beep Codes (Root Causes)

    Let’s go deeper into the actual technical reasons.

    1. Improper RAM Seating

    Even a slightly loose DIMM can break memory initialization.

    2. Dirty or Oxidized Contacts

    Dust or oxidation on RAM pins disrupts signal transmission.

    3. BIOS Incompatibility

    New DDR5/DDR5X modules sometimes need BIOS updates.

    4. Faulty RAM Stick

    One bad module can stop the entire system from booting.

    5. Motherboard Slot Failure

    Yes, sometimes it’s not RAM—it’s the slot or memory channel.

    6. Voltage Instability

    Incorrect XMP/EXPO profiles can cause memory training failure.


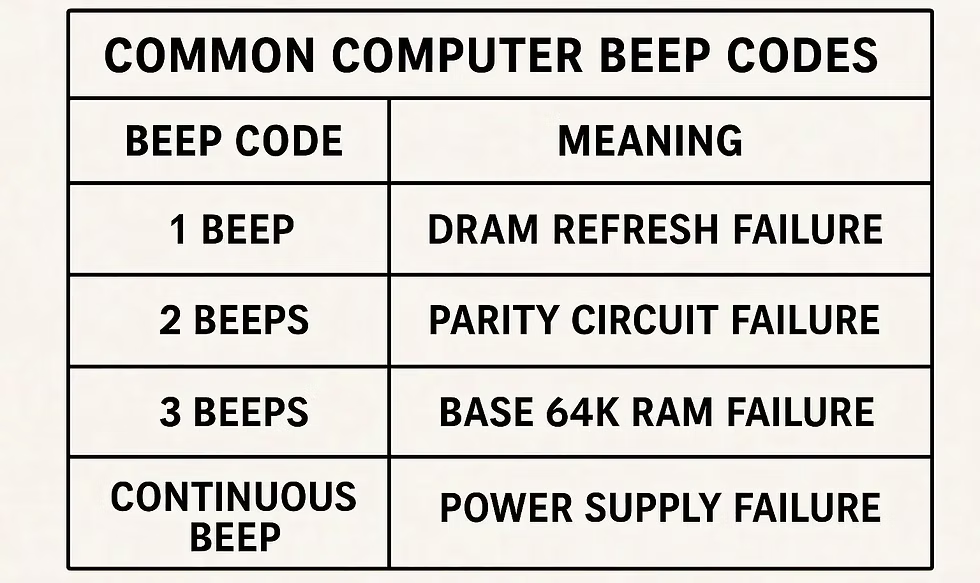
    RAM Beep Code Reference Table (General 2026 Guide)

    Beep PatternMeaningLikely Issue
    1 long, 2 shortRAM errorFaulty or unseated RAM
    Continuous short beepsPower/RAM issueVoltage or seating problem
    3 long beepsBase memory failureRAM not detected
    No beep, no displaySevere hardware issueRAM or motherboard fault
    Repeating long beepsMemory training failureBIOS or RAM incompatibility

    Note: Exact patterns vary by motherboard manufacturer, so always check BIOS type.


    Tools You Need for RAM Troubleshooting

    Before opening your system, gather these:

    • Compressed air or blower
    • Isopropyl alcohol (for cleaning contacts)
    • Soft brush
    • Screwdriver kit
    • Known-good RAM stick (for testing)
    • CMOS reset jumper or screwdriver
    • Anti-static wrist strap (recommended but often ignored 😅)

    Step-by-Step Guide: How to troubleshoot RAM issues using beep codes

    Now let’s fix the problem systematically.

    Step 1: Identify Beep Pattern Carefully

    Restart the system and listen closely.

    Don’t rush this step. Even a small difference in beep timing can change diagnosis.


    Step 2: Power Off and Disconnect System

    Turn off PSU switch and unplug the system completely.

    Wait at least 30–60 seconds before touching internal components.


    Step 3: Reseat RAM Modules

    Remove RAM sticks and reinstall them firmly until you hear a click.

    💡 Tech Mentor Tip: I once fixed a “dead motherboard” issue just by reseating RAM. No joke, it was just slightly loose.


    Step 4: Test One RAM Stick at a Time

    If you have multiple sticks:

    • Boot with one stick only
    • Try different slots
    • Identify faulty module or slot

    This is the most important isolation method.


    Step 5: Clear CMOS / Reset BIOS

    If RAM still fails:

    • Reset BIOS settings
    • Remove CMOS battery for 5 minutes
    • Or use motherboard reset jumper

    This clears unstable memory training settings.


    Step 6: Disable XMP / EXPO Profiles

    Modern RAM runs at high frequencies, but unstable profiles cause boot failure.

    • Enter BIOS
    • Disable XMP/EXPO
    • Boot with default speed

    If system works, instability was the issue.


    Step 7: Check for BIOS Update

    Older BIOS versions often fail with new DDR5 modules.

    Update motherboard firmware carefully (don’t interrupt power or you’ll regret it 😬).


    Step 8: Test on Another System (If Possible)

    If RAM still fails:

    • Test in another PC
    • Or use memory diagnostic tools

    If it fails everywhere → RAM is likely dead.


    Software vs Hardware Fix Comparison

    Fix TypeWhen to UseSuccess Rate
    BIOS resetRandom boot failuresHigh
    Reseat RAMBeep codes + no displayVery High
    Single-stick testIntermittent issuesHigh
    XMP disableBoot loopsMedium-High
    RAM replacementConfirmed failureFinal solution

    Real Talk: When RAM Is Actually Dead

    Here’s the honest truth most people don’t want to hear.

    Your RAM is likely failing if:

    • It fails in multiple systems
    • Beep codes persist after all fixes
    • BIOS cannot detect any module
    • System only boots with random sticks sometimes

    At that point, no software tweak will save it.


    Preventing RAM Issues in Future Builds

    If you want a stable system in 2026:

    • Always check motherboard QVL list
    • Avoid mixing different RAM brands
    • Keep BIOS updated
    • Don’t push unstable overclocks
    • Use quality PSU (yes, it affects RAM too)
    • Clean system every few months

    Small mistakes = big instability later.


    Tech Mentor Insight

    Here is the real talk about why your rig is acting up: most RAM failures are not sudden—they are gradual. Systems usually “warn you” through beep codes before complete failure.

    But users ignore those signals.

    And then they blame the motherboard or CPU.

    When in reality, your system was telling you the problem all along.

    Also, small typo warning from real-world experience—people often misread “motherboard” as “motherbord” in panic situations, so yeah, don’t rush troubleshooting 😄


    Final Thoughts & CTA

    If you’re dealing with RAM beep codes, don’t panic and don’t start replacing parts randomly. Follow a structured approach and isolate the issue step by step.

    For more deep hardware troubleshooting guides, DIY repair walkthroughs, and real-world PC fixes, visit fixrig.xyz—your go-to hub for hardware enthusiasts and system builders.

    Got a stubborn RAM issue that won’t go away? Drop your problem in the comments or reach out to the fixrig.xyz community. Someone has definitely seen that exact beep pattern before and already solved it.

    Because in modern PC repair, knowledge isn’t optional anymore—it’s the difference between a quick fix and a costly mistake.

  • Troubleshooting GPU Artifacting: Is Your Card Dying? (2026 Expert Fix Guide)

    Troubleshooting GPU Artifacting: Is Your Card Dying? (2026 Expert Fix Guide)

    H1: Troubleshooting GPU Artifacting: Is Your Card Dying or Just Misbehaving?

    If your screen suddenly starts showing weird colored squares, flickering textures, random glitches, or “digital snow,” then congrats—you’ve just met GPU artifacting. And look, I’ve seen this error a thousand times in gaming rigs, editing stations, and even high-end AI workstations. Sometimes it’s nothing serious. Other times… yeah, your GPU might be on life support.

    Here’s the real talk: not every artifact means your card is dead. But ignoring it? That’s how people turn a fixable issue into a full GPU replacement.

    Let’s break it down like a senior hardware engineer would—simple, practical, and based on real-world 2026 troubleshooting standards.


    What is GPU Artifacting (In Simple Terms)?

    GPU artifacting is visual corruption caused when your graphics card starts producing incorrect image data.

    Instead of clean frames, you get:

    • Random colored pixels
    • Checkerboard patterns
    • Flickering textures
    • Screen tearing that looks “broken”
    • Weird geometric glitches in games or UI

    In modern systems (RTX 40/50 series, RX 7000+ and newer), artifacting is often tied to VRAM instability, overheating, or driver-level conflicts.


    Common Symptoms of GPU Artifacting

    If you’re unsure whether your GPU is failing, check for these signs:

    Visual Symptoms

    • Pink/green squares in games
    • Texture flashing or disappearing
    • UI elements glitching in Windows
    • Black screen flashes during load

    Performance Symptoms

    • Sudden FPS drops
    • System freezes under load
    • Crashes when launching games

    Hardware Behavior

    • GPU fans ramping up aggressively
    • High temperatures even at idle
    • Coil whine increasing over time

    Root Causes of GPU Artifacting (2026 Breakdown)

    Let’s go deeper than just “your GPU is bad.”

    1. VRAM Degradation

    Modern GPUs rely heavily on GDDR6X / GDDR7 memory. If VRAM starts failing, artifacting is usually the first sign.

    2. Thermal Throttling

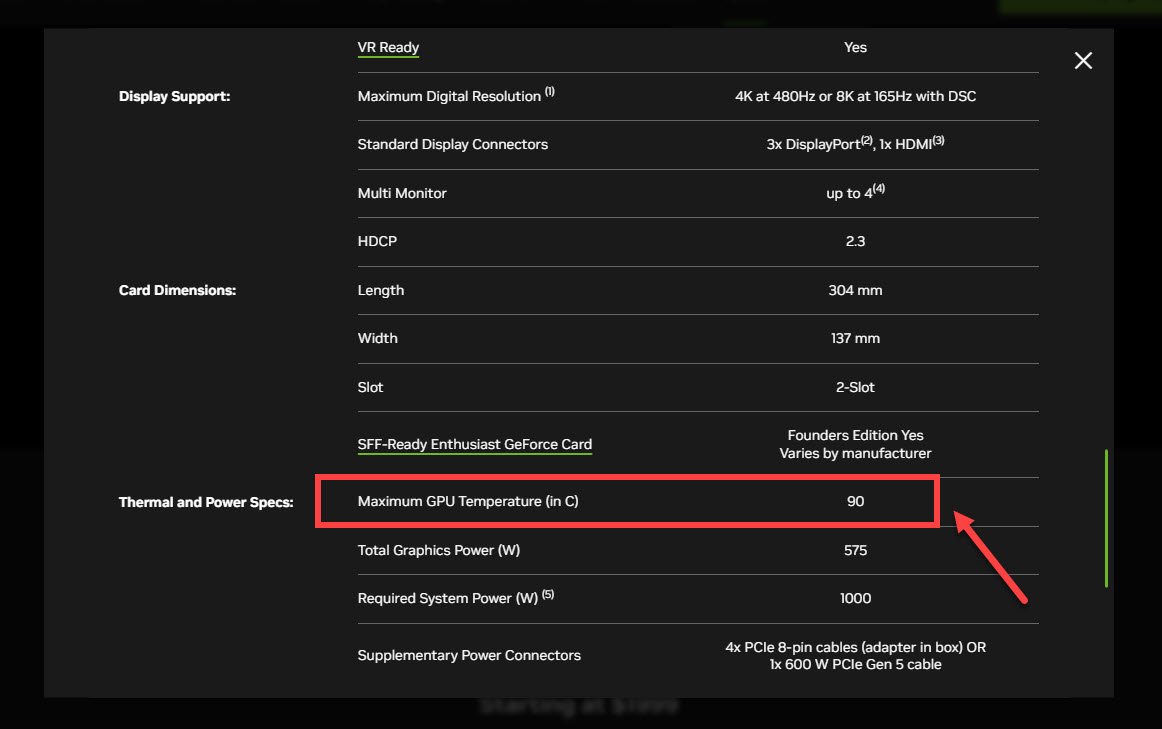
    When temps exceed safe limits (~85–95°C depending on model), the GPU starts miscalculating frames.

    3. Driver Corruption

    Bad or outdated drivers can easily cause artifact-like symptoms, especially after Windows updates.

    4. Overclock Instability

    Even factory OC cards can become unstable over time due to silicon aging.

    5. Power Supply Issues

    Undervoltage or unstable PSU rails can corrupt GPU output signals.

    6. Physical Damage or Dust

    Dust buildup or poor airflow = overheating = artifacts. Simple but deadly.


    Quick Diagnosis Table: Software vs Hardware Issue

    SymptomLikely CauseFix Type
    Artifacts only in gamesDriver/overclockSoftware fix
    Artifacts on boot screenHardware failureHardware repair
    Crashes under loadPSU/GPU heatMixed fix
    Normal desktop, glitches in 3D appsVRAM stressHardware/VRAM issue
    Random flicker + black screenPower instabilityPSU check

    Step-by-Step GPU Artifact Troubleshooting Guide

    Let’s fix this like professionals at fixrig.xyz would.

    Step 1: Check Temperatures First

    Download any hardware monitor tool and check:

    • Idle GPU temp
    • Load GPU temp

    If you’re hitting 85°C+ constantly, that’s your first red flag.

    💡 Tech Mentor Tip: I once saw a “dead GPU” turn out to be just clogged with 3 years of dust. No joke.


    Step 2: Reset GPU Overclock

    If you’ve overclocked your card:

    • Reset to stock settings
    • Disable any boost utilities

    Even factory OC cards can become unstable over time (silicon aging is real).


    Step 3: Clean Driver Reinstall (VERY IMPORTANT)

    Do NOT just update drivers. Do a clean install:

    • Use DDU (Display Driver Uninstaller)
    • Reinstall latest stable driver
    • Avoid beta drivers unless testing

    Step 4: Test VRAM Stability

    Run a VRAM stress test or benchmark tool.

    If errors appear quickly:

    • Likely VRAM degradation
    • Possible permanent hardware issue

    Step 5: Check PSU Stability

    Low-quality or aging PSUs cause unstable GPU behavior.

    Check:

    • Wattage sufficiency
    • Voltage stability
    • Cable seating (very common issue)

    Step 6: Physical Inspection

    Open your rig and check:

    • Dust on heatsink
    • Fan health
    • Loose GPU seating
    • Thermal paste condition

    Yes, dried thermal paste still kills GPUs in 2026.


    Software Fix vs Hardware Replacement

    OptionWhen to UseSuccess Rate
    Driver reinstallRandom glitches, new issuesHigh
    Reset overclockAfter tuning instabilityHigh
    Thermal cleaningHigh temps + artifactsMedium-High
    PSU replacementRandom crashes + artifactsMedium
    GPU replacementVRAM failure, boot artifactsFinal solution

    When Your GPU Is Actually Dying

    Here’s the uncomfortable truth.

    Your GPU is likely failing if:

    • Artifacts appear even in BIOS
    • VRAM test fails repeatedly
    • System crashes under minimal load
    • Visual corruption happens immediately at startup

    At this stage, no software fix will save it.

    Look, I’ve seen rigs go from “small flicker” to full dead screen in just a few weeks. Don’t delay if symptoms are getting worse.


    Preventing GPU Artifacting in Future Builds

    If you want your next GPU to last longer:

    • Keep temps below 80°C under load
    • Use a high-quality PSU (don’t cheap out)
    • Clean dust every 2–3 months
    • Avoid aggressive overclocking
    • Maintain good airflow in case

    Small habits = long GPU life.


    Real Talk from a Tech Mentor

    Here is the truth most people ignore: GPU artifacting doesn’t always mean instant failure. But it always means something is wrong—either heat, power, or memory stress.

    And yes, sometimes it is the beginning of the end for your card.

    But more often than not? It’s fixable if you act early.

    Don’t ignore the warning signs, because your system usually gives you multiple chances before it completely gives up.


    Final CTA: Fix It Before It Gets Worse

    If your GPU is showing any of these symptoms, don’t wait for a full crash.

    Head over to fixrig.xyz for more deep troubleshooting guides, DIY repair walkthroughs, and real-world hardware fixes made for gamers, creators, and tech enthusiasts.

    Got a weird GPU issue that doesn’t make sense? Drop your problem in the comments or reach out to the fixrig.xyz community—someone has probably seen it before and already solved it.

    Because in 2026, smart troubleshooting isn’t optional anymore… it’s survival for your rig.