Look, I’ve seen this mistake a thousand times—people think a “DIY PC repair kit” is just a screwdriver and maybe some thermal paste.
Here is the real talk about why your rig is acting up when repairs go wrong: most PC damage happens not from the fault itself, but from using the wrong tools or poor handling techniques.
In this fixrig.xyz expert guide, we’ll break down the Best tools for a DIY home computer repair kit, built with modern 2026 hardware standards so you can safely repair, upgrade, and troubleshoot PCs like a real technician.
Why You Need a Proper DIY Computer Repair Kit
Modern PCs are no longer simple machines. They include:
- High-density motherboards
- Precision GPU assemblies
- NVMe SSDs with fragile connectors
- Sensitive BIOS and firmware systems
- Static-sensitive RAM and circuits
Using random tools = risk of permanent damage.

Essential Categories of a DIY PC Repair Kit
1. Basic Hand Tools (Mechanical Work)
Used for assembly and disassembly.
2. ESD Protection Tools (Safety Layer)
Prevents static damage.
3. Diagnostic Tools (Hardware Testing)
Used for troubleshooting.
4. Thermal Management Tools
For cooling and paste application.
5. Advanced Diagnostic Equipment
For deep-level hardware analysis.
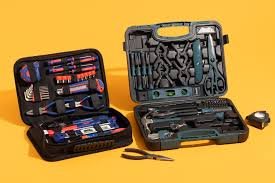
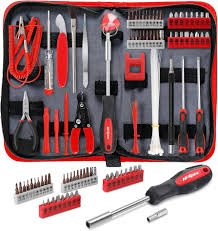
Tools Checklist: Best Tools for a DIY Home Computer Repair Kit
Here’s a complete professional-grade checklist:
Basic Tools
- Precision screwdriver set (magnetic tips)
- Plastic pry tools
- Tweezers (anti-static)
- Cable ties
Safety Tools
- Anti-static wrist strap
- ESD mat
- Insulated gloves (optional)
Cleaning Tools
- Compressed air blower
- Soft anti-static brush
- Microfiber cloth
Thermal Tools
- High-quality thermal paste
- Thermal paste applicator
- Isopropyl alcohol (90%+)
Diagnostic Tools
- USB bootable drive
- Multimeter
- External storage device
Comparison Table: Budget vs Professional Repair Kit
| Kit Type | Cost | Tools Included | Suitability |
|---|---|---|---|
| Basic Kit | Low | Screwdrivers, brush | Home users |
| Intermediate Kit | Medium | ESD tools + cleaning tools | Enthusiasts |
| Professional Kit | High | Full diagnostic + thermal tools | Technicians |
Step-by-Step: Building Your DIY Computer Repair Kit
Step 1: Start with Precision Screwdrivers
This is your foundation tool.
You’ll need:
- Phillips heads
- Torx bits
- Flat heads
Look, I’ve seen this error a thousand times—people use household screwdrivers and strip motherboard screws.
Don’t do that.
Step 2: Add ESD Protection (Critical Safety Layer)
Static electricity can silently kill components.
Add:
- Anti-static wrist strap
- ESD mat for workspace
This protects:
- RAM
- GPU
- Motherboard circuits
Step 3: Include Plastic Pry Tools
Never use metal tools for:
- Laptop opening
- Case separation
- Connector removal
Plastic tools prevent scratches and circuit damage.
Step 4: Install Cleaning Equipment
Dust is a silent performance killer.
Include:
- Compressed air blower
- Soft brush
- Microfiber cloth
Use for:
- GPU cleaning
- CPU heatsink dust removal
- PSU intake cleaning
Step 5: Add Thermal Maintenance Kit
Thermal performance = system stability.
Include:
- High-grade thermal paste
- Alcohol wipes (90%+)
- Applicator tool
Overheating causes:
- Thermal throttling
- BSOD
- Random shutdowns
Step 6: Add Diagnostic Tools
This is where real technicians separate from beginners.
Include:
- Multimeter (voltage testing)
- USB boot tools (Windows/Linux recovery)
- External SSD/HDD
Use cases:
- PSU voltage checks
- Boot failure diagnosis
- Data recovery
Step 7: Organize Your Toolkit Properly
Use:
- Tool organizer box
- Magnetic trays
- Labelled compartments
Messy tools = lost screws = hardware damage risk.
Advanced Tools for 2026-Level Repairs
1. USB POST Diagnostic Cards
Used for motherboard boot diagnostics.
2. Thermal Camera (Optional but Powerful)
Detects:
- overheating VRMs
- GPU hotspots
3. BIOS Flash Drive
Used for:
- firmware recovery
- motherboard updates
4. External GPU/SSD Enclosures
Used for:
- data recovery
- hardware isolation testing
Common Mistakes in DIY Repair Kits
Buying Cheap Screwdriver Sets
They strip screws easily.
Ignoring ESD Protection
One static shock = dead motherboard.
Using Too Much Thermal Paste
More is not better—it reduces efficiency.
Not Organizing Tools
Leads to accidental damage and lost parts.
Pro Tips from a Hardware Engineer
- Always work in a clean, dry environment
- Never force components into slots
- Label screws during disassembly
- Keep BIOS tools ready for emergencies
And here’s something most guides won’t tell you:
A good technician is not defined by repair skills—but by how safely they avoid causing new damage during repair.
When to Upgrade Your Toolkit
Upgrade if:
- You start repairing multiple PCs
- You deal with laptops frequently
- You handle GPU/CPU replacements
- You perform BIOS-level troubleshooting
At that stage, basic kits are no longer enough.
Final Thoughts: Tools Define Your Repair Quality
The Best tools for a DIY home computer repair kit are not just accessories—they are your safety system, precision system, and diagnostic system combined.
If you invest in the right tools:
- Repairs become safer
- Diagnostics become accurate
- Hardware lifespan increases
CTA: Build Your Pro Repair Setup with fixrig.xyz
At fixrig.xyz, we don’t just fix PCs—we engineer reliable systems.
Want help choosing your first repair kit or upgrading to pro-level tools?
Drop your setup or budget in the comments, and I’ll design a custom toolkit for you.
Because in real hardware repair… the right tool is the difference between fixing a system and destroying it.
Leave a Reply