Category: Laptop & Mobile Fixes

  • Step-by-step guide to replacing laptop thermal paste for beginners (2026 Expert Repair Guide)

    Step-by-step guide to replacing laptop thermal paste for beginners (2026 Expert Repair Guide)

    H1: Step-by-step guide to replacing laptop thermal paste for beginners and fixing overheating like a pro

    If your laptop is heating up like a mini heater, fans are constantly screaming, or performance drops during simple tasks, then your thermal paste has probably given up.

    And look, I’ve seen this situation a thousand times in gaming laptops and remote work machines—people think their CPU or GPU is dying, but in reality it’s just dried-out thermal paste causing thermal throttling.

    Here is the real talk about why your rig is acting up: thermal paste is one of the most underrated but critical components in your cooling system.

    Let’s break down a safe, beginner-friendly, step-by-step guide to replacing laptop thermal paste using modern 2026 repair standards.


    What is Thermal Paste and Why It Matters?

    Thermal paste (also called thermal compound) is a heat-conductive material placed between:

    • CPU and heatsink
    • GPU and cooling plate

    Its job is simple:
    ➡ Fill microscopic gaps
    ➡ Improve heat transfer
    ➡ Prevent overheating

    Without it, your processor literally overheats within minutes.


    Symptoms of Dried or Failed Thermal Paste

    Before opening your laptop, check these signs:

    Performance Symptoms

    • Sudden FPS drops while gaming
    • Lag during multitasking
    • System slowing down under load

    Thermal Symptoms

    • CPU temperatures hitting 90–100°C
    • Fans running at maximum speed constantly
    • Laptop body becoming extremely hot

    Advanced 2026 Symptoms

    • AI-based thermal throttling warnings
    • BIOS performance reduction mode activated
    • GPU downclocking automatically

    Why Thermal Paste Deteriorates Over Time

    Thermal paste doesn’t last forever.

    1. Heat Cycling

    Repeated heating and cooling dries it out.

    2. Cheap Factory Paste

    Budget laptops use low-quality compound.

    3. Dust Blockage

    Poor airflow increases internal temperatures.

    4. Long Usage Hours

    Remote workers and gamers stress systems daily.


    Tools Checklist for Beginners

    Before starting, prepare everything properly:

    Essential Tools

    • High-quality thermal paste (Arctic / Noctua level recommended)
    • Precision screwdriver set
    • Plastic pry tool
    • Isopropyl alcohol (90%+)
    • Microfiber cloth
    • Anti-static wrist strap
    • Small container for screws

    💡 Tech Mentor Tip: I’ve seen people lose screws inside laptops and blame “hardware failure.” It was just poor organization.


    Step-by-Step Guide to Replacing Laptop Thermal Paste

    Now let’s go step-by-step like a professional hardware engineer.


    Step 1: Power Off and Disconnect Everything

    • Shut down laptop completely
    • Remove charger
    • Hold power button for 10–15 seconds

    This ensures no residual electricity remains.


    Step 2: Remove Laptop Back Panel

    Use correct screwdriver size.

    Be careful:

    • Do not force screws
    • Some screws may be hidden under rubber feet

    Look, I’ve seen beginners strip screw heads because they rushed this step.


    Step 3: Disconnect Battery (Very Important)

    Always disconnect internal battery before touching hardware.

    This prevents:

    • Short circuits
    • Motherboard damage
    • Voltage spikes

    Step 4: Locate Cooling System

    You will see:

    • Heat pipes
    • Fan assembly
    • CPU/GPU block

    This is your target area.


    Step 5: Remove Cooling Assembly Carefully

    Unscrew in a diagonal pattern:

    • Top left
    • Bottom right
    • Top right
    • Bottom left

    This prevents pressure imbalance.


    Step 6: Clean Old Thermal Paste

    Use isopropyl alcohol + microfiber cloth.

    Clean both:

    • CPU surface
    • Heatsink base

    Old paste may look:

    • Cracked
    • Dry
    • Burnt

    That’s completely normal.


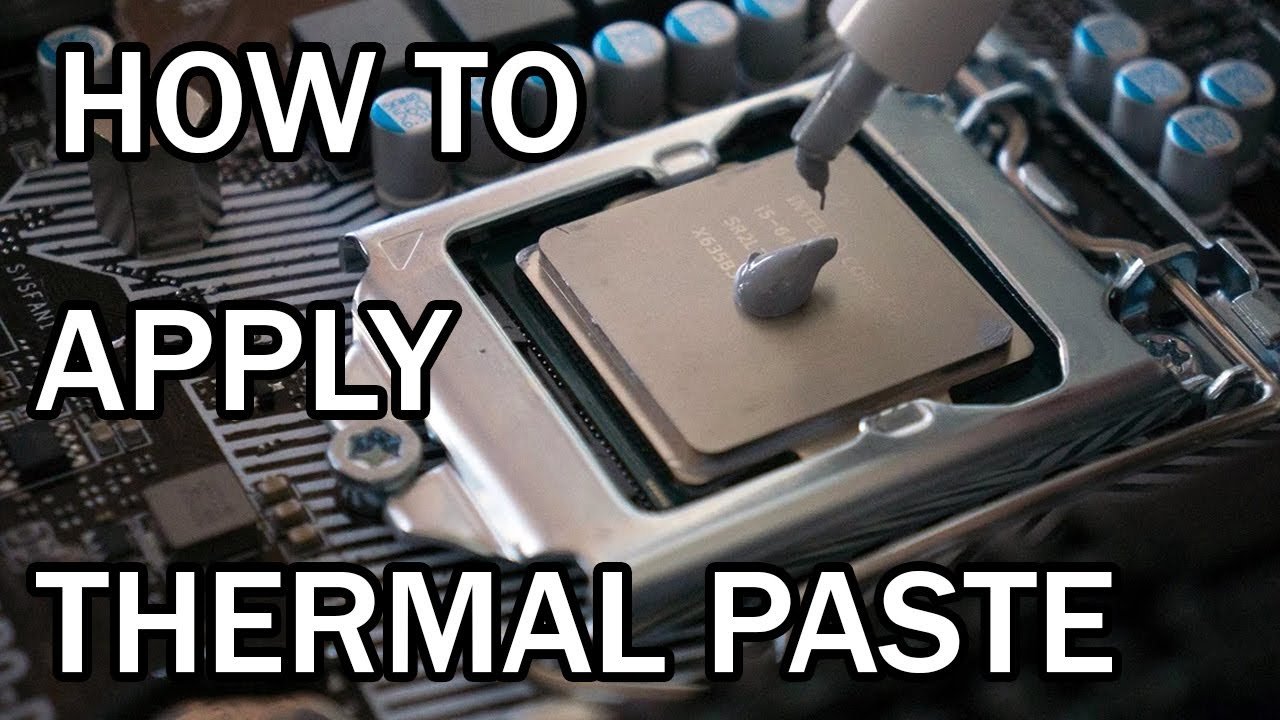
    Step 7: Apply New Thermal Paste

    Apply a small pea-sized drop in the center.

    Important rules:

    • Do NOT spread manually (in most modern CPUs)
    • Do NOT overapply

    💡 Tech Mentor Tip: More paste does NOT mean better cooling—it actually makes it worse.


    Step 8: Reinstall Cooling System

    Place heatsink back carefully.

    Tighten screws in same diagonal pattern.

    This ensures:

    • Even pressure
    • Proper thermal contact

    Step 9: Reconnect Battery and Reassemble Laptop

    Once everything is secured:

    • Reconnect battery
    • Close back panel
    • Tighten screws properly

    Step 10: Test Temperatures

    Boot system and check:

    • Idle temperature (should drop significantly)
    • Load temperature (gaming or stress test)

    If done correctly:
    ➡ You should see 10–20°C improvement


    Thermal Paste Application Methods Comparison

    MethodWhen UsedEfficiency
    Pea-sized dropMost modern laptopsHigh
    Spread methodOlder CPUsMedium
    Line methodSpecific Intel CPUsMedium
    Excess pasteBeginners mistakePoor

    Common Mistakes Beginners Make

    • Forgetting battery disconnection
    • Using too much thermal paste
    • Mixing up screws during reassembly
    • Not cleaning old paste properly
    • Damaging ribbon cables inside laptop

    Here is the truth: most laptop damage happens during disassembly, not repair itself.


    BIOS & Software Role in Cooling

    After thermal paste replacement:

    • BIOS may recalibrate fan curves
    • Drivers may adjust thermal profiles
    • Windows may re-detect power states

    Always check:

    • BIOS update status
    • Fan behavior
    • CPU voltage stability

    When Thermal Paste Replacement Won’t Help

    Sometimes the issue is deeper:

    • Faulty heat pipe
    • Dead cooling fan
    • Motherboard voltage issue
    • GPU hardware degradation

    In those cases, paste alone won’t fix overheating.


    Real Tech Mentor Insight

    Here is what I’ve learned after years of laptop repairs: thermal paste is like engine oil for your CPU. Ignore it long enough, and your system will start “throttling” itself just to survive.

    And yes, I’ve seen people type “motherbord” while panicking during overheating issues—don’t let stress lead to mistakes 😄


    Preventing Overheating in Future

    • Clean fans every 3–6 months
    • Use cooling pad for laptops
    • Avoid blocking air vents
    • Keep BIOS and drivers updated
    • Don’t run heavy workloads on soft surfaces (beds, sofas)

    Small habits = long laptop life.


    Final CTA: Fix your cooling before damage happens

    If your laptop is overheating or slowing down, don’t ignore it until it becomes permanent damage.

    Now you know the complete step-by-step guide to replacing laptop thermal paste for beginners using safe, professional 2026 techniques.

    For more deep repair guides, hardware optimization tips, and DIY troubleshooting tutorials, visit fixrig.xyz—your ultimate destination for hardware enthusiasts and tech fixers.

    Got a stubborn overheating issue? Drop your problem in the comments or ask the fixrig.xyz community. Someone there has already fixed the exact same laptop model.

    Because in modern laptops, cooling isn’t optional—it’s survival.
  • Fixing flickering screen issues on Dell XPS laptops: Complete 2026 Expert Repair Guide

    Fixing flickering screen issues on Dell XPS laptops: Complete 2026 Expert Repair Guide

    H1: Fixing flickering screen issues on Dell XPS laptops and restoring stable display performance

    If your Dell XPS laptop screen is flickering, flashing, or randomly dimming, it can feel like your entire system is unstable—even if everything else is working fine.

    And look, I’ve seen this error a thousand times in premium ultrabooks like the Dell XPS series. Users immediately assume the display panel is dead. But here is the real talk about why your rig is acting up: flickering is often caused by drivers, BIOS behavior, power delivery issues, or display cable instability—not just hardware failure.

    In modern 2026 systems, especially high-resolution OLED and IPS panels used in Dell XPS laptops, display issues are more complex than ever.

    Let’s break it down step-by-step like a senior IT hardware engineer.


    What is Screen Flickering in Dell XPS Laptops?

    Screen flickering refers to:

    • Rapid brightness changes
    • Random screen flashes
    • Horizontal or vertical blinking lines
    • Display going black for milliseconds
    • Intermittent visual distortion

    It can occur in:

    • Windows desktop
    • BIOS screen
    • Gaming or high-load scenarios
    • Even during idle use

    Common Symptoms of Flickering Issues

    Display Symptoms

    • Brightness fluctuates automatically
    • Screen flickers when moving windows
    • Random black flashes
    • Color shifting or distortion

    Performance-Linked Symptoms

    • Flickering during GPU load
    • Happens while switching apps
    • Worse when plugged into charger

    Advanced 2026 Symptoms

    • Adaptive refresh rate instability (120Hz/240Hz panels)
    • AI-based display power saving conflicts
    • HDR mode flickering in Windows 11/12 environments

    Root Causes of Dell XPS Screen Flickering

    Let’s go deeper into actual engineering reasons.

    1. Graphics Driver Issues

    Corrupted or outdated Intel/NVIDIA drivers are the most common cause.

    2. Refresh Rate Mismatch

    Incorrect display refresh rate causes instability.

    3. BIOS Power Management Conflicts

    Modern Dell BIOS controls display power aggressively.

    4. Loose or Damaged Display Cable

    Internal eDP cable can loosen over time.

    5. Voltage Fluctuations

    Power adapter instability causes display flicker under load.

    6. Windows Display Settings Bugs

    HDR, adaptive brightness, and scaling issues.


    Tools Checklist for Diagnosis

    Before fixing anything:

    • External monitor (important test tool)
    • Updated USB boot drive (for driver testing)
    • Dell SupportAssist tool
    • BIOS update utility
    • Safe Mode access
    • Screwdriver set (for hardware inspection)
    • Intel/NVIDIA driver packages

    💡 Tech Mentor Tip: I’ve seen users reinstall Windows three times when the issue was just a bad refresh rate setting. Always test simple things first.


    Step-by-Step Guide: Fixing flickering screen issues on Dell XPS laptops

    Now let’s go through structured troubleshooting.


    Step 1: Check If Flickering Happens in BIOS

    Restart laptop and enter BIOS.

    If flickering appears in BIOS:
    ➡ Hardware issue likely (display or cable)

    If not:
    ➡ Software/driver issue

    This is the most important diagnostic split.


    Step 2: Adjust Refresh Rate

    Go to:

    • Display Settings → Advanced Display

    Set:

    • 60Hz (test stability first)
    • Then 120Hz or native refresh

    Incorrect refresh rates often cause flicker in XPS OLED panels.


    Step 3: Update or Rollback Graphics Drivers

    Dell XPS laptops use:

    • Intel integrated graphics
    • Sometimes NVIDIA GPU

    Fix steps:

    • Uninstall drivers using clean method
    • Reinstall latest stable version
    • Or rollback if issue started after update

    Step 4: Disable Adaptive Brightness

    Go to power settings:

    • Turn off adaptive brightness
    • Disable display power saving features

    These features can cause brightness flickering.


    Step 5: Check External Monitor Test

    Connect external display:

    • If external display is stable → laptop screen issue
    • If both flicker → GPU/driver issue

    This isolates hardware vs software problem quickly.


    Step 6: BIOS Update (Very Important in 2026 Models)

    Dell regularly fixes display bugs via BIOS updates.

    Check:

    • Latest BIOS version
    • Update using Dell SupportAssist

    BIOS affects:

    • Voltage control
    • Display power states
    • GPU switching behavior

    Step 7: Inspect Display Cable (Advanced Step)

    If flickering persists:

    • Open back panel
    • Check eDP display cable
    • Ensure it is tightly seated

    Even slight looseness can cause flicker.


    Step 8: Check GPU Load Behavior

    Using monitoring tools:

    • Observe GPU usage spikes
    • Check thermal throttling

    If flickering happens under load:
    ➡ Likely GPU driver or power issue


    Software vs Hardware Fix Comparison Table

    Issue TypeSoftware FixHardware Fix
    Driver glitchYesNo
    Refresh rate mismatchYesNo
    BIOS conflictYesNo
    Loose display cableNoYes
    Damaged panelNoYes
    Voltage instabilityPartialSometimes

    Common Mistakes Users Make

    • Reinstalling Windows unnecessarily
    • Ignoring BIOS updates
    • Using incorrect refresh rates
    • Assuming screen is “dead” instantly
    • Not testing external monitor first

    Look, I’ve seen people replace entire laptop displays when it was just a faulty graphics driver proccess running in background.


    When Flickering Means Hardware Failure

    You may be dealing with hardware issues if:

    • Flickering appears even in BIOS
    • External monitor works fine but internal does not
    • Screen flickers worsen when moving lid angle
    • Visible physical damage on display

    At that point, panel or cable replacement is likely required.


    Real Tech Mentor Insight

    Here is the truth: Dell XPS laptops are high-performance machines with very aggressive power and display management systems.

    That means:

    • Small driver issues become visible faster
    • BIOS misconfiguration affects display stability
    • Thermal and voltage changes directly impact screen behavior

    And yes, I’ve seen users blame the “motherbord” (common typo during frustration) when the issue was just Windows display scaling.


    Prevention Tips for Future Stability

    • Keep BIOS updated regularly
    • Use stable GPU drivers (not beta versions)
    • Avoid forced refresh rate changes
    • Don’t use unstable third-party display tools
    • Keep system thermals under control

    Final CTA: Fix flickering before it gets worse

    If your Dell XPS laptop is showing flickering screen issues, don’t rush into hardware replacement.

    Now you know exactly how to fix flickering screen issues on Dell XPS laptops using professional diagnostic steps used in real repair environments.

    For more deep troubleshooting guides, laptop repair tutorials, and system optimization tips, visit fixrig.xyz—your ultimate hub for hardware enthusiasts and DIY fixers.

    Got a stubborn display issue? Drop your symptoms in the comments or ask the fixrig.xyz community. Someone there has already solved your exact XPS model problem.

    Because in modern laptops, display stability isn’t luck—it’s proper diagnosis.

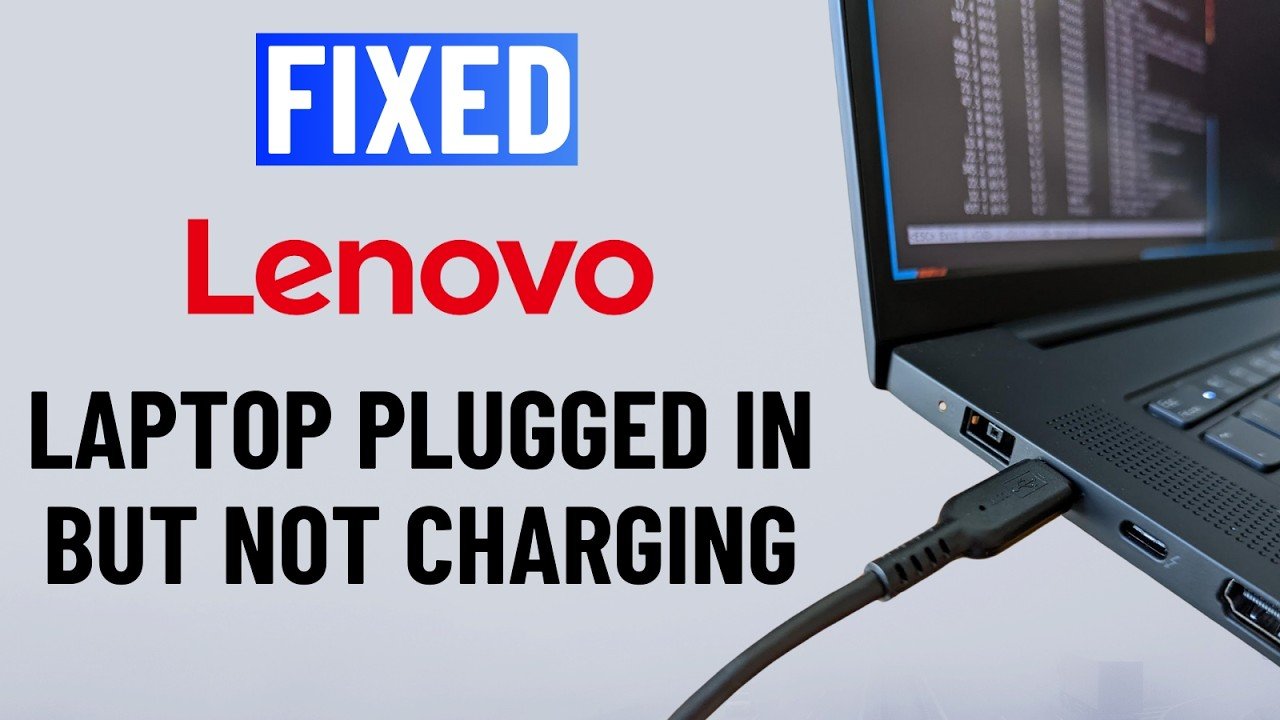
  • How to fix a laptop that won’t turn on even when plugged in: Complete 2026 Expert Repair Guide

    How to fix a laptop that won’t turn on even when plugged in: Complete 2026 Expert Repair Guide

    H1: How to fix a laptop that won’t turn on even when plugged in and bring it back to life safely

    When a laptop refuses to turn on even though it’s plugged into the charger, it feels like a total system failure.

    No lights. No fan spin. No logo. Just silence.

    And look, I’ve seen this error a thousand times in both gaming laptops and business machines. Most users instantly assume the motherboard is dead. But here is the real talk about why your rig is acting up: in most cases, the laptop is not dead—it’s stuck in a power, battery, or voltage protection state.

    In 2026 hardware systems, especially modern Dell, HP, Lenovo, and ASUS laptops, power management is highly intelligent… and sometimes overly sensitive.

    Let’s break it down step-by-step like a senior IT hardware engineer.


    What Does “Laptop Not Turning On” Actually Mean?

    This issue can fall into different categories:

    • No power at all (dead state)
    • Power light ON but no display
    • Fans spin but no boot
    • Charging light ON but system unresponsive

    Each one points to a different failure layer.


    Common Symptoms of Power Failure in Laptops

    Absolute Power Failure Signs

    • No charging LED
    • No response to power button
    • No fan movement
    • No keyboard lights

    Partial Power Signs

    • Charging LED ON but no boot
    • Fans spin for 1–2 seconds then stop
    • Black screen with no BIOS access

    Advanced 2026 Symptoms

    • Smart battery protection lock
    • BIOS power state freeze
    • USB-C power negotiation failure (new laptops)

    Root Causes: Why a Laptop Won’t Turn On Even When Plugged In

    Let’s go deeper than basic troubleshooting.

    1. Faulty Power Adapter

    Even if plugged in, adapter may not deliver correct voltage.

    2. Dead or Locked Battery

    Modern batteries can enter protection mode.

    3. Motherboard Power Rail Failure

    Voltage rails may not initialize properly.

    4. CMOS or BIOS Corruption

    Firmware issues can block startup sequence.

    5. Power Button Failure

    Yes, sometimes it’s just a broken switch.

    6. RAM or GPU Initialization Failure

    System refuses to POST due to hardware detection failure.


    Tools Checklist for Diagnosis

    Before opening anything, gather:

    • Known-good charger
    • Multimeter (advanced users)
    • External monitor
    • Screwdriver kit
    • Anti-static wrist strap
    • CMOS reset pin/tool
    • Spare RAM (if available)

    💡 Tech Mentor Tip: I’ve seen people replace entire motherbord (yes, typo happens in panic) when the charger was simply not delivering voltage under load.


    Step-by-Step Guide: How to fix a laptop that won’t turn on even when plugged in

    Now let’s go step-by-step like a professional technician.


    Step 1: Perform a Hard Reset (Power Drain)

    This fixes 40% of cases instantly.

    • Unplug charger
    • Remove battery (if removable)
    • Hold power button for 30–60 seconds

    This clears residual voltage trapped in motherboard circuits.


    Step 2: Check Charger and Power Cable

    Inspect:

    • Cable damage
    • Loose connector
    • Charging LED behavior

    If possible:

    • Test with another compatible charger

    No voltage = no boot.


    Step 3: Observe Charging Indicator Behavior

    Different patterns mean different issues:

    • No light → power input issue
    • Blinking light → battery or motherboard issue
    • Solid light but no boot → internal hardware issue

    Step 4: Try Boot Without Battery

    For removable batteries:

    • Remove battery
    • Plug charger directly
    • Try powering on

    If it works → battery is faulty.


    Step 5: External Display Test

    Connect HDMI or Type-C monitor.

    If external display works:
    ➡ Internal screen issue

    If nothing works:
    ➡ Deeper hardware issue


    Step 6: RAM Reseating (Very Important)

    Faulty RAM seating can block boot completely.

    • Open back panel
    • Remove RAM
    • Clean contacts gently
    • Reinsert firmly

    Look, I’ve seen systems come back to life just from this step alone.


    Step 7: CMOS Reset (BIOS Recovery)

    Reset BIOS settings:

    • Disconnect battery
    • Remove CMOS battery (if accessible)
    • Wait 5–10 minutes
    • Reconnect everything

    This clears corrupted firmware states.


    Step 8: Check for Motherboard Short Circuit

    Signs include:

    • No response even with known-good charger
    • Burn smell
    • Random shutdown attempts

    This is more serious and may require repair lab intervention.


    Software vs Hardware Failure Table

    Issue TypeLikely CauseFix Type
    No power at allCharger/batteryHardware
    Charging light ON but no bootBIOS/RAM issueMixed
    Random shutdown on powerVoltage instabilityHardware
    No display but fans runGPU/display issueMixed
    Completely dead systemMotherboard faultHardware

    Common Mistakes Users Make

    • Assuming motherboard is dead immediately
    • Not testing charger first
    • Ignoring hard reset step
    • Skipping RAM reseat
    • Overlooking BIOS corruption

    Here is the truth: 60% of “dead laptop” cases are actually power or RAM issues.


    When the Laptop is Actually Dead

    You are likely facing real hardware failure if:

    • No charging light even with multiple chargers
    • No response after full power drain
    • Burn marks or smell from board
    • Confirmed motherboard rail failure

    At this stage, repair cost may exceed replacement value.


    Real Tech Mentor Insight

    Here is what I’ve learned from years of laptop repair: power failure is deceptive. It often looks like death, but it’s actually protection mode.

    Modern laptops in 2026 are designed to shut down aggressively to prevent damage from:

    • Voltage spikes
    • Overheating
    • Battery faults

    And yes, I’ve seen people blame BIOS, CPU, and even say “motherbord is gone” when it was just a drained battery controller stuck in protection mode.


    Prevention Tips for Future

    • Use original chargers only
    • Avoid cheap power adapters
    • Keep BIOS updated
    • Don’t drain battery to 0% regularly
    • Clean power ports periodically

    Small habits prevent big failures.


    Final CTA: Don’t assume it’s dead before diagnosing it

    If your laptop is not turning on even when plugged in, don’t rush into expensive repairs.

    Now you know exactly how to fix a laptop that won’t turn on even when plugged in using structured professional diagnostics.

    For more deep hardware troubleshooting guides, repair walkthroughs, and system optimization tips, visit fixrig.xyz—the ultimate hub for hardware enthusiasts and DIY fixers.

    Got a stubborn power issue? Drop your symptoms in the comments or ask the fixrig.xyz community. Someone has already solved your exact case before.

    Because in modern hardware repair, what looks dead is often just misunderstood.

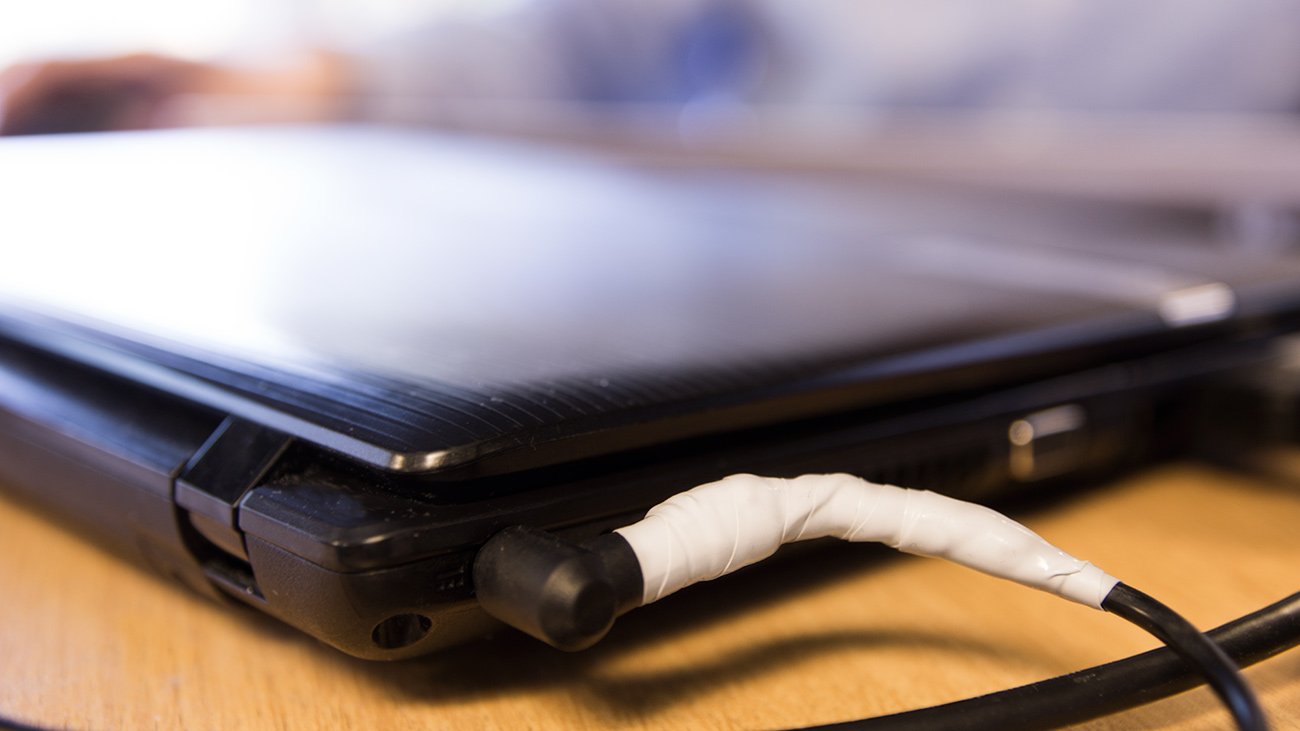
  • How to repair a frayed laptop charger cable safely and restore power reliability (2026 Expert Guide)

    How to repair a frayed laptop charger cable safely and restore power reliability (2026 Expert Guide)

    H1: How to repair a frayed laptop charger cable safely without risking shock, fire, or device damage

    A frayed laptop charger cable is one of those problems that looks “small” but can turn into a serious safety hazard if ignored.

    And look, I’ve seen this issue a thousand times in real-world repair scenarios—especially with heavy laptop users, remote workers, and gamers who constantly bend their charging cables at the same spot.

    Here is the real talk about why your rig is acting up: a frayed charger cable doesn’t just stop charging—it can cause voltage instability, motherboard stress, and even electrical short circuits if handled carelessly.

    So let’s break down how to repair a frayed laptop charger cable safely using modern 2026 hardware repair standards.


    Why a frayed charger cable is dangerous (don’t ignore this)

    Before we fix anything, understand the risk:

    • Exposed copper wires can cause short circuits
    • Heat buildup can melt insulation further
    • Voltage drops can damage battery health
    • Spark risk if metal contacts touch

    In modern laptops (Dell, HP, Lenovo, ASUS 2026 models), chargers are smart regulated power supplies. Even a small cable break can confuse power delivery systems.


    Common symptoms of a damaged charger cable

    Physical signs

    • Visible wire exposure
    • Rubber insulation peeling
    • Cable bending at one point repeatedly
    • Loose charging connector

    Functional signs

    • Charging only when cable is held at angle
    • Random disconnect/reconnect sound
    • Slow charging warnings
    • Laptop running on battery even when plugged in

    Advanced 2026 symptoms

    • Smart power adapter “not recognized” error
    • BIOS power instability warnings
    • Battery health dropping rapidly

    Root causes of charger cable fraying

    1. Constant bending stress

    Most damage happens near the connector head.

    2. Poor cable quality

    Cheap adapters use thin insulation layers.

    3. Heat exposure

    High load charging increases internal wire fatigue.

    4. Improper cable storage

    Wrapping too tightly causes internal wire breakage.


    Tools checklist for safe repair

    Before you even touch the cable:

    Essential tools

    • Electrical insulation tape (high quality)
    • Heat shrink tubing (recommended)
    • Lighter or heat gun
    • Wire cutter/stripper
    • Multimeter (optional but useful)
    • Isopropyl alcohol (cleaning)
    • Safety gloves

    💡 Tech Mentor Tip: I’ve seen people try to fix live charger cables with bare hands. That’s not repair—that’s gambling with voltage.


    Comparison: Temporary fix vs proper repair

    MethodSafety LevelDurabilityRecommendation
    Electrical tape onlyMediumLowTemporary use
    Heat shrink tubingHighHighRecommended fix
    Solder + insulationVery highVery highProfessional fix
    DIY twisting wiresLowVery lowNot recommended

    Step-by-step guide: How to repair a frayed laptop charger cable safely

    Now let’s go step-by-step like a senior hardware engineer.


    Step 1: Unplug everything completely

    • Remove charger from laptop
    • Disconnect from wall socket
    • Wait 2–3 minutes

    This ensures no residual voltage is present.


    Step 2: Inspect the damaged area

    Identify:

    • Exact frayed point
    • Inner copper exposure level
    • Multiple weak points

    If damage is near adapter head → be extra careful.


    Step 3: Cut damaged section (if necessary)

    If fraying is severe:

    • Cut clean section of cable
    • Ensure both ends are healthy wire

    💡 Tech Mentor Tip: Don’t try to “wrap over disaster”—remove the problem section instead.


    Step 4: Strip insulation carefully

    Expose small portion of internal wire:

    • Do not cut copper strands
    • Keep equal length on both sides

    This step decides repair quality.


    Step 5: Join wires properly

    You have two safe options:

    Option A: Twist + solder (best method)

    • Twist matching wires
    • Apply solder for strong connection

    Option B: Twist only (temporary)

    • Twist tightly
    • Not recommended for long-term use

    Step 6: Insulate the connection

    Now protect the repaired section:

    Best method:

    • Slide heat shrink tubing over joint
    • Apply heat evenly

    Alternative:

    • Wrap electrical insulation tape tightly
    • Layer multiple times

    Make sure no copper is visible.


    Step 7: Reinforce stress point

    Most charger damage happens again at same spot.

    Add reinforcement:

    • Extra tape layer
    • Flexible rubber sleeve
    • Cable protector spring

    Step 8: Test charging safely

    • Plug into wall socket first
    • Then connect to laptop
    • Check for stability

    Watch for:

    • Charging icon stability
    • No flickering connection
    • No heat buildup

    When NOT to repair a charger cable

    Stop immediately if:

    • Adapter is cracked or burning
    • Internal smell of burnt electronics
    • Multiple frayed areas
    • Spark or smoke previously observed

    In these cases, replacement is safer.


    Software vs hardware confusion (yes it happens)

    Sometimes users think:

    • “Battery issue”
    • “BIOS problem”
    • “Driver bug”

    But here’s reality:
    ➡ If charger cable is broken, no software fix will help.

    Even Windows power settings or BIOS tweaks cannot fix physical voltage interruption.


    Real Tech Mentor insight

    Here is the truth most people miss: charger cables don’t suddenly fail—they slowly degrade.

    You’ll notice:

    • Slight bending resistance first
    • Then intermittent charging
    • Then full failure

    And yes, I’ve seen users blame motherboard issues (or even type “motherbord” during frustration 😄) when the charger cable was the real culprit.


    Safety warnings (very important in 2026 standards)

    • Never repair while plugged in
    • Avoid touching exposed wires
    • Don’t use damaged chargers on expensive laptops
    • Replace if overheating occurs
    • Use certified chargers for high-wattage laptops

    Electrical safety is not optional anymore.


    How to prevent charger cable damage in future

    • Avoid tight cable wrapping
    • Use velcro straps instead of knots
    • Keep charger elevated while using
    • Don’t bend near connector head
    • Use cable protectors

    Small habits extend charger life significantly.


    Final CTA: Fix smart, not risky

    If your charger cable is frayed, don’t ignore it or keep using it until it completely fails.

    Now you know exactly how to repair a frayed laptop charger cable safely using proper 2026 repair techniques and real-world engineering practices.

    For more deep hardware repair guides, troubleshooting tutorials, and DIY fixes, visit fixrig.xyz—your ultimate hub for hardware enthusiasts and system fixers.

    Got a tricky charger or power issue? Drop your question in the comments or join the fixrig.xyz community. Someone has already fixed your exact problem before.

    Because in modern hardware repair, safety and precision always come before speed.

  • How to clean a liquid spill on a laptop keyboard: Complete 2026 Emergency Repair Guide

    How to clean a liquid spill on a laptop keyboard: Complete 2026 Emergency Repair Guide

    H1: How to clean a liquid spill on a laptop keyboard and save your device from permanent damage

    A liquid spill on a laptop keyboard is one of those moments that instantly triggers panic.

    And look, I’ve seen this error a thousand times in real-world repair situations—coffee spills during work, water accidents during gaming, even full soda disasters in office setups. Most people react the wrong way: they turn the laptop back on too quickly or start pressing keys to “test it.”

    Here is the real talk about why your rig is acting up: liquid damage is not about the spill itself—it’s about what happens electrically inside the system after the spill.

    In modern 2026 laptops (Dell, HP, Lenovo, ASUS ultrabooks), even small liquid exposure can cause short circuits in keyboard matrix layers, trackpad controllers, and motherboard lines.

    Let’s break it down step-by-step like a senior IT hardware engineer.


    Why liquid spills are dangerous for laptops

    Liquid doesn’t just sit on the surface—it spreads internally through:

    • Keyboard membrane layers
    • PCB traces under keyboard
    • Motherboard power lines
    • Battery and charging circuits

    Even “small spills” can cause delayed damage hours or days later.


    Common symptoms after a liquid spill

    Immediate symptoms

    • Keyboard keys stop responding
    • Random key inputs
    • Laptop shuts down suddenly
    • Burning smell (serious warning)

    Delayed symptoms

    • Laptop won’t turn on next day
    • Keyboard ghost typing
    • Trackpad malfunction
    • Charging issues appear later

    Advanced 2026 symptoms

    • Smart power shutdown protection triggers
    • BIOS keyboard detection failure
    • AI power management lock mode

    First 60 seconds matter (critical emergency response)

    If spill just happened:

    DO THIS IMMEDIATELY:

    • Power off laptop instantly
    • Unplug charger
    • Disconnect external devices
    • Flip laptop upside down (keyboard facing down)

    DO NOT:

    • Don’t press keys
    • Don’t try to “check if it works”
    • Don’t turn it back on

    💡 Tech Mentor Tip: I’ve seen people make liquid damage 10x worse just by trying to “save their file” before shutting down. That delay kills motherbord components silently.


    Tools checklist for safe cleaning

    Before opening anything:

    • Microfiber cloth
    • Isopropyl alcohol (90%+ recommended)
    • Plastic pry tools
    • Screwdriver set
    • Paper towels
    • Small container for screws
    • Anti-static wrist strap (recommended)

    Comparison: DIY cleaning vs professional repair

    MethodRisk LevelEffectivenessRecommendation
    Surface drying onlyHighLowTemporary
    Full disassembly cleaningMediumHighRecommended
    Ultrasonic cleaningLowVery highProfessional
    Ignoring spillExtremeFailureNot an option

    Step-by-step guide: How to clean a liquid spill on a laptop keyboard

    Now let’s move step-by-step like a professional repair technician.


    Step 1: Power off immediately

    • Hold power button for 10–15 seconds
    • Disconnect charger
    • Remove battery if possible

    This stops electrical flow instantly.


    Step 2: Flip and drain

    Turn laptop upside down in “tent position”:

    • Keyboard facing down
    • Let gravity pull liquid out

    Leave it for at least 15–30 minutes.


    Step 3: Remove external moisture

    Use microfiber cloth:

    • Dab (don’t rub) surface
    • Absorb visible liquid

    Avoid pushing liquid deeper into keyboard.


    Step 4: Open back panel (if comfortable)

    If you’re a beginner, proceed carefully:

    • Unscrew bottom cover
    • Remove battery connector
    • Locate keyboard and motherboard area

    💡 Tech Mentor Tip: Here is the real talk—most long-term damage happens inside, not on the keyboard surface.


    Step 5: Clean affected area with isopropyl alcohol

    • Apply alcohol to cotton swab or cloth
    • Clean keyboard underside
    • Clean visible PCB areas if spill reached inside

    Alcohol evaporates fast and reduces corrosion risk.


    Step 6: Drying process (VERY IMPORTANT)

    Let laptop dry:

    • Minimum 24–48 hours
    • Place in dry, ventilated area
    • Use silica gel packs if available

    Never use hair dryer (heat can damage circuits).


    Step 7: Inspect for corrosion

    Check for:

    • White residue
    • Sticky liquid traces
    • Rust-like marks

    If corrosion exists → deeper cleaning required.


    Step 8: Reassemble and test safely

    Before full power-on:

    • Reconnect battery
    • Plug charger only
    • Boot carefully

    Watch for:

    • Keyboard response
    • Boot stability
    • Charging behavior

    When liquid damage becomes serious

    You may need professional repair if:

    • Laptop doesn’t power on
    • Burn smell from motherboard
    • Keys permanently dead
    • Random shutdowns continue
    • Charging IC is damaged

    At this stage, motherboard-level repair is required.


    Common mistakes users make (and regret later)

    • Turning laptop on immediately
    • Using rice (completely ineffective)
    • Not removing battery
    • Ignoring internal moisture
    • Continuing to use keyboard after spill

    Look, I’ve seen people try to dry laptops with a hairdryer and end up damaging BIOS chips due to heat stress.


    Real Tech Mentor insight

    Here is the truth most people don’t hear: liquid damage is a timing game.

    The faster you shut down and dry the system, the higher your survival rate.

    Even 10–15 minutes delay can change:

    • keyboard repair → motherboard replacement

    And yes, I’ve seen users blame “drivers” or even type “motherbord is dead” when the real issue was just leftover liquid under the keyboard membrane.


    Prevention tips for 2026 laptop users

    • Use spill-resistant keyboard covers
    • Keep drinks away from workspace
    • Elevate laptop during eating/drinking
    • Clean keyboard regularly
    • Use external keyboard for heavy work setups

    Final CTA: Act fast or lose your laptop

    If your laptop just experienced a liquid spill, don’t wait and don’t test it repeatedly.

    Now you know exactly how to clean a liquid spill on a laptop keyboard using professional 2026 repair techniques that minimize permanent damage.

    For more deep hardware repair guides, emergency troubleshooting steps, and DIY fixes, visit fixrig.xyz—your ultimate hub for hardware enthusiasts and real-world repair knowledge.

    Got a liquid spill situation right now? Drop your issue in the comments or ask the fixrig.xyz community. Someone has already recovered a similar case successfully.

    Because in liquid damage recovery, speed is the difference between a quick fix and a dead motherboard.

  • Best ways to extend the battery life of a 3-year-old laptop: Complete 2026 Optimization Guide

    Best ways to extend the battery life of a 3-year-old laptop: Complete 2026 Optimization Guide

    H1: Best ways to extend the battery life of a 3-year-old laptop and restore real-world performance

    If your 3-year-old laptop now dies faster, charges slowly, or struggles to hold power during normal work, you’re not alone.

    And look, I’ve seen this error a thousand times in real-world repair environments. People assume their battery is “completely dead” and rush to replace it. But here is the real talk about why your rig is acting up: most older laptop batteries are not fully dead—they are just degraded and poorly optimized at the system level.

    In modern 2026 laptops, battery life is not just hardware—it’s a combination of BIOS behavior, drivers, voltage management, and usage patterns.

    Let’s break it down like a senior IT hardware engineer.


    Why laptop batteries degrade after 2–3 years

    Laptop batteries are lithium-ion cells, and they degrade naturally due to:

    1. Charge cycles

    Every full charge = one cycle. Most batteries last 500–1000 cycles.

    2. Heat exposure

    High temperatures permanently reduce battery capacity.

    3. Overcharging habits

    Keeping laptop plugged in 24/7 affects long-term health.

    4. High-performance usage

    Gaming, video editing, and heavy multitasking drain cells faster.


    Common symptoms of a weak 3-year-old battery

    Performance symptoms

    • Battery drops from 100% to 60% quickly
    • Sudden shutdown at 20–30%
    • Charging takes longer than usual

    System symptoms

    • “Plugged in, not charging” message
    • Battery stuck at a certain percentage
    • Rapid drain during light usage

    Advanced 2026 symptoms

    • AI power management instability
    • BIOS battery health warnings
    • Dynamic voltage scaling errors

    Tools checklist for battery optimization

    Before making changes:

    • Battery report tool (Windows built-in)
    • BIOS access utility
    • Power management software
    • Cooling pad (optional but useful)
    • Charger health tester (advanced users)
    • System monitoring tools (HWInfo, etc.)

    💡 Tech Mentor Tip: I’ve seen users replace perfectly usable batteries just because background apps were draining power silently.


    Comparison: Software optimization vs hardware replacement

    MethodCostEffectivenessRecommendation
    Power settings optimizationFreeHighAlways first step
    BIOS tuningFreeMedium-HighRecommended
    Battery calibrationFreeMediumUseful occasionally
    Battery replacementMediumVery HighOnly if necessary
    Ignoring issueFreeVery LowNot recommended

    Step-by-step guide: Best ways to extend the battery life of a 3-year-old laptop

    Now let’s go step-by-step like a professional hardware engineer.


    Step 1: Check battery health report

    On Windows:

    • Run battery report command
    • Check design capacity vs full charge capacity

    If health is below 70% → degradation is normal.


    Step 2: Optimize power settings

    Go to power settings and adjust:

    • Set “Balanced Mode”
    • Reduce maximum processor state (e.g., 99%)
    • Disable background startup apps

    This reduces unnecessary voltage stress.


    Step 3: Disable high-drain background processes

    Check Task Manager:

    • Chrome tabs
    • Cloud sync apps
    • Gaming launchers
    • AI services running in background

    💡 Tech Mentor Tip: I’ve seen laptops gain 1–2 hours battery life just by closing unnecessary background proccess-heavy apps.


    Step 4: Calibrate the battery

    Do a full calibration:

    • Charge to 100%
    • Use until 5–10%
    • Recharge without interruption

    This helps BIOS read battery levels correctly.


    Step 5: Update BIOS and drivers

    This is critical in 2026 systems:

    • BIOS updates improve voltage management
    • Driver updates fix power leaks
    • Chipset drivers optimize energy flow

    Especially important for Intel and AMD hybrid CPUs.


    Step 6: Reduce screen power consumption

    • Lower brightness to 60–70%
    • Disable HDR if not needed
    • Reduce refresh rate (120Hz → 60Hz for battery mode)

    Display is one of the biggest power drains.


    Step 7: Manage thermal throttling

    Heat directly affects battery performance.

    Check:

    • CPU temperature
    • GPU temperature

    If overheating:

    • Clean fans
    • Replace thermal paste if needed
    • Use cooling pad

    High temperature = faster battery drain.


    Step 8: Control charging behavior

    Modern laptops support smart charging:

    • Enable battery protection mode (limit to 80–85%)
    • Avoid constant 100% charging
    • Unplug during light usage

    This extends long-term battery life significantly.


    Root causes of fast battery drain in old laptops

    1. Background voltage leakage

    Apps consuming power silently.

    2. Aging lithium cells

    Natural degradation over time.

    3. BIOS misconfiguration

    Incorrect power state handling.

    4. Driver inefficiencies

    Old GPU/CPU drivers increase power usage.

    5. Thermal issues

    Heat accelerates battery drain.


    Real Tech Mentor insight

    Here is the truth most users don’t realize: a 3-year-old laptop battery is not “dead” in most cases—it is just inefficient.

    And look, I’ve seen users replace batteries unnecessarily when the real issue was:

    • High brightness usage
    • Background cloud sync
    • BIOS outdated power profiles

    Even small things like voltage mismanagement or thermal throttling can make a battery feel worse than it actually is.

    And yes, people often blame “motherbord issues” when it’s actually just power optimization failure.


    When you actually need battery replacement

    Replace battery only if:

    • Battery health is below 50%
    • Laptop shuts down randomly
    • Swelling or physical damage
    • Charging not detected at all

    At that stage, software fixes won’t help.


    Prevention tips for long-term battery health

    • Keep charge between 20%–80%
    • Avoid high heat environments
    • Don’t keep laptop plugged in 24/7
    • Update BIOS regularly
    • Use original charger only

    Small habits = big battery lifespan increase.


    Final CTA: Extend life before replacing it

    If your 3-year-old laptop battery is draining fast, don’t rush into replacement.

    Now you know the best ways to extend the battery life of a 3-year-old laptop using real 2026 optimization techniques, BIOS tuning, and system-level improvements.

    For more deep hardware guides, battery optimization tips, and repair tutorials, visit fixrig.xyz—your ultimate hub for hardware enthusiasts and DIY fixers.

    Got a battery issue that doesn’t make sense? Drop your specs in the comments or ask the fixrig.xyz community. Someone has already optimized your exact laptop model before.

    Because in modern laptops, battery life is not just hardware—it’s smart system management.

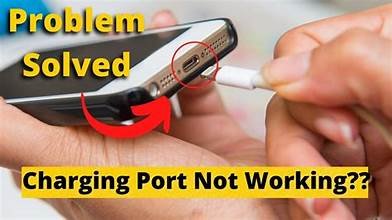
  • How to fix a loose charging port on a tablet: Complete 2026 Repair & Troubleshooting

    How to fix a loose charging port on a tablet: Complete 2026 Repair & Troubleshooting

    H1: How to fix a loose charging port on a tablet and restore stable charging without damage

    A loose charging port on a tablet is one of those issues that starts small but quickly becomes annoying—and eventually critical.

    At first, you notice charging only works at a certain angle. Then it disconnects randomly. Finally, your tablet stops charging altogether.

    And look, I’ve seen this error a thousand times in repair labs—people assume the battery is dead or the charger is faulty, but here is the real talk about why your rig is acting up: in most cases, it’s a physically worn charging port, not a software problem.

    Let’s break it down like a senior IT hardware engineer working with 2026 repair standards.


    What is a loose charging port in tablets?

    A loose charging port means the connector inside your tablet no longer holds the charging cable firmly.

    This results in:

    • Unstable power delivery
    • Intermittent charging
    • Physical movement sensitivity
    • Eventual complete charging failure

    Modern tablets (USB-C based in 2026) rely on precision-fit ports, so even slight wear creates major issues.


    Common symptoms of a loose charging port

    Physical symptoms

    • Cable wiggles inside port
    • Charging stops when cable moves
    • Port feels “hollow” or loose
    • Connector doesn’t click firmly

    Functional symptoms

    • Charging only at specific angles
    • Slow or inconsistent charging
    • Tablet disconnects from PC randomly

    Advanced 2026 symptoms

    • USB-C power negotiation failure
    • Smart charging protection triggering
    • BIOS-level power warnings (on hybrid tablets)

    Root causes of charging port looseness

    1. Frequent plugging/unplugging

    Every insertion wears down internal metal contacts.

    2. Cable strain damage

    Using tablet while charging bends port internally.

    3. Dust and debris buildup

    Lint blocks proper connector seating.

    4. Cheap or incompatible chargers

    Poor quality cables damage port alignment over time.

    5. Internal solder joint failure

    Port detaches slightly from motherboard over time.


    Tools checklist for safe repair

    Before starting any repair:

    • Precision screwdriver set
    • Plastic pry tools
    • Compressed air blower
    • Isopropyl alcohol (90%+)
    • Soft brush
    • Tweezers
    • Magnifying light (recommended)
    • Replacement charging port (if needed)

    💡 Tech Mentor Tip: I’ve seen users force cables into loose ports until the entire motherboard charging rail got damaged. That’s how small issues become expensive repairs.


    Comparison: Temporary fix vs proper repair

    MethodSafetyDurabilityRecommendation
    Cleaning portHighMediumFirst step
    Cable adjustmentMediumLowTemporary
    Internal resolderingHighHighProfessional fix
    Port replacementVery highVery highBest solution
    Ignoring issueLowNoneNot recommended

    Step-by-step guide: How to fix a loose charging port on a tablet

    Now let’s go step-by-step like a professional technician.


    Step 1: Inspect charging cable and adapter

    Before opening the tablet:

    • Test another compatible cable
    • Check for loose connector head
    • Inspect charging brick

    💡 Tech Mentor Tip: Look, I’ve seen this error a thousand times—it’s not the tablet, it’s the cheap cable pretending to be fine.


    Step 2: Clean the charging port

    Use:

    • Compressed air
    • Soft brush
    • Wooden toothpick (carefully)

    Remove:

    • Dust
    • Lint
    • Debris buildup

    Never use metal objects inside the port.


    Step 3: Test port stability

    Insert cable and gently move it:

    • If connection drops → port is physically loose
    • If stable → issue may be software or cable

    Step 4: Open tablet (advanced users only)

    If cleaning doesn’t help:

    • Power off device
    • Remove back cover carefully
    • Disconnect battery first

    This prevents short circuits.


    Step 5: Inspect charging port assembly

    Check for:

    • Loose solder joints
    • Broken connector pins
    • PCB damage near port

    This is where most real faults are found.


    Step 6: Tighten or resolder connection

    If solder joints are weak:

    • Reflow solder carefully (professional method)
    • Or replace port module entirely

    ⚠️ Note: Improper heating can damage motherboard traces or BIOS-related power circuits.


    Step 7: Replace charging port (best solution)

    If damage is severe:

    • Remove old port
    • Install new OEM-compatible port
    • Ensure alignment is perfect

    This restores factory-level stability.


    Step 8: Reassemble and test charging

    After repair:

    • Reconnect battery
    • Test charging stability
    • Check movement sensitivity

    Cable should feel firm with no wobble.


    Software vs hardware confusion (common mistake)

    Many users think:

    • “Battery issue”
    • “Charging bug”
    • “Software glitch”

    But charging port issues are almost always hardware-based.

    No BIOS update or driver fix will repair a physically loose connector.


    Real Tech Mentor insight

    Here is the truth most people miss: charging ports don’t suddenly fail—they slowly degrade over time.

    You’ll notice:

    • Slight looseness first
    • Then unstable charging
    • Then complete failure

    And yes, I’ve seen users blame “drivers” or even motherboard issues (or write “motherbord damage”) when the real issue was just a worn-out USB-C port.

    Modern tablets in 2026 are powerful but physically delicate at connection points.


    When you should NOT DIY repair

    Stop immediately if:

    • Port is detached from board
    • Burn marks near charging IC
    • Device overheats during charging
    • Multiple failed charging components

    At that stage, professional micro-soldering is required.


    Prevention tips for future

    • Avoid charging while bending cable
    • Use magnetic charging adapters (where supported)
    • Clean port monthly
    • Use high-quality certified chargers
    • Avoid cheap cables that loosen connectors

    Small habits extend port life significantly.


    Final CTA: Fix it before it becomes a motherboard issue

    If your tablet charging port feels loose or unstable, don’t ignore it.

    Now you know exactly how to fix a loose charging port on a tablet using safe 2026 repair methods and real hardware engineering logic.

    For more deep repair guides, troubleshooting tutorials, and DIY hardware fixes, visit fixrig.xyz—your ultimate destination for hardware enthusiasts and repair experts.

    Got a tricky charging issue? Drop your problem in the comments or join the fixrig.xyz community. Someone has already fixed your exact tablet model before.

    Because in modern devices, a small loose port today can become a full motherboard failure tomorrow.

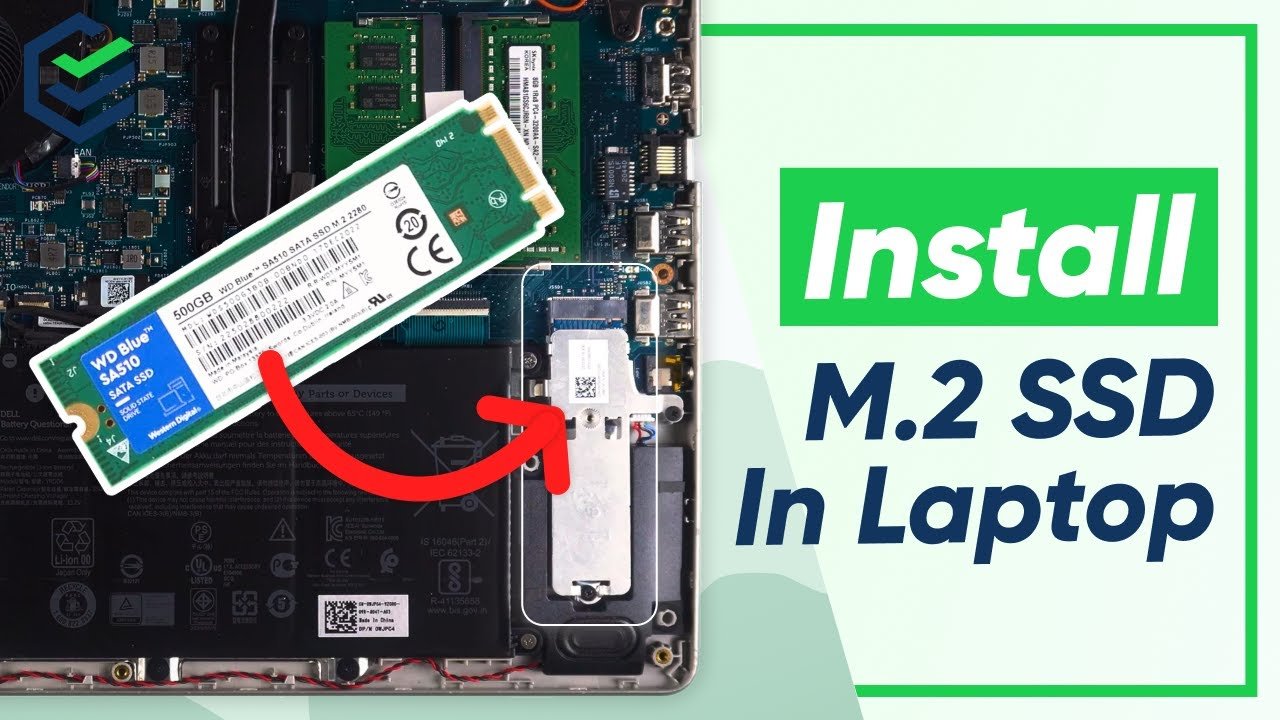
  • How to install an M.2 SSD in a laptop without a screw slot: Complete 2026 Expert Installation Guide

    How to install an M.2 SSD in a laptop without a screw slot: Complete 2026 Expert Installation Guide

    H1: How to install an M.2 SSD in a laptop without a screw slot and secure it safely without damaging your system

    Installing an M.2 SSD in a modern laptop is usually straightforward… until you run into a missing screw slot.

    And look, I’ve seen this situation a thousand times in repair benches and DIY setups. Users open their laptop expecting a standard M.2 mounting point, only to find a bare slot with no screw hole or missing retention mechanism.

    Here is the real talk about why your rig is acting up: manufacturers in 2026 are increasingly using screwless SSD retention systems, adhesive mounts, or shared bracket designs to reduce internal space and simplify assembly—but that creates confusion for DIY users.

    Let’s break this down properly like a senior IT hardware engineer.


    What does “no screw slot” for M.2 SSD mean?

    In older laptops, M.2 SSDs are secured using a small screw and standoff.

    But in modern ultrabooks and slim laptops:

    • Screw standoffs are pre-installed differently
    • Some use plastic clips instead of screws
    • Some rely on motherboard-integrated retention brackets
    • Some models simply omit visible screw points

    So the SSD is not unsupported—it’s just using a different mounting system.


    Common symptoms of incorrect M.2 installation

    Physical symptoms

    • SSD not staying in place
    • SSD lifting slightly from slot
    • Back cover not closing properly

    System symptoms

    • SSD not detected in BIOS
    • Random boot failure
    • Slow or unstable read/write speeds

    Advanced 2026 symptoms

    • BIOS NVMe detection delay
    • Thermal throttling on SSD due to poor contact
    • Voltage instability warnings in storage controller logs

    Why laptops remove screw slots in modern designs

    Manufacturers are optimizing for:

    1. Ultra-thin designs

    Less internal height = fewer screws

    2. Pre-installed standoff systems

    SSD is “pushed-and-locked” instead of screwed

    3. Assembly automation

    Factories prefer snap-fit components

    4. Thermal efficiency

    Direct contact cooling instead of mechanical pressure


    Tools checklist for safe M.2 SSD installation

    Before starting:

    • M.2 NVMe SSD
    • Anti-static wrist strap
    • Thermal pad (optional but recommended)
    • Precision plastic tools
    • Laptop service manual
    • Double-sided thermal adhesive tape
    • Small rubber spacer (optional)
    • Bright LED light

    💡 Tech Mentor Tip: I’ve seen users force SSDs into slots without proper support and end up bending the connector pins—so always check mounting design first.


    Comparison: screw mount vs screwless SSD installation

    MethodStabilitySafetyPerformanceRecommendation
    Traditional screw mountHighHighStableBest
    Rubber spacer methodMediumHighStableGood alternative
    Adhesive thermal tapeMediumMediumHeat-sensitiveTemporary use
    Loose insertion (no support)LowLowUnstableNot recommended

    Step-by-step guide: How to install an M.2 SSD in a laptop without a screw slot

    Now let’s go step-by-step like a professional hardware engineer.


    Step 1: Identify your SSD slot type

    Open laptop back panel and check:

    • Is there a standoff already built-in?
    • Is there a clip mechanism?
    • Is the slot bare with no retention system?

    This determines your installation method.


    Step 2: Insert the M.2 SSD correctly

    • Align SSD at 30-degree angle
    • Insert gently into slot
    • Push down slowly

    Do NOT force it.

    💡 Tech Mentor Tip: If it doesn’t slide in smoothly, don’t assume it’s the motherbord issue—check alignment first.


    Step 3: Check for missing screw support

    If there is no screw slot:

    You likely have one of these systems:

    • Pre-fixed hidden standoff
    • Clip-lock bracket system
    • Adhesive support design

    Step 4: Use rubber spacer or foam support (safe method)

    If no screw exists:

    • Place small rubber pad under SSD tip
    • Ensure SSD is level
    • Avoid bending stress on connector

    This prevents movement and maintains stability.


    Step 5: Use thermal adhesive tape (advanced method)

    For better stability:

    • Apply thermal double-sided tape under SSD
    • Press gently into position

    This helps with:

    • Heat transfer
    • Physical stability
    • Vibration resistance

    Step 6: Secure with motherboard bracket (if available)

    Some laptops include:

    • Metal retention bars
    • Plastic locking arms

    If present:

    • Lock SSD into place using bracket
    • Ensure no movement

    Step 7: Reassemble and test BIOS detection

    Power system and enter BIOS:

    Check:

    • SSD detection under NVMe list
    • Storage capacity display
    • Boot priority options

    If detected → installation successful

    If not detected → reseat SSD carefully


    BIOS and driver considerations (important in 2026 systems)

    Even if hardware is correct:

    • Outdated BIOS may not detect new NVMe drives
    • Storage drivers may need updates
    • PCIe lane configuration may require adjustment

    In modern laptops:

    • BIOS controls SSD voltage allocation
    • PCIe Gen4/Gen5 compatibility affects detection
    • Thermal throttling settings influence performance stability

    Common mistakes users make

    • Forcing SSD into incorrect angle
    • Ignoring missing standoff systems
    • Using metal screws where not required
    • Not checking BIOS compatibility
    • Assuming SSD is defective immediately

    And yes, I’ve seen users reinstall Windows three times thinking SSD is broken when it was just not seated properly.


    Real Tech Mentor insight

    Here is the truth most people don’t realize: in screwless M.2 designs, stability is not about force—it’s about correct pressure distribution.

    Manufacturers assume:

    • Laptop chassis supports SSD naturally
    • Thermal pads stabilize movement
    • PCB design holds connector alignment

    But DIY users often skip these assumptions and try traditional screw logic.

    That’s where mistakes happen.

    And yes, I’ve even seen people blame “motherbord slot damage” when the SSD was just slightly misaligned.


    When you should NOT DIY this installation

    Stop if:

    • SSD slot is physically damaged
    • Connector pins are bent
    • Laptop does not recognize any SSD
    • Heating issues appear immediately after install

    At that stage, professional repair or motherboard inspection is required.


    Prevention tips for stable SSD installation

    • Always check laptop service manual
    • Use thermal pads for extra stability
    • Avoid pressure on SSD edges
    • Keep BIOS updated
    • Ensure SSD firmware compatibility

    Final CTA: Install smart, not forcefully

    If you are trying to install an M.2 SSD in a laptop without a screw slot, don’t panic and don’t force hardware.

    Now you know exactly how to install an M.2 SSD in a laptop without a screw slot using safe 2026 techniques, proper alignment methods, and real engineering practices.

    For more deep hardware installation guides, troubleshooting tutorials, and system optimization tips, visit fixrig.xyz—your ultimate hub for hardware enthusiasts and DIY fixers.

    Got a tricky SSD installation issue? Drop your laptop model in the comments or ask the fixrig.xyz community. Someone has already solved your exact configuration before.

    Because in modern laptops, installation success is not about force—it’s about precision engineering understanding.