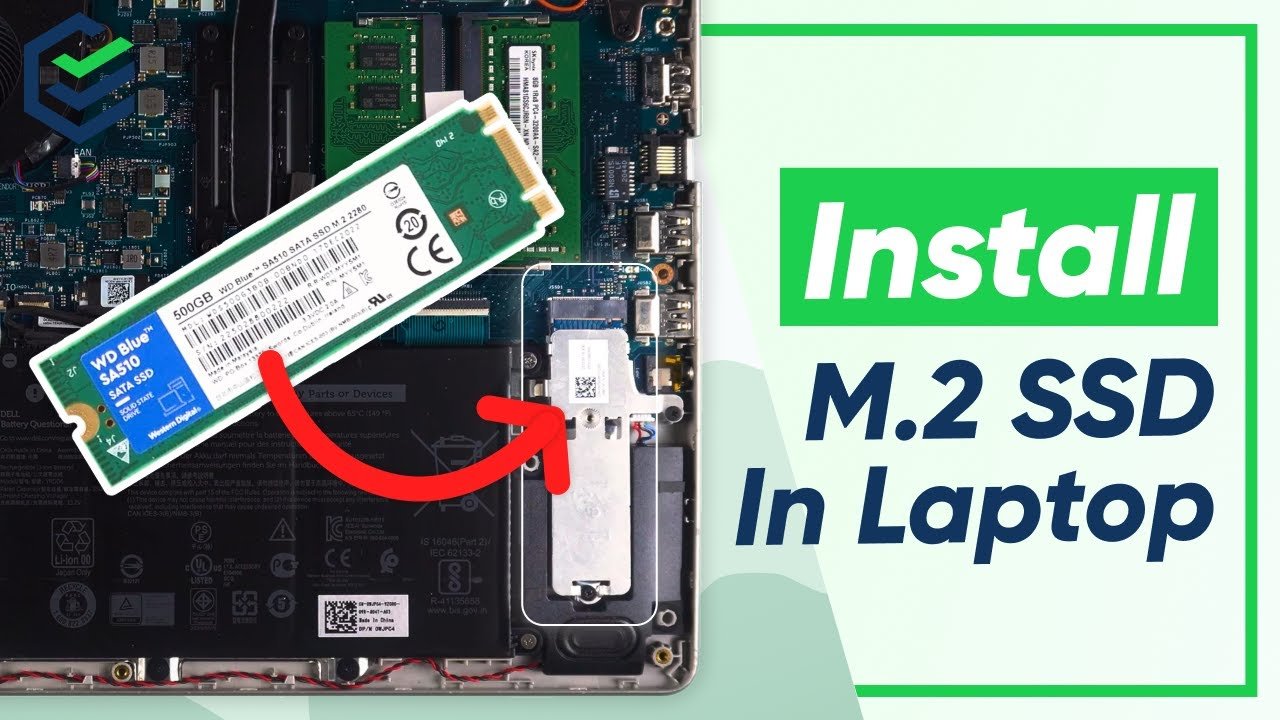

H1: How to install an M.2 SSD in a laptop without a screw slot and secure it safely without damaging your system
Installing an M.2 SSD in a modern laptop is usually straightforward… until you run into a missing screw slot.
And look, I’ve seen this situation a thousand times in repair benches and DIY setups. Users open their laptop expecting a standard M.2 mounting point, only to find a bare slot with no screw hole or missing retention mechanism.
Here is the real talk about why your rig is acting up: manufacturers in 2026 are increasingly using screwless SSD retention systems, adhesive mounts, or shared bracket designs to reduce internal space and simplify assembly—but that creates confusion for DIY users.
Let’s break this down properly like a senior IT hardware engineer.
What does “no screw slot” for M.2 SSD mean?
In older laptops, M.2 SSDs are secured using a small screw and standoff.
But in modern ultrabooks and slim laptops:
- Screw standoffs are pre-installed differently
- Some use plastic clips instead of screws
- Some rely on motherboard-integrated retention brackets
- Some models simply omit visible screw points
So the SSD is not unsupported—it’s just using a different mounting system.
Common symptoms of incorrect M.2 installation
Physical symptoms
- SSD not staying in place
- SSD lifting slightly from slot
- Back cover not closing properly
System symptoms
- SSD not detected in BIOS
- Random boot failure
- Slow or unstable read/write speeds
Advanced 2026 symptoms
- BIOS NVMe detection delay
- Thermal throttling on SSD due to poor contact
- Voltage instability warnings in storage controller logs
Why laptops remove screw slots in modern designs
Manufacturers are optimizing for:
1. Ultra-thin designs
Less internal height = fewer screws
2. Pre-installed standoff systems
SSD is “pushed-and-locked” instead of screwed
3. Assembly automation
Factories prefer snap-fit components
4. Thermal efficiency
Direct contact cooling instead of mechanical pressure
Tools checklist for safe M.2 SSD installation
Before starting:
- M.2 NVMe SSD
- Anti-static wrist strap
- Thermal pad (optional but recommended)
- Precision plastic tools
- Laptop service manual
- Double-sided thermal adhesive tape
- Small rubber spacer (optional)
- Bright LED light
💡 Tech Mentor Tip: I’ve seen users force SSDs into slots without proper support and end up bending the connector pins—so always check mounting design first.
Comparison: screw mount vs screwless SSD installation
| Method | Stability | Safety | Performance | Recommendation |
|---|---|---|---|---|
| Traditional screw mount | High | High | Stable | Best |
| Rubber spacer method | Medium | High | Stable | Good alternative |
| Adhesive thermal tape | Medium | Medium | Heat-sensitive | Temporary use |
| Loose insertion (no support) | Low | Low | Unstable | Not recommended |
Step-by-step guide: How to install an M.2 SSD in a laptop without a screw slot
Now let’s go step-by-step like a professional hardware engineer.
Step 1: Identify your SSD slot type
Open laptop back panel and check:
- Is there a standoff already built-in?
- Is there a clip mechanism?
- Is the slot bare with no retention system?
This determines your installation method.
Step 2: Insert the M.2 SSD correctly
- Align SSD at 30-degree angle
- Insert gently into slot
- Push down slowly
Do NOT force it.
💡 Tech Mentor Tip: If it doesn’t slide in smoothly, don’t assume it’s the motherbord issue—check alignment first.
Step 3: Check for missing screw support
If there is no screw slot:
You likely have one of these systems:
- Pre-fixed hidden standoff
- Clip-lock bracket system
- Adhesive support design
Step 4: Use rubber spacer or foam support (safe method)
If no screw exists:
- Place small rubber pad under SSD tip
- Ensure SSD is level
- Avoid bending stress on connector
This prevents movement and maintains stability.
Step 5: Use thermal adhesive tape (advanced method)
For better stability:
- Apply thermal double-sided tape under SSD
- Press gently into position
This helps with:
- Heat transfer
- Physical stability
- Vibration resistance
Step 6: Secure with motherboard bracket (if available)
Some laptops include:
- Metal retention bars
- Plastic locking arms
If present:
- Lock SSD into place using bracket
- Ensure no movement
Step 7: Reassemble and test BIOS detection
Power system and enter BIOS:
Check:
- SSD detection under NVMe list
- Storage capacity display
- Boot priority options
If detected → installation successful
If not detected → reseat SSD carefully
BIOS and driver considerations (important in 2026 systems)
Even if hardware is correct:
- Outdated BIOS may not detect new NVMe drives
- Storage drivers may need updates
- PCIe lane configuration may require adjustment
In modern laptops:
- BIOS controls SSD voltage allocation
- PCIe Gen4/Gen5 compatibility affects detection
- Thermal throttling settings influence performance stability
Common mistakes users make
- Forcing SSD into incorrect angle
- Ignoring missing standoff systems
- Using metal screws where not required
- Not checking BIOS compatibility
- Assuming SSD is defective immediately
And yes, I’ve seen users reinstall Windows three times thinking SSD is broken when it was just not seated properly.
Real Tech Mentor insight
Here is the truth most people don’t realize: in screwless M.2 designs, stability is not about force—it’s about correct pressure distribution.
Manufacturers assume:
- Laptop chassis supports SSD naturally
- Thermal pads stabilize movement
- PCB design holds connector alignment
But DIY users often skip these assumptions and try traditional screw logic.
That’s where mistakes happen.
And yes, I’ve even seen people blame “motherbord slot damage” when the SSD was just slightly misaligned.
When you should NOT DIY this installation
Stop if:
- SSD slot is physically damaged
- Connector pins are bent
- Laptop does not recognize any SSD
- Heating issues appear immediately after install
At that stage, professional repair or motherboard inspection is required.
Prevention tips for stable SSD installation
- Always check laptop service manual
- Use thermal pads for extra stability
- Avoid pressure on SSD edges
- Keep BIOS updated
- Ensure SSD firmware compatibility
Final CTA: Install smart, not forcefully
If you are trying to install an M.2 SSD in a laptop without a screw slot, don’t panic and don’t force hardware.
Now you know exactly how to install an M.2 SSD in a laptop without a screw slot using safe 2026 techniques, proper alignment methods, and real engineering practices.
For more deep hardware installation guides, troubleshooting tutorials, and system optimization tips, visit fixrig.xyz—your ultimate hub for hardware enthusiasts and DIY fixers.
Got a tricky SSD installation issue? Drop your laptop model in the comments or ask the fixrig.xyz community. Someone has already solved your exact configuration before.
Because in modern laptops, installation success is not about force—it’s about precision engineering understanding.
Leave a Reply