Category: Data & Storage Troubleshooting

  • Fixing “Disk Boot Failure” on Modern UEFI Systems (Complete 2026 Hardware Troubleshooting Guide)

    Fixing “Disk Boot Failure” on Modern UEFI Systems (Complete 2026 Hardware Troubleshooting Guide)

    Look, I’ve seen this error a thousand times—and it always shows up at the worst possible moment.

    You press the power button… fans spin… and instead of Windows loading, you get:
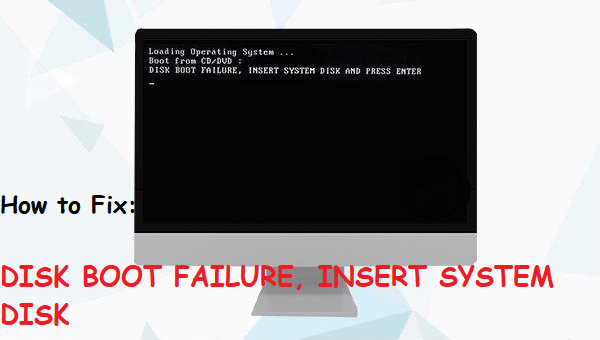
    “Disk Boot Failure”
    or
    “No Boot Device Found”

    Here is the real talk about why your rig is acting up: this is not just a Windows issue. It’s a boot chain failure inside your UEFI system, meaning your motherboard can’t correctly find, read, or initialize your storage device.

    In this expert guide from fixrig.xyz, I’ll break down Fixing “Disk Boot Failure” on modern UEFI systems, step-by-step, using real hardware troubleshooting logic—not guesswork.


    Common Symptoms of Disk Boot Failure

    Before fixing anything, confirm the behavior:

    1. “No Boot Device Found”

    System cannot locate OS drive.

    2. Boot Loop Into BIOS

    PC keeps returning to UEFI screen.

    3. Black Screen After POST

    System passes startup but fails to load OS.

    4. SSD/HDD Not Detected

    Drive missing from BIOS entirely.

    If your seeing any of these, your boot chain is broken somewhere.


    Root Causes (UEFI Boot System Breakdown)

    Incorrect Boot Order

    System tries wrong drive first.

    Corrupted Bootloader (EFI Partition)

    UEFI cannot find boot files.

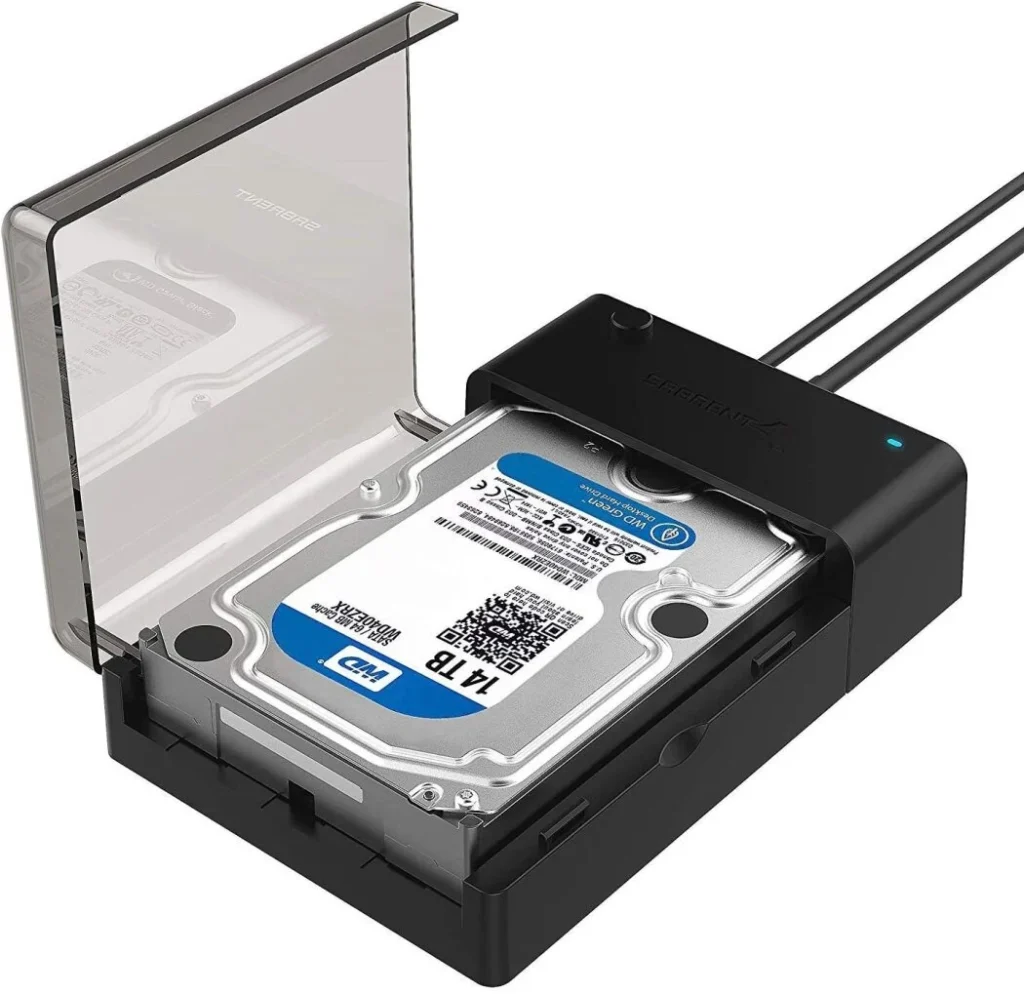
    Faulty or Disconnected Storage Drive

    Loose SATA/NVMe connection.

    BIOS Reset or Update Failure

    Settings reverted to defaults.

    SSD/HDD Hardware Failure

    Drive not responding at hardware level.

    Secure Boot / UEFI Conflicts

    Modern systems block incompatible boot entries.


    Tools Checklist Before Troubleshooting

    Prepare:

    • BIOS/UEFI access (DEL/F2 key)
    • Windows installation USB
    • SATA/NVMe cables (if desktop)
    • External drive enclosure
    • Spare bootable drive (optional)

    Pro tip: Always verify hardware before assuming software corruption.


    Comparison Table: Software Fix vs Hardware Fix

    Fix TypeDifficultyCostSuccess Rate
    Boot Order FixEasyFreeHigh
    UEFI RepairMediumFreeHigh
    Bootloader RebuildMediumFreeVery High
    Cable/Drive CheckEasyLowHigh
    Drive ReplacementHard$$Maximum

    Step-by-Step: Fixing “Disk Boot Failure” on Modern UEFI Systems

    Step 1: Enter BIOS/UEFI

    Restart system and press:

    • DEL / F2 / ESC (depends on motherboard)

    Check:

    • Is your SSD/HDD visible?

    If NOT detected → hardware issue likely.


    Step 2: Check Boot Order

    Go to Boot Settings:

    • Set your main SSD as Boot Option #1
    • Disable unnecessary boot devices

    Incorrect priority is one of the most common causes.


    Step 3: Enable UEFI Mode Properly

    Modern systems require:

    • UEFI mode enabled
    • Legacy/CSM disabled (in most cases)

    Mismatch causes boot failure.


    Step 4: Check Storage Mode (AHCI vs RAID)

    Wrong mode breaks booting:

    • AHCI → standard SSD setups
    • RAID → multi-drive configurations

    Changing this incorrectly can trigger Disk Boot Failure.


    Step 5: Inspect Physical Connections

    For desktop users:

    • Reseat SATA cables
    • Reinsert NVMe SSD
    • Check motherboard slots

    Loose connections = instant boot failure.


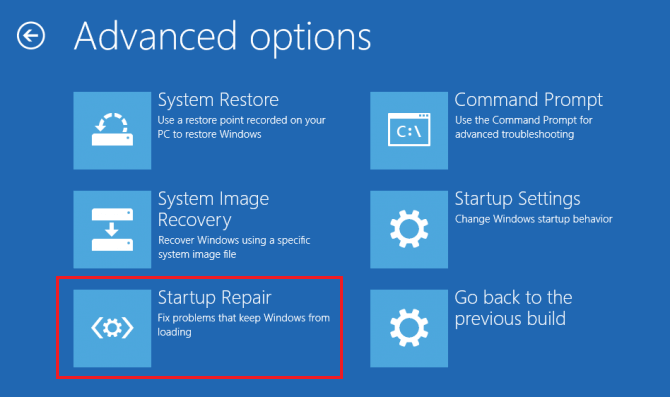
    Step 6: Repair Bootloader Using Windows USB

    If drive is detected:

    • Boot from Windows USB
    • Select Repair Your Computer
    • Open Command Prompt

    Run:

    • bootrec /fixmbr
    • bootrec /fixboot
    • bootrec /rebuildbcd

    This rebuilds EFI boot structure.


    Step 7: Check Disk Health (SMART Status)

    A failing drive may show:

    • Slow detection
    • Missing partitions
    • Random boot failure

    If SMART status is bad → backup immediately.


    Step 8: Disable Secure Boot Temporarily

    Secure Boot can block boot entries:

    • Disable it temporarily
    • Test system boot

    Then re-enable after fixing.


    Advanced Troubleshooting (Pro Level)

    BIOS Reset After Update

    If system recently updated BIOS:

    • Settings may reset
    • Boot order often changes

    Reconfigure manually.
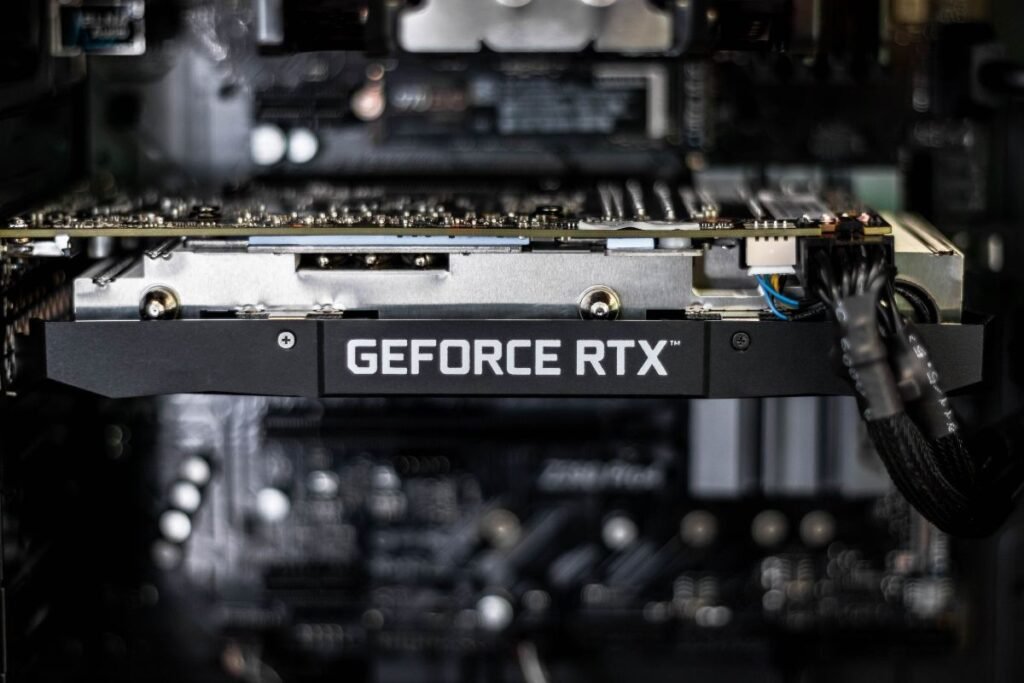

    NVMe Slot Issues

    Some motherboards share lanes:

    • GPU + NVMe conflicts
    • Disabled slots

    Check motherboard manual.


    Corrupted EFI Partition

    Symptoms:

    • Drive detected but won’t boot

    Fix via bootrec or reinstall EFI.


    Voltage or PSU Instability

    Unstable power can cause:

    • Drive detection failure
    • Random boot errors

    Check PSU health.


    Common Mistakes That Make It Worse

    Reinstalling OS Immediately

    This destroys recovery chances unnecessarily.

    Ignoring BIOS Settings

    Most users skip this critical step.

    Switching Storage Modes Randomly

    Can break existing installations.

    Not Checking Physical Drive

    Software fixes won’t help dead hardware.


    Real-World Scenarios

    Problem: SSD not detected

    Cause: Cable or hardware failure
    Fix: Reseat or replace drive


    Problem: Boot loop into BIOS

    Cause: Wrong boot order
    Fix: Set correct boot device


    Problem: After Windows update system won’t boot

    Cause: EFI corruption
    Fix: Bootloader repair


    Pro Tips from a Hardware Engineer

    • Always back up EFI and system partitions
    • Keep BIOS updated—but stable
    • Prefer UEFI over Legacy boot
    • Use high-quality SSDs for OS drives

    And here’s something most guides won’t tell you:
    A single BIOS setting change can make a perfectly healthy drive look “dead” to your system.


    When to Replace Hardware

    Replace your drive if:

    • Not detected in BIOS at all
    • SMART shows failure warnings
    • Repeated boot failures continue

    At that point, recovery is secondary to replacement.


    Final Thoughts: Boot Failure is a System-Level Problem

    Fixing “Disk Boot Failure” on modern UEFI systems is not just about Windows repair—it’s about understanding the entire boot chain: BIOS → UEFI → Storage → EFI → OS.

    Break one link, and the system stops.

    Fix the right link, and everything works again.


    CTA: Fix Your Boot System Like a Pro

    At fixrig.xyz, we help you diagnose hardware problems at the root—not just treat symptoms.

    Still stuck on Disk Boot Failure? Not sure if it’s BIOS, SSD, or bootloader?

    Drop your system specs and issue in the comments—and let’s troubleshoot your rig step-by-step.

    Because your system should boot cleanly… every single time.

  • How to Recover Data from a Clicking Hard Drive Safely (2026 Hardware Recovery Guide)

    How to Recover Data from a Clicking Hard Drive Safely (2026 Hardware Recovery Guide)

    Look, I’ve seen this issue a thousand times—and it always starts the same way.

    You hear a faint click… click… click… from your hard drive. Then your system slows down. Then files disappear. And finally—your drive becomes inaccessible.

    Here is the real talk about why your rig is acting up: a clicking hard drive is not a software issue. It’s almost always mechanical failure inside the drive—read/write head damage, spindle issues, or firmware-level corruption.

    In this expert guide from fixrig.xyz, I’ll show you how to recover data from a clicking hard drive safely, without making the damage worse.


    Why Hard Drives Start Clicking (Hardware Reality)

    A clicking sound usually means the drive is struggling to read data.

    1. Read/Write Head Failure

    The head tries to read but keeps resetting position.

    2. Spindle Motor Issues

    Platters fail to spin correctly.

    3. Bad Sectors Expansion

    Damaged areas increase rapidly.

    4. Power Instability

    Voltage drops can cause repeated head calibration.

    5. Firmware Loop Failure

    Drive can’t initialize properly.

    If your hearing clicking sounds repeatedly, stop using the drive immediately.


    Critical Warning Before Recovery

    Never do this:

    • Don’t keep rebooting the PC
    • Don’t run disk repair tools repeatedly
    • Don’t try random “fix software”

    Every attempt can reduce recovery chances.


    Tools Checklist for Safe Data Recovery

    Prepare carefully:

    • SATA/USB adapter
    • Secondary working PC
    • Data recovery software (read-only mode)
    • External storage drive
    • Anti-static environment

    Pro tip: Always recover to a different drive—not the same one.


    Comparison Table: DIY Recovery vs Professional Recovery

    MethodRisk LevelCostSuccess Rate
    Software RecoveryMediumLowModerate
    Disk ImagingLowMediumHigh
    Clean Room RecoveryVery LowHighVery High
    Continued Use of DriveExtremeFreeVery Low

    Step-by-Step: How to Recover Data from a Clicking Hard Drive Safely

    Step 1: Stop Using the Drive Immediately

    This is the most important step.

    • Power off system
    • Disconnect drive

    Every second of use increases damage.


    Step 2: Check Basic Connections

    Sometimes the issue is not internal:

    • Replace SATA cable
    • Try different USB port
    • Test external enclosure

    Loose connections can mimic clicking.


    Step 3: Try External Connection Only

    • Connect drive via USB adapter
    • Avoid internal booting

    This reduces system stress on the drive.


    Step 4: Attempt Drive Detection (Carefully)

    Check if system detects the drive:

    • BIOS check
    • Disk Management (Windows)

    If not detected → likely hardware failure.


    Step 5: Create a Sector-by-Sector Clone

    This is the safest DIY recovery method:

    • Use disk imaging tools
    • Clone entire drive to healthy disk

    This prevents further wear.

    Never recover directly from failing drive.


    Step 6: Use Data Recovery Software

    Once image is created:

    • Scan cloned drive
    • Recover files selectively

    Focus on critical data first.


    Step 7: Prioritize Important Files

    Recover in order:

    • Documents
    • Photos
    • Work files
    • System data

    Avoid unnecessary full restore attempts.


    Advanced Troubleshooting (Pro Level)

    Check Power Supply Stability

    Unstable PSU can worsen clicking:

    • Test with different power source
    • Avoid cheap adapters

    Voltage drops can damage heads further.


    Listen for Pattern Changes

    • Fast clicking = head failure
    • Slow clicking = spindle issue
    • No spin = motor failure

    This helps diagnose severity.


    BIOS Detection Behavior

    If BIOS:

    • Detects drive → partial recovery possible
    • Doesn’t detect → serious hardware failure

    Common Mistakes That Destroy Data Forever

    Repeated Power Cycling

    This causes more head crashes.

    Running CHKDSK Immediately

    Can overwrite recoverable data.

    Freezing the Drive (Myth)

    Does not repair modern drives and can cause condensation damage.

    Ignoring Early Warning Clicks

    Early intervention is critical.


    Real-World Scenarios

    Problem: Clicking but still detected

    Cause: Bad sectors or head misalignment
    Fix: Clone immediately


    Problem: Not detected at all

    Cause: PCB or motor failure
    Fix: Professional recovery needed


    Problem: Clicking after drop

    Cause: Physical head crash
    Fix: Stop immediately, no DIY attempt


    Pro Tips from a Hardware Engineer

    • Always maintain backups (3-2-1 rule)
    • Never trust a clicking drive again
    • Use SSDs for critical work
    • Monitor SMART health regularly

    And here’s something most guides won’t tell you:
    Once a mechanical drive starts clicking, every additional attempt to “fix it” usually reduces recovery success.


    When to Go for Professional Recovery

    Choose expert recovery if:

    • Drive is not detected in BIOS
    • Clicking is continuous and loud
    • Data is highly valuable

    At this stage, DIY methods may cause permanent loss.


    Final Thoughts: Speed Matters More Than Tools

    Recovering data from a clicking hard drive safely is not about fancy software—it’s about timing and damage control.

    Stop using the drive early.
    Clone it properly.
    Recover from a safe copy.

    That’s the real strategy.


    CTA: Save Your Data the Right Way

    At fixrig.xyz, we help you understand hardware failures before they become disasters.

    Still hearing clicking sounds? Not sure if your drive is recoverable?

    Drop your drive symptoms in the comments—and let’s guide you step-by-step before it’s too late.

    Because once data is gone… prevention was your only chance.

  • Troubleshooting External Hard Drive Not Showing Up in Disk Management (2026 Expert Fix Guide)

    Troubleshooting External Hard Drive Not Showing Up in Disk Management (2026 Expert Fix Guide)

    Look, I’ve seen this issue a thousand times—and it always starts with the same panic moment.

    You plug in your external hard drive… nothing shows up in File Explorer… then you open Disk Management and—still nothing.

    Here is the real talk about why your rig is acting up: this is not always data loss. In most cases, it’s a hardware detection failure between USB controller, drivers, power delivery, or disk initialization at OS level.

    In this fixrig.xyz expert guide, I’ll walk you through troubleshooting external hard drive not showing up in Disk Management, step by step, like a real hardware engineer—not a generic tech blog.


    Common Symptoms of External Drive Not Showing Up

    Before fixing, identify the exact behavior:

    1. Drive Not Visible in File Explorer

    Windows does not assign a drive letter.

    2. Missing in Disk Management

    Even advanced tools can’t detect it.

    3. USB Sound But No Drive

    Connection is partially working.

    4. Device Appears in Device Manager Only

    Hardware is detected but not initialized.

    5. Random Disconnects

    Drive appears and disappears repeatedly.


    Root Causes (Hardware + System-Level Breakdown)

    Faulty USB Port or Cable

    Weak or damaged connection prevents stable detection.

    Insufficient Power Supply

    External drives need proper voltage delivery.

    Missing or Corrupted Drivers

    System cannot communicate with storage device.

    Uninitialized or RAW Disk State

    Drive exists but has no partition table.

    BIOS or UEFI USB Configuration Issues

    Some systems disable external storage detection.

    Physical Drive Failure

    Mechanical or SSD failure inside enclosure.


    Tools Checklist Before Troubleshooting

    Prepare these tools:

    • Alternate USB cable
    • Different USB ports (rear preferred)
    • External power adapter (if required)
    • Another PC for testing
    • Disk Management access
    • Device Manager access

    Pro tip: Always isolate hardware vs software before assuming data loss.


    Comparison Table: Software Issue vs Hardware Issue

    Cause TypeSymptomsFix DifficultyRecovery Chance
    Software (Drivers/Partition)Drive partially detectedEasyHigh
    USB Cable/Port IssueIntermittent detectionEasyHigh
    Power FailureDrive spins off/onMediumMedium
    Firmware/Controller IssueNot visible anywhereHardMedium
    Physical FailureNo detection at allVery HardLow

    Step-by-Step: Troubleshooting External Hard Drive Not Showing in Disk Management

    Step 1: Check Physical Connection

    Start simple:

    • Unplug and replug drive
    • Try different USB port
    • Avoid front panel ports

    Look, I’ve seen this error a thousand times—it’s often just a bad cable.


    Step 2: Try Another System

    Connect drive to another PC:

    • If it works → your system issue
    • If not → drive issue

    This isolates the fault immediately.


    Step 3: Check Device Manager

    Press:

    • Win + X → Device Manager

    Look under:

    • Disk Drives
    • USB Controllers

    If unknown device appears → driver issue.


    Step 4: Scan Disk Management Properly

    Open:

    • Disk Management

    Check for:

    • Unallocated disk
    • Offline disk
    • No drive letter

    If visible but unallocated → data may still be safe.


    Step 5: Assign Drive Letter Manually

    If disk exists but not shown:

    • Right-click → Change Drive Letter
    • Assign new letter

    This fixes many “invisible drive” cases.


    Step 6: Reinstall USB Drivers

    Go to Device Manager:

    • Uninstall USB controllers
    • Restart PC

    Windows will reinstall drivers automatically.

    Drivers play a critical role in detection stability.


    Step 7: Check Power Delivery

    Some external drives require:

    • Dual USB power
    • External adapter

    Low voltage = drive spin failure.

    Voltage instability is a hidden cause most users ignore.


    Step 8: Initialize Disk (ONLY if empty or new)

    If disk shows as:

    • Unknown
    • Not initialized

    You can initialize it—but WARNING:

    • This erases existing partition data structure

    Only do this if data is not important.


    Step 9: Disable USB Power Saving

    Windows may cut power:

    • Control Panel → Power Options
    • Disable USB selective suspend

    This prevents random disconnects.


    Step 10: BIOS/UEFI USB Check

    Enter BIOS:

    • Ensure USB storage support enabled
    • Enable legacy USB if required

    Some systems restrict external device detection at firmware level.


    Advanced Troubleshooting (Pro Level)

    Check Disk in Diskpart

    Use Command Prompt:

    • diskpart
    • list disk

    If visible here → software-level issue.

    If NOT visible → hardware-level problem.


    Test Enclosure vs Drive Separately

    Sometimes:

    • SATA drive is fine
    • USB enclosure is dead

    Try removing drive from enclosure.


    Check SMART Status (If Detected)

    If drive appears:

    • Run SMART diagnostics

    Warning signs:

    • Reallocated sectors
    • Read errors

    Common Mistakes That Make It Worse

    Formatting Immediately

    This destroys recoverable data structure.

    Ignoring Power Issues

    Many external drives fail due to low voltage.

    Using Cheap USB Hubs

    Unstable power = detection failure.

    Reconnecting Repeatedly

    Can worsen mechanical wear.


    Real-World Scenarios

    Problem: Drive spins but not visible

    Cause: Partition or driver issue
    Fix: Disk Management repair


    Problem: No response at all

    Cause: Power or hardware failure
    Fix: Try different cable or enclosure


    Problem: Visible on other PC

    Cause: System configuration issue
    Fix: Driver reset or USB fix


    Pro Tips from a Hardware Engineer

    • Always use rear motherboard USB ports
    • Avoid cheap cables for external HDDs
    • Backup data regularly (3-2-1 rule)
    • Monitor drive health with SMART tools

    And here’s something most guides won’t tell you:
    External drive issues are often NOT disk failures—they are USB controller or power instability problems disguised as disk failure.


    When to Consider Hardware Failure

    Assume failure if:

    • Drive not detected on multiple systems
    • No spin-up sound
    • Repeated clicking or vibration issues
    • Enclosure replacement doesn’t help

    At that stage, professional recovery may be needed.


    Final Thoughts: Diagnose Before You Panic

    Troubleshooting external hard drive not showing up in Disk Management is all about layered diagnosis:

    Hardware → Cable → Power → Drivers → Disk Management → BIOS

    Skip steps, and you’ll miss the real cause.

    Follow the process, and most “dead drives” come back to life—or at least reveal their true condition.


    CTA: Fix Your Storage Like a Pro

    At fixrig.xyz, we don’t guess—we diagnose hardware problems properly.

    Still can’t see your external drive in Disk Management? Not sure if it’s dead or just hidden?

    Drop your setup details in the comments—and we’ll help you troubleshoot it step by step.

    Because in real hardware engineering… nothing is ever “random”—it’s always a signal waiting to be understood.

  • How to Fix Coil Whine in High-End Graphics Cards (2026 Hardware Engineer Guide)

    How to Fix Coil Whine in High-End Graphics Cards (2026 Hardware Engineer Guide)

    Look, I’ve seen this issue a thousand times—and it always confuses users the same way.

    You buy a high-end GPU, install it, run a game… and suddenly you hear a high-pitched electrical buzzing sound.

    That’s coil whine.

    Here is the real talk about why your rig is acting up: coil whine is not a “fault” in most cases—it’s a physics side-effect of electrical components vibrating under high load frequency changes, especially in modern high-performance GPUs.

    In this fixrig.xyz expert breakdown, I’ll show you how to fix coil whine in high-end graphics cards, or at least reduce it to near silence using real hardware-level techniques.


    What Is Coil Whine? (Hardware Explanation)

    Coil whine happens when electrical components vibrate at high frequency under load.

    Main Sources Inside GPU:

    • Power delivery coils (VRMs)
    • Inductors on PCB
    • Capacitor oscillation under load spikes

    When GPU load changes rapidly, current flow fluctuates, causing vibration → sound.


    Common Symptoms of Coil Whine

    1. High-Pitched Noise During Gaming

    Especially in high-FPS scenes.

    2. Noise Changes with FPS

    More FPS = more whine.

    3. Silent Desktop, Loud Under Load

    Idle is fine, gaming triggers sound.

    4. PSU or GPU Area Buzzing

    Sound comes from GPU zone or PSU region.


    Root Causes (2026 GPU Power Behavior)

    High Frame Rates (Uncapped FPS)

    Modern GPUs push 300–1000 FPS in menus → unstable power draw.

    Voltage Spikes

    Rapid voltage switching in VRMs.

    PSU Ripple Noise

    Low-quality power supply amplifies coil vibrations.

    Poor Electrical Dampening

    Budget GPUs or aging components lack insulation.

    Extreme Overclocking

    Increases current fluctuations.


    Tools Checklist for Diagnosis

    Before attempting fixes:

    • FPS limiter software
    • GPU monitoring tool
    • PSU with stable output rating
    • Alternative power cable
    • Benchmark software

    Pro tip: Always test coil whine under controlled FPS conditions.


    Comparison Table: Software Fix vs Hardware Fix

    Fix TypeDifficultyCostEffectiveness
    FPS LimitingEasyFreeHigh
    V-Sync / G-SyncEasyFreeHigh
    Undervolting GPUMediumFreeVery High
    PSU UpgradeMedium$$High
    GPU ReplacementHard$$$Absolute

    Step-by-Step: How to Fix Coil Whine in High-End Graphics Cards

    Step 1: Limit FPS Immediately

    This is the most effective first step.

    • Enable V-Sync
    • Or set FPS cap (60/120/144)

    Why it works:
    Less FPS = less power fluctuation = reduced coil vibration.


    Step 2: Enable G-Sync or FreeSync

    If supported:

    • Smooth frame delivery
    • Reduced sudden power spikes

    This stabilizes GPU load behavior.


    Step 3: Try Undervolting GPU

    Undervolting reduces electrical stress:

    • Lower voltage
    • Same performance in many cases
    • Reduced coil vibration

    Use tools like MSI Afterburner.


    Step 4: Check PSU Quality

    Look, I’ve seen this error a thousand times—people blame GPU, but PSU is often the real culprit.

    Check:

    • Wattage rating
    • 80+ certification
    • Stable rails (12V line)

    A weak PSU = unstable voltage = louder coil whine.


    Step 5: Change Power Cable or PCIe Connector

    Sometimes issue is simple:

    • Replace PCIe cables
    • Avoid daisy-chaining

    Poor contact increases electrical noise.


    Step 6: Try Different Power Outlet

    Yes, even wall power matters:

    • Avoid overloaded extension boards
    • Use direct socket

    Voltage instability contributes to noise.


    Step 7: Adjust In-Game Settings

    High FPS menus are the worst offenders:

    • Cap menu FPS
    • Reduce unnecessary rendering load

    Many games run 500+ FPS in menus → coil whine spikes.


    Step 8: Apply GPU Power Limit

    In GPU software:

    • Reduce power limit by 10–20%

    This stabilizes voltage swings.


    Step 9: Test Case Airflow & Mounting

    Improper mounting can amplify noise:

    • Tighten GPU screws
    • Ensure no vibration contact with case

    Sometimes sound is amplified physically.


    Step 10: BIOS/UEFI Power Settings

    Some motherboards support:

    • PCIe power management
    • Power phase tuning

    Adjusting this can reduce noise.


    Advanced Troubleshooting (Pro Level Fixes)

    PSU Swap Testing

    If possible:

    • Test GPU with another PSU

    This isolates root cause quickly.


    Frame Rate Behavior Analysis

    If coil whine:

    • Increases with FPS → GPU normal behavior
    • Constant noise → PSU or hardware issue

    Cap Background FPS

    Modern GPUs render hidden frames:

    • Steam menus
    • Browsers
    • Launchers

    Cap global FPS for stability.


    Common Mistakes That Make Coil Whine Worse

    Running Unlimited FPS

    This is the biggest cause.

    Using Low-Quality PSU

    Cheap units amplify noise.

    Overclocking Without Testing

    Increases voltage instability.

    Ignoring PSU-GPU Pairing

    Mismatch causes electrical imbalance.


    Real-World Scenarios

    Problem: Coil whine in menus only

    Cause: Uncapped FPS
    Fix: FPS limiter or V-Sync


    Problem: Constant buzzing under load

    Cause: PSU instability
    Fix: PSU upgrade or replacement


    Problem: New GPU has coil whine

    Cause: Normal manufacturing variance
    Fix: Undervolt or limit FPS


    Pro Tips from a Hardware Engineer

    • Coil whine is NOT always a defect
    • High FPS = high electrical switching noise
    • Undervolting often gives best balance
    • PSU quality matters more than users think

    And here’s something most guides won’t tell you:
    Even two identical GPUs can behave differently due to microscopic differences in coil winding and PCB manufacturing tolerances.


    When to Consider RMA or Replacement

    Only consider replacement if:

    • Coil whine is extreme even at low FPS
    • Noise persists across multiple PSUs
    • It affects usability

    Otherwise, it’s usually manageable.


    Final Thoughts: Physics, Not Failure

    Fixing coil whine in high-end graphics cards is not about “eliminating” it completely—it’s about controlling electrical load behavior.

    You’re not fixing a broken GPU…
    You’re managing how power flows through it.


    CTA: Optimize Your GPU Like a Pro

    At fixrig.xyz, we go beyond basic fixes—we teach real hardware engineering thinking.

    Still dealing with coil whine? Not sure if it’s your GPU or PSU?

    Drop your full system specs in the comments—and let’s tune your setup step-by-step.

    Because in high-end hardware… silence is not luck, it’s engineering.

  • Troubleshooting “System Thread Exception Not Handled” BSOD (Complete 2026 Fix Guide)

    Troubleshooting “System Thread Exception Not Handled” BSOD (Complete 2026 Fix Guide)

    Look, I’ve seen this BSOD a thousand times—and it almost always hits users at the worst possible moment.

    You’re working, gaming, or just booting your PC… and suddenly the system crashes with a blue screen:

    “SYSTEM_THREAD_EXCEPTION_NOT_HANDLED”

    Here is the real talk about why your rig is acting up: this error is almost always caused by faulty drivers, corrupted system files, GPU instability, or low-level hardware conflicts inside Windows kernel operations.

    In this fixrig.xyz expert guide, I’ll walk you through Troubleshooting “System Thread Exception Not Handled” BSOD step-by-step like a real hardware engineer—not generic Windows advice.


    Common Symptoms of This BSOD Error

    Before fixing it, confirm what you’re seeing:

    1. Sudden Blue Screen on Startup

    System crashes before login screen.

    2. Looping Restart Cycle

    PC keeps restarting repeatedly.

    3. Error Points to a File (e.g., nvlddmkm.sys)

    Indicates driver-level failure.

    4. Random Crashes During Gaming or Load

    Usually GPU or RAM instability.

    5. Safe Mode Works, Normal Mode Doesn’t

    Strong indicator of driver issue.


    Root Causes (Deep Hardware + Software Breakdown)

    Corrupt or Faulty GPU Drivers

    Most common cause in modern systems.

    Incompatible Windows Update

    Driver mismatch after update.

    RAM Instability or XMP Issues

    Overclocked memory causing kernel faults.

    Faulty System Files

    Windows kernel corruption.

    Overheating or Thermal Throttling

    Unstable hardware behavior under load.

    BIOS Misconfiguration

    Incorrect memory or CPU settings.


    Tools Checklist Before Troubleshooting

    Prepare these tools:

    • Windows Safe Mode access
    • Driver update/uninstaller tool (DDU recommended)
    • USB recovery drive
    • BIOS access
    • RAM testing tool (Windows Memory Diagnostic / MemTest)

    Pro tip: Always isolate software vs hardware before making changes.


    Comparison Table: Software Fix vs Hardware Fix

    Fix TypeDifficultyCostEffectiveness
    Driver RepairEasyFreeVery High
    System RestoreEasyFreeHigh
    BIOS ResetMediumFreeHigh
    RAM TestingMediumFreeMedium-High
    Hardware ReplacementHard$$Permanent Fix

    Step-by-Step Fix for “System Thread Exception Not Handled”

    Step 1: Boot into Safe Mode

    If system crashes:

    • Force shutdown 3 times
    • Enter Recovery Mode
    • Select Safe Mode

    Safe Mode disables problematic drivers.


    Step 2: Identify Faulty Driver File

    If BSOD shows file like:

    • nvlddmkm.sys (GPU driver)
    • ntfs.sys (storage)

    This gives direct clue.


    Step 3: Clean Reinstall GPU Drivers

    Look, I’ve seen this error a thousand times—GPU drivers are usually the real culprit.

    Use:

    • Display Driver Uninstaller (DDU)
    • Reinstall latest stable driver

    Avoid beta drivers unless necessary.


    Step 4: Run System File Checker

    Open CMD (Admin):

    • sfc /scannow
    • DISM /Online /Cleanup-Image /RestoreHealth

    This repairs corrupted Windows files.


    Step 5: Check RAM Stability

    Faulty RAM = kernel crash.

    Test using:

    • Windows Memory Diagnostic
    • MemTest86

    If errors appear → RAM issue confirmed.


    Step 6: Reset BIOS Settings

    Enter BIOS:

    • Load default settings
    • Disable unstable XMP profiles temporarily

    Incorrect RAM timing can trigger BSOD.


    Step 7: Check Temperature & Voltage

    Overheating causes instability:

    • Monitor CPU/GPU temps
    • Check voltage fluctuations

    Thermal throttling can indirectly cause system crashes.


    Step 8: Uninstall Recent Windows Updates

    If issue started recently:

    • Roll back latest update
    • Or use System Restore point

    Some updates break driver compatibility.


    Step 9: Update Chipset & Motherboard Drivers

    Many users ignore this step:

    • Install latest chipset drivers
    • Update motherboard firmware

    This improves system stability.


    Advanced Troubleshooting (Pro Level Fixes)

    GPU Underclocking Test

    If crash happens under load:

    • Reduce GPU clock speed
    • Test stability

    RAM XMP Disable Test

    XMP profiles can be unstable:

    • Disable XMP
    • Run system at default speed

    Check Storage Health

    Corrupt system files may come from failing SSD/HDD:

    • Run SMART test
    • Check disk errors

    BIOS Update (Careful)

    If motherboard firmware is outdated:

    • Update BIOS safely
    • Avoid power interruption

    This fixes deep compatibility issues.


    Common Mistakes That Make It Worse

    Reinstalling Windows Immediately

    Often unnecessary and time-consuming.

    Ignoring Driver Conflicts

    Most BSODs are driver-related.

    Keeping Overclock Enabled

    Unstable OC = random kernel crashes.

    Installing Random Drivers from Websites

    Always use official sources.


    Real-World Scenarios

    Problem: BSOD after GPU driver update

    Cause: Driver corruption
    Fix: Clean reinstall using DDU


    Problem: BSOD during gaming

    Cause: GPU instability or heat
    Fix: Lower clocks + check temps


    Problem: BSOD after RAM upgrade

    Cause: XMP mismatch
    Fix: Disable XMP or retune RAM


    Pro Tips from a Hardware Engineer

    • Always use stable GPU drivers, not latest experimental ones
    • Keep BIOS settings simple unless you understand tuning
    • Monitor RAM stability after upgrades
    • Maintain clean driver environment

    And here’s something most guides won’t tell you:
    This BSOD is rarely random—it’s almost always a driver-hardware communication failure inside Windows kernel execution threads.


    When to Consider Hardware Failure

    You may have hardware issues if:

    • BSOD persists after clean reinstall
    • RAM tests fail
    • GPU crashes across multiple systems
    • System corrupts repeatedly

    At that stage, replacement or deep diagnostics is needed.


    Final Thoughts: Stability is Engineering, Not Luck

    Troubleshooting “System Thread Exception Not Handled” BSOD is about systematic isolation:

    Drivers → RAM → BIOS → GPU → Storage → OS

    Skip steps, and you miss the real problem.

    Follow the process, and most systems recover completely.


    CTA: Fix Your System Like a Pro

    At fixrig.xyz, we don’t guess—we diagnose hardware at engineering level.

    Still stuck on BSOD errors? Not sure if it’s RAM, GPU, or drivers?

    Drop your full system details in the comments—and let’s debug it step-by-step.

    Because in real hardware troubleshooting… every crash is just a clue waiting to be decoded.

  • Troubleshooting “Display Driver Stopped Responding” During Gaming (2026 Complete Fix Guide)

    Troubleshooting “Display Driver Stopped Responding” During Gaming (2026 Complete Fix Guide)

    Look, I’ve seen this error a thousand times—and it always shows up right in the middle of intense gameplay.

    Your screen freezes… goes black… then recovers with a message like:

    “Display driver stopped responding and has recovered.”

    Here is the real talk about why your rig is acting up: this is almost never a single issue. It’s usually a GPU driver timeout caused by instability in graphics processing, voltage spikes, overheating, or memory pressure under gaming load.

    In this fixrig.xyz expert guide, I’ll break down Troubleshooting “Display Driver Stopped Responding” during gaming step-by-step like a real hardware engineer—not generic Windows advice.


    Common Symptoms of Display Driver Crash

    1. Screen Freeze During Gaming

    Game pauses suddenly for a few seconds.

    2. Black Screen Recovery

    Display goes black, then returns.

    3. Error Notification Popup

    Windows reports driver recovery.

    4. Game Crashes to Desktop

    Especially in high-GPU-load scenes.

    5. Stuttering Before Crash

    Performance drops before failure.


    Root Causes (GPU + System-Level Analysis)

    Outdated or Corrupted GPU Drivers

    Most common trigger in modern systems.

    GPU Overheating (Thermal Throttling)

    High temperatures cause driver reset.

    Power Supply Instability (Voltage Drops)

    Unstable PSU leads to GPU timeout.

    Overclocking Instability

    Too high GPU/VRAM clocks.

    Memory Pressure in Games

    VRAM exhaustion causes reset.

    Windows TDR (Timeout Detection Recovery)

    GPU not responding within system timeout window.


    Tools Checklist Before Troubleshooting

    Prepare:

    • GPU monitoring tool (MSI Afterburner)
    • Driver cleanup tool (DDU)
    • Temperature monitoring software
    • PSU wattage checker
    • Stable internet for driver download

    Pro tip: Always isolate software vs hardware instability first.


    Comparison Table: Software Fix vs Hardware Fix

    Fix TypeDifficultyCostEffectiveness
    Driver ReinstallEasyFreeVery High
    GPU Settings ResetEasyFreeHigh
    Cooling ImprovementMediumLowHigh
    PSU UpgradeMedium$$Very High
    GPU ReplacementHard$$$Permanent Fix

    Step-by-Step Fix for “Display Driver Stopped Responding” During Gaming

    Step 1: Clean Reinstall GPU Drivers

    Look, I’ve seen this error a thousand times—drivers are the main culprit.

    Steps:

    • Boot into Safe Mode
    • Use DDU (Display Driver Uninstaller)
    • Remove all GPU drivers completely
    • Install latest stable driver

    Avoid beta drivers unless required.


    Step 2: Monitor GPU Temperature

    Check during gameplay:

    • Idle: 35–50°C
    • Gaming: 65–85°C

    If above 85°C → thermal throttling likely.

    Fix:

    • Clean dust
    • Improve airflow
    • Reapply thermal paste if needed

    Step 3: Disable GPU Overclocking

    Overclock instability is a silent killer.

    • Reset GPU to default clocks
    • Disable factory OC temporarily

    Test stability again.


    Step 4: Adjust Power Settings

    Windows and GPU settings:

    • Set Power Mode to “High Performance”
    • Disable aggressive power saving

    This stabilizes GPU response timing.


    Step 5: Increase TDR Timeout (Advanced Fix)

    Windows may reset GPU too quickly.

    Registry tweak:

    • TdrDelay = 10–15 seconds

    This prevents premature driver reset.


    Step 6: Check PSU Stability

    Here is the real deal—many users ignore this.

    Weak PSU = unstable GPU behavior.

    Check:

    • Wattage capacity
    • 80+ certification
    • Rail stability (12V line)

    Voltage drops = driver crash loop.


    Step 7: Lower In-Game Graphics Load

    Reduce stress:

    • Lower texture quality
    • Disable ray tracing
    • Cap FPS (important)

    Uncapped FPS = unstable GPU spikes.


    Step 8: Test VRAM Usage

    If VRAM is full:

    • Reduce resolution
    • Close background apps

    Memory overflow can trigger driver reset.


    Advanced Troubleshooting (Pro Level Fixes)

    BIOS Update for GPU Stability

    Some motherboards improve PCIe compatibility via BIOS updates.


    PCIe Slot Change

    Move GPU to another slot if available:

    • Fixes lane instability
    • Improves signal integrity

    Undervolting GPU

    Undervolting can stabilize:

    • Power spikes
    • Temperature
    • Driver response timing

    Often better than overclocking.


    Check Background GPU Load

    Apps like:

    • Browsers
    • Streaming software
    • Recording tools

    Can overload GPU unexpectedly.


    Common Mistakes That Make It Worse

    Installing Random GPU Drivers

    Always use official NVIDIA/AMD sources.

    Ignoring PSU Quality

    Cheap PSU = unstable GPU behavior.

    Overclocking Without Testing

    Even small OC can break stability.

    Running Max Settings on Weak Hardware

    Not all rigs are built for ultra settings.


    Real-World Scenarios

    Problem: Crash only in AAA games

    Cause: GPU load spike
    Fix: FPS cap + driver clean install


    Problem: Crash after driver update

    Cause: corrupted install
    Fix: rollback or DDU reinstall


    Problem: Random desktop recovery errors

    Cause: PSU or overheating
    Fix: check thermals + voltage


    Pro Tips from a Hardware Engineer

    • Always prefer stable drivers over newest ones
    • Keep GPU temps below 80°C for long-term stability
    • FPS cap is underrated stability tool
    • PSU quality matters more than most users realize

    And here’s something most guides won’t tell you:
    This error is not just a “driver problem”—it’s a GPU response timeout triggered by unstable hardware conditions under real-time rendering pressure.


    When to Consider Hardware Replacement

    Replace or upgrade if:

    • Crashes persist after clean driver install
    • GPU overheats despite cooling fixes
    • PSU cannot handle load spikes
    • VRAM is consistently maxed out

    At that point, software fixes won’t help.


    Final Thoughts: Stability is Engineering, Not Luck

    Troubleshooting “Display Driver Stopped Responding” during gaming is all about system stability tuning:

    Drivers → Thermals → Power → Memory → Load → BIOS

    Fix the weakest link, and your system stabilizes.


    CTA: Fix Your GPU Like a Pro

    At fixrig.xyz, we don’t guess—we diagnose hardware at engineering level.

    Still getting display driver crashes during gaming? Not sure if it’s GPU, PSU, or thermals?

    Drop your full system specs in the comments—and let’s tune your rig step-by-step.

    Because in real gaming performance… stability wins over power every single time.