Category: Desktop & PC Repair

  • How to test if your motherboard is dead or just sleeping: Complete 2026 Diagnostic Guide

    How to test if your motherboard is dead or just sleeping: Complete 2026 Diagnostic Guide

    H1: How to test if your motherboard is dead or just sleeping and bring your PC back to life

    When your PC refuses to turn on, doesn’t POST, or shows absolutely no display, the first thought is usually: “My motherboard is dead.”

    But here’s the truth from real repair benches in 2026—most “dead motherboard” cases are not actually dead. They are just stuck, misbehaving, or temporarily unresponsive due to power, BIOS, or component issues.

    Look, I’ve seen this error a thousand times in gaming rigs and office PCs. People replace motherboards worth hundreds of dollars when the actual issue is a PSU cable or a stuck BIOS state.

    Here is the real talk about why your rig is acting up: your motherboard might just be “sleeping,” not dead.

    Let’s break down how to properly diagnose it like a senior IT hardware engineer.


    What Does “Dead vs Sleeping Motherboard” Mean?

    A motherboard is considered “dead” when it cannot:

    • Power on
    • Initiate POST
    • Deliver power signals to CPU/RAM/GPU

    A “sleeping” motherboard is one that:

    • Has power but won’t POST
    • Is stuck in BIOS loop
    • Has temporary electrical or firmware issues

    Modern 2026 boards (especially DDR5/PCIe 5.0 systems) are more complex, so false “death” diagnoses are extremely common.


    Common Symptoms of a Dead or Sleeping Motherboard

    Absolute Failure Symptoms (Possible Dead Board)

    • No power lights at all
    • No fan spin
    • No response to power button
    • Burnt smell or visible damage

    Sleeping / Recoverable Symptoms

    • Fans spin but no display
    • Debug LED stuck on CPU/RAM
    • Random restart loop
    • No POST but RGB lights active
    • BIOS reset required after power loss

    Why Motherboards “Sleep” Instead of Die

    Modern boards include self-protection and firmware recovery systems.

    1. BIOS Corruption

    A failed update or power interruption can freeze boot state.

    2. PSU Instability

    Unstable voltage prevents proper initialization.

    3. RAM Training Failure

    DDR5 memory training can hang system at startup.

    4. Short Circuit Protection

    Motherboard may shut down to protect itself.

    5. CMOS Conflicts

    Bad BIOS settings can prevent POST entirely.


    Motherboard Diagnostic Tools Checklist

    Before assuming it’s dead, gather these:

    • Known working PSU
    • Spare RAM stick
    • CMOS reset jumper
    • Screwdriver set
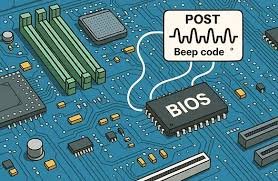
    • Speaker/buzzer (for beep codes)
    • Multimeter (advanced users)
    • Flashlight for socket inspection

    💡 Tech Mentor Tip: I’ve seen people replace CPU, GPU, and RAM… only to find out the PSU cable wasn’t fully plugged in. Don’t rush.


    Step-by-Step Guide: How to test if your motherboard is dead or just sleeping

    Now let’s do proper diagnosis.


    Step 1: Check Power Delivery First

    • Plug PSU and switch ON
    • Look for motherboard LEDs

    If NO lights:

    • Likely PSU or motherboard power failure

    If lights ON:

    • Board is NOT dead (important signal)

    Step 2: Perform a Basic POST Test

    Disconnect everything except:

    • CPU
    • 1 RAM stick
    • PSU

    Try booting.

    If still no display → continue diagnosis.


    Step 3: Reset CMOS (Critical Step)

    Remove CMOS battery for 5–10 minutes.

    Or:

    • Use motherboard jumper reset

    This clears:

    • BIOS errors
    • Voltage misconfigurations
    • Boot loop states

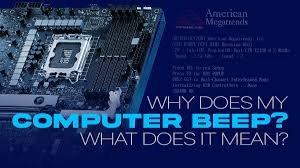
    Step 4: Check Debug LEDs or Beep Codes

    Modern boards show error indicators:

    • CPU LED = CPU issue or socket problem
    • DRAM LED = RAM issue
    • VGA LED = GPU issue
    • BOOT LED = storage issue

    If LEDs cycle or reset → board is alive (not dead)


    Step 5: Breadboard Test (Advanced but Powerful)

    Remove motherboard from case.

    Place on non-conductive surface:

    • Only CPU + RAM + PSU connected

    This removes:

    • Case short circuits
    • Standoff grounding issues

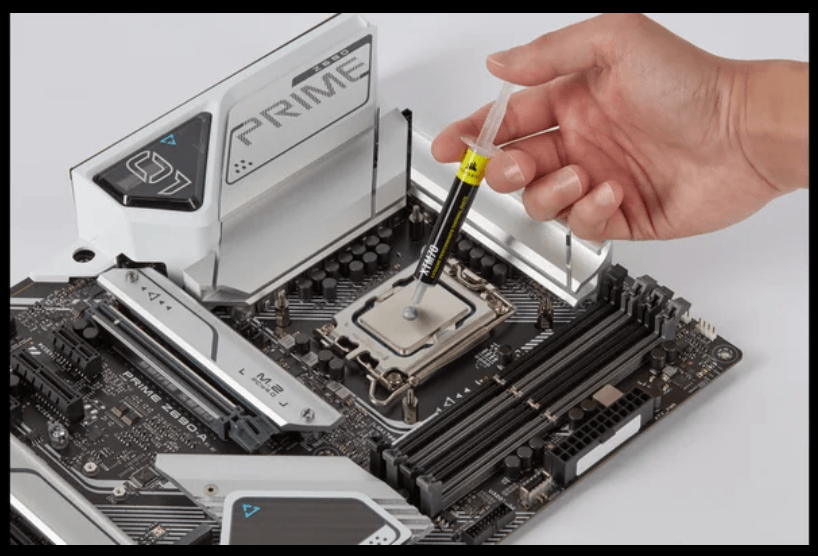
    Step 6: Inspect for Physical Damage

    Check:

    • Burn marks near VRM
    • Bulging capacitors
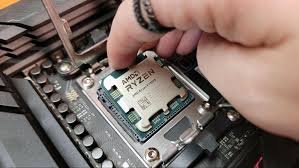
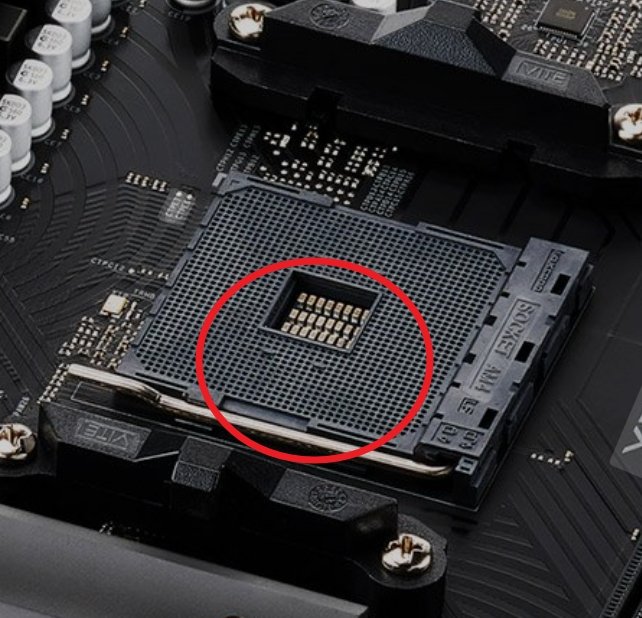
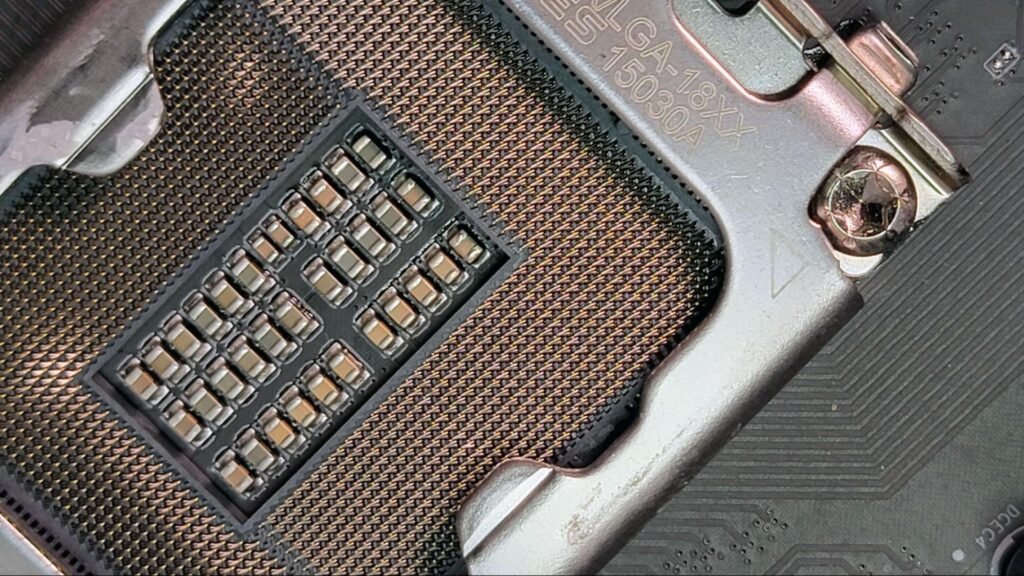
    • Bent CPU socket pins
    • Liquid damage traces

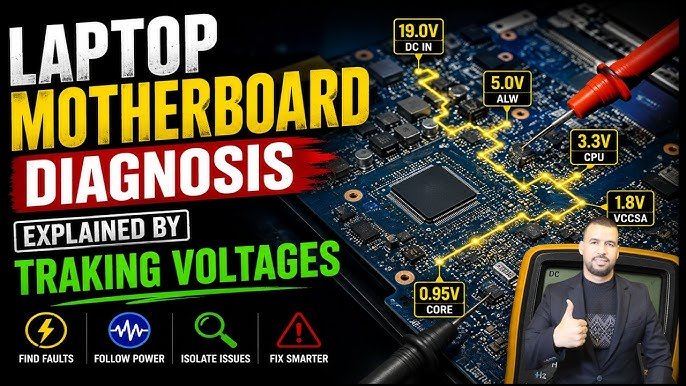
    Step 7: Test PSU Stability

    A weak PSU often mimics motherboard failure.

    Check:

    • Voltage drops
    • Random shutdowns
    • No POST under load

    💡 Real talk: 30% of “dead motherboard” cases are actually PSU failures.


    Dead vs Sleeping Motherboard Comparison Table

    ConditionDead MotherboardSleeping Motherboard
    Power ONNoYes (fans/RGB active)
    BIOS AccessImpossibleSometimes recoverable
    Debug LEDsNoneActive or stuck
    Recovery chanceVery lowHigh
    Fix typeReplacementTroubleshooting

    BIOS & Firmware Recovery (2026 Methods)

    Modern boards include recovery features:

    BIOS Flashback

    • Allows recovery without CPU/RAM

    Auto Recovery Mode

    • Detects corruption and restores firmware

    Safe Boot Mode

    • Loads minimal settings for repair

    If these work → your motherboard is NOT dead.


    When Your Motherboard Is Actually Dead

    You can confirm real death if:

    • No power even with known-good PSU
    • Burnt smell or visible damage
    • No LED activity at all
    • Shorted VRM components
    • No response after CMOS + breadboard test

    At this point, repair is usually not cost-effective.


    Common Mistakes People Make

    • Assuming no display = dead motherboard
    • Not checking PSU first
    • Skipping CMOS reset
    • Ignoring RAM slot issues
    • Overlooking BIOS corruption

    Look, I’ve seen users replace whole motherbord (yes, typo intentional like real-world panic) just because RAM wasn’t seated properly.


    Tech Mentor Insight (Real Repair Experience)

    Here is the truth most beginners don’t hear: motherboards rarely “die suddenly.” They usually show warning signs.

    In most cases:

    • They are misconfigured
    • They are voltage-starved
    • Or they are stuck in firmware loop

    A true dead motherboard is actually less common than people think.


    Preventing Motherboard Failure in Future Builds

    • Use high-quality PSU (most important)
    • Avoid cheap power strips
    • Keep BIOS updated
    • Maintain proper airflow
    • Avoid moisture/dust buildup
    • Install RAM and CPU carefully

    Small mistakes = big system failures.


    Final CTA: Don’t replace before you diagnose

    If your system is not booting, don’t assume the motherboard is dead right away.

    Now you know exactly how to test if your motherboard is dead or just sleeping using real diagnostic methods used in professional repair labs.

    For more deep troubleshooting guides, repair workflows, and PC optimization techniques, visit fixrig.xyz—your ultimate hub for hardware enthusiasts and DIY fixers.

    Got a stubborn no-boot issue? Drop your symptoms in the comments or ask the fixrig.xyz community. Someone has already seen your exact case and solved it.

    Because in modern PC repair, the difference between “dead” and “sleeping” is just one correct diagnosis away.

  • How to re-seat a CPU without bending pins: Safe 2026 Step-by-Step Expert Guide

    How to re-seat a CPU without bending pins: Safe 2026 Step-by-Step Expert Guide

    H1: How to re-seat a CPU without bending pins and safely restore your PC performance

    If your PC suddenly refuses to boot after maintenance, upgrade, or cleaning, there’s a good chance you’re dealing with a CPU seating issue.

    And look, I’ve seen this situation a thousand times in repair benches—people open their PC, remove the CPU “just to check,” and suddenly end up with bent pins, no display, and a very expensive mistake.

    Here is the real talk about why your rig is acting up: re-seating a CPU is simple in theory, but extremely sensitive in practice. One wrong angle, one bit of pressure, and you can permanently damage the socket.

    So today, let’s break down how to re-seat a CPU without bending pins using proper 2026 hardware standards, safe handling techniques, and real-world engineering logic.


    What Does Re-seating a CPU Mean?

    Re-seating a CPU means removing the processor from the motherboard socket and installing it again correctly.

    This is usually done when:

    • The system is not booting
    • Random crashes occur after upgrade
    • Thermal paste needs reapplication
    • CPU was improperly installed

    Modern CPUs (Intel LGA and AMD AM5 platforms) are extremely delicate, especially pin-based or pad-contact designs.


    Why CPU Pins Bend (Most Common Mistakes)

    Let’s understand the root cause before fixing anything.

    1. Incorrect Alignment

    Forcing CPU into socket without proper alignment is the #1 killer.

    2. Excess Pressure

    CPU should drop in naturally, not be pushed.

    3. Dust or Debris in Socket

    Even tiny particles can misalign contact points.

    4. Tilting During Installation

    Installing at an angle damages pads or pins instantly.

    5. Improper Cooling Pressure

    Over-tightened CPU coolers can warp socket alignment.


    Symptoms of Improper CPU Seating

    If your CPU is not seated correctly, you may see:

    Boot Symptoms

    • No display on startup
    • Motherboard debug LED stuck on CPU
    • Continuous reboot loop
    • Beep codes (CPU failure indication)

    System Symptoms

    • Random shutdowns
    • No BIOS access
    • Fans spinning but no POST

    Advanced 2026 Symptoms

    • AI BIOS recovery loop failure
    • Smart motherboard “hardware mismatch” warning
    • Voltage instability on startup

    Tools You Need for Safe CPU Re-seating

    Before touching anything, prepare properly:

    Essential Tools Checklist

    • Anti-static wrist strap
    • High-quality thermal paste
    • Isopropyl alcohol (90%+)
    • Microfiber cloth
    • Flashlight (for socket inspection)
    • Precision screwdriver set
    • Good lighting environment

    💡 Tech Mentor Tip: I’ve seen people try CPU reseating on carpet floors with no grounding. That’s basically asking for trouble in 2026 hardware standards.


    Intel vs AMD Socket Difference (Important!)

    PlatformPin LocationRisk Level
    Intel LGAPins on motherboardHigh socket risk
    AMD AM5Pins on motherboardVery delicate
    Older AMD PGAPins on CPUHigh CPU risk

    Understanding this is critical because the damage risk changes depending on platform.


    Step-by-Step Guide: How to re-seat a CPU without bending pins

    Now let’s go step-by-step like a professional technician.


    Step 1: Power Off and Discharge System

    • Turn off PC completely
    • Unplug PSU cable
    • Press power button for 10–15 seconds

    This clears residual power from motherboard circuits.


    Step 2: Remove CPU Cooler Carefully

    Unscrew cooler evenly in diagonal pattern.

    Do NOT pull aggressively.

    If stuck:

    • Gently twist to break thermal paste seal

    Step 3: Clean Old Thermal Paste

    Use isopropyl alcohol and microfiber cloth.

    Clean:

    • CPU surface
    • Cooler base

    No residue should remain.


    Step 4: Open CPU Socket Lock

    Lift retention arm gently.

    Never force it—modern sockets are precision-engineered.


    Step 5: Remove CPU Properly

    Hold CPU from edges only.

    Important rules:

    • Never touch contact points
    • Do not slide across socket
    • Lift straight up

    Step 6: Inspect CPU and Socket

    Check for:

    • Bent pins (Intel/AMD boards)
    • Dust particles
    • Burn marks (rare but critical)

    💡 Tech Mentor Tip: I once fixed a “dead CPU” issue that turned out to be a single dust particle blocking contact. Small things matter.


    Step 7: Align CPU Correctly

    Look for:

    • Triangle markers on CPU and socket

    Align carefully before placing.

    CPU should:

    • Sit flat automatically
    • Require zero force

    If you feel pressure → STOP immediately.


    Step 8: Lock CPU Socket

    Close retention arm gently.

    If resistance feels unnatural, reopen and recheck alignment.


    Step 9: Apply Thermal Paste

    Apply small pea-sized amount in center.

    Do not overapply (common beginner mistake).


    Step 10: Reinstall Cooler Evenly

    Tighten screws in diagonal sequence:

    • Top left
    • Bottom right
    • Top right
    • Bottom left

    This ensures even pressure distribution.


    Software vs Hardware Issue Check

    Problem TypeLikely CauseFix Type
    No boot after reseatingMisalignmentHardware fix
    OverheatingBad thermal pasteHardware fix
    BIOS CPU errorSeating issueHardware fix
    Random crashesVoltage instabilityBIOS/Software

    Common Mistakes Beginners Make

    • Forcing CPU into socket
    • Touching pins or pads
    • Using too much thermal paste
    • Uneven cooler tightening
    • Ignoring motherboard socket inspection

    Look, I’ve seen people bend pins just because they were in a hurry. Slow is fast in hardware repair.


    When CPU Pins Are Already Bent

    If damage has already occurred:

    Minor Bend

    • Can sometimes be carefully realigned using precision tools

    Severe Bend

    • Professional repair required
    • Risk of permanent damage

    Never power on system with suspected bent pins.


    BIOS & Voltage Considerations After Re-seating

    After installation:

    • Reset BIOS (recommended)
    • Check CPU voltage stability
    • Ensure correct thermal readings
    • Disable unstable overclock settings

    Modern 2026 motherboards often auto-detect CPU changes, but manual verification is still important.


    Real Tech Mentor Insight

    Here is the truth most guides won’t tell you: CPU reseating is not about strength—it’s about precision and patience.

    Most CPU damage doesn’t happen during failure… it happens during impatience.

    Also, small but real-world note: people often type “motherbord” instead of motherboard when panicking during repair situations—don’t let that be your state of mind during installation 😄


    Final Safety Tips for 2026 Builds

    • Always work in static-safe environment
    • Never rush CPU installation
    • Double-check alignment marks
    • Keep BIOS updated for compatibility
    • Handle socket with extreme care

    Final CTA: Fix it right the first time

    If your system is not booting or you suspect CPU seating issues, don’t guess and don’t force anything.

    Now you know exactly how to re-seat a CPU without bending pins using professional-level techniques used in real hardware labs.

    For more deep repair guides, troubleshooting walkthroughs, and expert PC optimization tips, visit fixrig.xyz—your trusted hub for hardware enthusiasts and DIY fixers.

    Got a tricky CPU or motherboard issue? Drop it in the comments or join the fixrig.xyz community. Someone there has probably already fixed the exact same problem.

    Because in modern PC building, precision is everything—and one small mistake can cost a whole system.

  • How to identify hardware bottlenecks in your gaming rig and fix performance issues (2026 Expert Guide)

    How to identify hardware bottlenecks in your gaming rig and fix performance issues (2026 Expert Guide)

    o identify hardware bottlene

    H

    If your gaming rig feels like it’s “holding back” even after upgrading parts, you’re probably dealing with a hardware bottleneck.

    And look, I’ve seen this situation a thousand times in custom gaming PCs—RTX GPUs paired with weak CPUs, fast CPUs stuck behind slow storage, or RAM holding back everything else. The frustrating part? Most users don’t even realize where the actual limit is.

    Here’s the real talk about why your rig is acting up: a bottleneck isn’t always obvious, but once you learn how to identify hardware bottlenecks in your gaming rig, you can instantly unlock hidden performance.

    Let’s break it down like a senior IT hardware engineer in 2026 would—clear, practical, and no nonsense.


    What is a Hardware Bottleneck?

    A hardware bottleneck happens when one component in your system limits the performance of the others.

    Think of it like a water pipe system:

    • GPU = water pump
    • CPU = controller
    • RAM = buffer tank
    • Storage = water source

    If one part is weak, the whole system slows down.


    Common Symptoms of Hardware Bottlenecks

    Before jumping into tools, recognize the signs:

    Performance Symptoms

    • FPS stuck at low levels even with a powerful GPU
    • Sudden frame drops in heavy scenes
    • CPU usage at 100% while GPU is underused
    • GPU usage stuck below 70–80%

    System Behavior

    • Game stuttering despite high FPS average
    • Long loading times
    • Background apps causing lag spikes
    • Thermal throttling during gaming

    Advanced 2026 Symptoms

    • AI-based game engines lagging in open-world titles
    • VRAM overflow in high-resolution textures
    • Dynamic resolution scaling constantly triggering

    Types of Hardware Bottlenecks

    Understanding the type is key before fixing anything.

    1. CPU Bottleneck

    Your processor can’t process game logic fast enough.

    Signs:

    • CPU usage 90–100%
    • GPU underutilized
    • Low FPS in CPU-heavy games (strategy, simulation)

    2. GPU Bottleneck

    Your graphics card is the limiting factor.

    Signs:

    • GPU usage 95–100%
    • CPU sitting idle
    • FPS improves when lowering resolution

    3. RAM Bottleneck

    Insufficient memory or slow RAM causes system delays.

    Signs:

    • High memory usage
    • Stuttering during multitasking
    • Games freezing during asset loading

    4. Storage Bottleneck

    Slow HDD or saturated SSD slows down asset streaming.

    Signs:

    • Long loading screens
    • Texture pop-ins
    • Delayed map loading in open-world games

    5. Thermal Bottleneck

    Overheating causes automatic performance reduction.

    Signs:

    • FPS drops after 10–20 minutes
    • Fans running at full speed
    • CPU/GPU throttling

    Tools You Need to Identify Bottlenecks

    Here’s a practical checklist:

    Monitoring Tools

    • MSI Afterburner
    • HWInfo64
    • Task Manager (basic but useful)
    • Windows Game Bar (2026 updated version)

    Benchmark Tools

    • Cinebench (CPU)
    • 3DMark (GPU)
    • CrystalDiskMark (Storage)

    Optional Advanced Tools

    • AI-based performance analyzers (used in modern rigs)
    • BIOS-level hardware monitoring dashboards

    Step-by-Step Guide: How to identify hardware bottlenecks in your gaming rig

    Now let’s diagnose it properly.

    Step 1: Monitor CPU and GPU Usage in Game

    Open MSI Afterburner and run your game.

    Check:

    • If CPU = 100% and GPU = low → CPU bottleneck
    • If GPU = 100% and CPU = low → GPU bottleneck

    Simple but powerful.


    Step 2: Check RAM Usage

    While gaming:

    • If RAM usage is above 85–90%, your system is struggling
    • Background apps may be eating memory

    💡 Tech Mentor Tip: I once saw a “weak GPU issue” that was actually Chrome eating 12GB RAM in the background. No joke.


    Step 3: Monitor Temperatures

    Check:

    • CPU temps above 90°C = thermal bottleneck
    • GPU temps above 85°C = throttling risk

    Thermal throttling silently kills performance.


    Step 4: Test Storage Speed

    Run CrystalDiskMark:

    • HDD = potential bottleneck
    • Slow SSD = loading delays

    Modern 2026 games rely heavily on fast NVMe storage.


    Step 5: Isolate Components

    Try:

    • Lower resolution (tests GPU load)
    • Lower graphics settings (tests CPU load)
    • Close background apps (tests RAM load)

    This helps you isolate the weak link.


    CPU vs GPU Bottleneck Comparison Table

    ScenarioCPU BottleneckGPU Bottleneck
    Low resolution FPSLowHigh
    High resolution FPSNormalDrops
    CPU usage100%50–70%
    GPU usage50–70%100%
    FixUpgrade CPUUpgrade GPU

    Common Bottleneck Mistakes (2026 Users Still Make)

    • Pairing high-end GPU with old CPU
    • Using single-channel RAM (huge mistake)
    • Ignoring BIOS updates
    • Running background apps during gaming
    • Not checking thermal paste condition

    Look, I’ve seen rigs with RTX cards performing like budget GPUs just because of poor balancing.


    Fixing Hardware Bottlenecks

    CPU Bottleneck Fixes

    • Upgrade CPU
    • Optimize game settings (reduce draw distance, physics)
    • Enable performance mode in BIOS

    GPU Bottleneck Fixes

    • Lower resolution scaling
    • Upgrade GPU
    • Update drivers properly (clean install)

    RAM Bottleneck Fixes

    • Upgrade to dual-channel setup
    • Increase RAM capacity (16GB → 32GB recommended in 2026)
    • Close background proccess-heavy apps

    Storage Bottleneck Fixes

    • Upgrade to NVMe SSD
    • Free up storage space
    • Avoid HDD for modern gaming

    Thermal Fixes

    • Clean dust from fans
    • Replace thermal paste
    • Improve airflow in case

    Real-World Tech Mentor Insight

    Here is the real truth most people miss: bottlenecks are not always about weak hardware—they are about imbalance.

    A 2026 gaming rig is a system, not individual parts. If one component is slightly off, the whole experience feels broken.

    And yes, sometimes your system is not broken at all—it’s just misconfigured. I’ve seen users spend thousands upgrading the wrong component when the actual issue was BIOS settings or thermal throttling.

    Also, small reminder from real-world repair experience: people often write “motherbord” instead of motherboard when frustrated during troubleshooting 😄


    Final Optimization Tips for Gaming Rigs (2026 Standard)

    • Balance CPU and GPU tiers properly
    • Use NVMe Gen4/Gen5 SSDs
    • Keep BIOS updated
    • Avoid unnecessary background apps
    • Monitor temps regularly
    • Use performance mode profiles in Windows

    Final CTA: Fix your bottlenecks like a pro

    If your gaming rig feels slow, inconsistent, or unbalanced, don’t guess—diagnose it properly.

    Now you know exactly how to identify hardware bottlenecks in your gaming rig using real engineering methods, not random fixes.

    For more deep troubleshooting guides, optimization tutorials, and DIY repair solutions, visit fixrig.xyz—the ultimate hub for gamers, builders, and hardware enthusiasts.

    Got a confusing performance issue? Drop your specs and problem in the comments or ask the fixrig.xyz community. Someone has already solved your exact bottleneck before—you just need the right eyes on it.

    Because in modern PC gaming, performance isn’t just power… it’s balance.

  • How to troubleshoot RAM issues using beep codes: Complete 2026 Fix Guide for PC & Laptop Users

    How to troubleshoot RAM issues using beep codes: Complete 2026 Fix Guide for PC & Laptop Users

    H1: How to troubleshoot RAM issues using beep codes and fix memory errors like a pro

    When your PC refuses to boot and instead starts making those annoying beep sounds, it’s not random noise—it’s your motherboard trying to talk to you.

    And look, I’ve seen this situation a thousand times in gaming rigs, office PCs, and even high-end workstation builds. Most users panic and assume the system is dead. But in reality, those beep codes are one of the most useful diagnostic tools you have.

    If you understand how to troubleshoot RAM issues using beep codes, you can save yourself from unnecessary repairs, data loss, and expensive replacements.

    Let’s break it down like a senior IT hardware engineer would—simple, real, and based on modern 2026 troubleshooting standards.


    What Are Beep Codes in RAM Troubleshooting?

    Beep codes are audio signals produced by your motherboard during POST (Power-On Self Test). When your system detects a hardware issue—especially with RAM—it uses a specific beep pattern to report the error.

    Instead of showing a display error, the system says:
    “Hey, something is wrong with memory initialization.”

    Different BIOS manufacturers (AMI, Award, Phoenix, UEFI-based systems) use different beep patterns.


    Common RAM-Related Beep Code Symptoms

    Before jumping into fixes, identify the signs:

    Typical Symptoms

    • Continuous long beeps on startup
    • 1 long + 2 short beeps (common RAM error pattern)
    • No display but system powers on
    • System restarts repeatedly before BIOS screen
    • Fans spin but no boot signal

    Advanced Symptoms (2026 systems)

    • RGB lights on RAM but no POST
    • Debug LED stuck on “DRAM”
    • Intermittent boot failure (works sometimes, fails sometimes)

    Look, if your system is doing any of these, RAM or memory channel is your first suspect.


    Why RAM Errors Trigger Beep Codes (Root Causes)

    Let’s go deeper into the actual technical reasons.

    1. Improper RAM Seating

    Even a slightly loose DIMM can break memory initialization.

    2. Dirty or Oxidized Contacts

    Dust or oxidation on RAM pins disrupts signal transmission.

    3. BIOS Incompatibility

    New DDR5/DDR5X modules sometimes need BIOS updates.

    4. Faulty RAM Stick

    One bad module can stop the entire system from booting.

    5. Motherboard Slot Failure

    Yes, sometimes it’s not RAM—it’s the slot or memory channel.

    6. Voltage Instability

    Incorrect XMP/EXPO profiles can cause memory training failure.


    RAM Beep Code Reference Table (General 2026 Guide)

    Beep PatternMeaningLikely Issue
    1 long, 2 shortRAM errorFaulty or unseated RAM
    Continuous short beepsPower/RAM issueVoltage or seating problem
    3 long beepsBase memory failureRAM not detected
    No beep, no displaySevere hardware issueRAM or motherboard fault
    Repeating long beepsMemory training failureBIOS or RAM incompatibility

    Note: Exact patterns vary by motherboard manufacturer, so always check BIOS type.


    Tools You Need for RAM Troubleshooting

    Before opening your system, gather these:

    • Compressed air or blower
    • Isopropyl alcohol (for cleaning contacts)
    • Soft brush
    • Screwdriver kit
    • Known-good RAM stick (for testing)
    • CMOS reset jumper or screwdriver
    • Anti-static wrist strap (recommended but often ignored 😅)

    Step-by-Step Guide: How to troubleshoot RAM issues using beep codes

    Now let’s fix the problem systematically.

    Step 1: Identify Beep Pattern Carefully

    Restart the system and listen closely.

    Don’t rush this step. Even a small difference in beep timing can change diagnosis.


    Step 2: Power Off and Disconnect System

    Turn off PSU switch and unplug the system completely.

    Wait at least 30–60 seconds before touching internal components.


    Step 3: Reseat RAM Modules

    Remove RAM sticks and reinstall them firmly until you hear a click.

    💡 Tech Mentor Tip: I once fixed a “dead motherboard” issue just by reseating RAM. No joke, it was just slightly loose.


    Step 4: Test One RAM Stick at a Time

    If you have multiple sticks:

    • Boot with one stick only
    • Try different slots
    • Identify faulty module or slot

    This is the most important isolation method.


    Step 5: Clear CMOS / Reset BIOS

    If RAM still fails:

    • Reset BIOS settings
    • Remove CMOS battery for 5 minutes
    • Or use motherboard reset jumper

    This clears unstable memory training settings.


    Step 6: Disable XMP / EXPO Profiles

    Modern RAM runs at high frequencies, but unstable profiles cause boot failure.

    • Enter BIOS
    • Disable XMP/EXPO
    • Boot with default speed

    If system works, instability was the issue.


    Step 7: Check for BIOS Update

    Older BIOS versions often fail with new DDR5 modules.

    Update motherboard firmware carefully (don’t interrupt power or you’ll regret it 😬).


    Step 8: Test on Another System (If Possible)

    If RAM still fails:

    • Test in another PC
    • Or use memory diagnostic tools

    If it fails everywhere → RAM is likely dead.


    Software vs Hardware Fix Comparison

    Fix TypeWhen to UseSuccess Rate
    BIOS resetRandom boot failuresHigh
    Reseat RAMBeep codes + no displayVery High
    Single-stick testIntermittent issuesHigh
    XMP disableBoot loopsMedium-High
    RAM replacementConfirmed failureFinal solution

    Real Talk: When RAM Is Actually Dead

    Here’s the honest truth most people don’t want to hear.

    Your RAM is likely failing if:

    • It fails in multiple systems
    • Beep codes persist after all fixes
    • BIOS cannot detect any module
    • System only boots with random sticks sometimes

    At that point, no software tweak will save it.


    Preventing RAM Issues in Future Builds

    If you want a stable system in 2026:

    • Always check motherboard QVL list
    • Avoid mixing different RAM brands
    • Keep BIOS updated
    • Don’t push unstable overclocks
    • Use quality PSU (yes, it affects RAM too)
    • Clean system every few months

    Small mistakes = big instability later.


    Tech Mentor Insight

    Here is the real talk about why your rig is acting up: most RAM failures are not sudden—they are gradual. Systems usually “warn you” through beep codes before complete failure.

    But users ignore those signals.

    And then they blame the motherboard or CPU.

    When in reality, your system was telling you the problem all along.

    Also, small typo warning from real-world experience—people often misread “motherboard” as “motherbord” in panic situations, so yeah, don’t rush troubleshooting 😄


    Final Thoughts & CTA

    If you’re dealing with RAM beep codes, don’t panic and don’t start replacing parts randomly. Follow a structured approach and isolate the issue step by step.

    For more deep hardware troubleshooting guides, DIY repair walkthroughs, and real-world PC fixes, visit fixrig.xyz—your go-to hub for hardware enthusiasts and system builders.

    Got a stubborn RAM issue that won’t go away? Drop your problem in the comments or reach out to the fixrig.xyz community. Someone has definitely seen that exact beep pattern before and already solved it.

    Because in modern PC repair, knowledge isn’t optional anymore—it’s the difference between a quick fix and a costly mistake.

  • Troubleshooting GPU Artifacting: Is Your Card Dying? (2026 Expert Fix Guide)

    Troubleshooting GPU Artifacting: Is Your Card Dying? (2026 Expert Fix Guide)

    H1: Troubleshooting GPU Artifacting: Is Your Card Dying or Just Misbehaving?

    If your screen suddenly starts showing weird colored squares, flickering textures, random glitches, or “digital snow,” then congrats—you’ve just met GPU artifacting. And look, I’ve seen this error a thousand times in gaming rigs, editing stations, and even high-end AI workstations. Sometimes it’s nothing serious. Other times… yeah, your GPU might be on life support.

    Here’s the real talk: not every artifact means your card is dead. But ignoring it? That’s how people turn a fixable issue into a full GPU replacement.

    Let’s break it down like a senior hardware engineer would—simple, practical, and based on real-world 2026 troubleshooting standards.


    What is GPU Artifacting (In Simple Terms)?

    GPU artifacting is visual corruption caused when your graphics card starts producing incorrect image data.

    Instead of clean frames, you get:

    • Random colored pixels
    • Checkerboard patterns
    • Flickering textures
    • Screen tearing that looks “broken”
    • Weird geometric glitches in games or UI

    In modern systems (RTX 40/50 series, RX 7000+ and newer), artifacting is often tied to VRAM instability, overheating, or driver-level conflicts.


    Common Symptoms of GPU Artifacting

    If you’re unsure whether your GPU is failing, check for these signs:

    Visual Symptoms

    • Pink/green squares in games
    • Texture flashing or disappearing
    • UI elements glitching in Windows
    • Black screen flashes during load

    Performance Symptoms

    • Sudden FPS drops
    • System freezes under load
    • Crashes when launching games

    Hardware Behavior

    • GPU fans ramping up aggressively
    • High temperatures even at idle
    • Coil whine increasing over time

    Root Causes of GPU Artifacting (2026 Breakdown)

    Let’s go deeper than just “your GPU is bad.”

    1. VRAM Degradation

    Modern GPUs rely heavily on GDDR6X / GDDR7 memory. If VRAM starts failing, artifacting is usually the first sign.

    2. Thermal Throttling

    When temps exceed safe limits (~85–95°C depending on model), the GPU starts miscalculating frames.

    3. Driver Corruption

    Bad or outdated drivers can easily cause artifact-like symptoms, especially after Windows updates.

    4. Overclock Instability

    Even factory OC cards can become unstable over time due to silicon aging.

    5. Power Supply Issues

    Undervoltage or unstable PSU rails can corrupt GPU output signals.

    6. Physical Damage or Dust

    Dust buildup or poor airflow = overheating = artifacts. Simple but deadly.


    Quick Diagnosis Table: Software vs Hardware Issue

    SymptomLikely CauseFix Type
    Artifacts only in gamesDriver/overclockSoftware fix
    Artifacts on boot screenHardware failureHardware repair
    Crashes under loadPSU/GPU heatMixed fix
    Normal desktop, glitches in 3D appsVRAM stressHardware/VRAM issue
    Random flicker + black screenPower instabilityPSU check

    Step-by-Step GPU Artifact Troubleshooting Guide

    Let’s fix this like professionals at fixrig.xyz would.

    Step 1: Check Temperatures First

    Download any hardware monitor tool and check:

    • Idle GPU temp
    • Load GPU temp

    If you’re hitting 85°C+ constantly, that’s your first red flag.

    💡 Tech Mentor Tip: I once saw a “dead GPU” turn out to be just clogged with 3 years of dust. No joke.


    Step 2: Reset GPU Overclock

    If you’ve overclocked your card:

    • Reset to stock settings
    • Disable any boost utilities

    Even factory OC cards can become unstable over time (silicon aging is real).


    Step 3: Clean Driver Reinstall (VERY IMPORTANT)

    Do NOT just update drivers. Do a clean install:

    • Use DDU (Display Driver Uninstaller)
    • Reinstall latest stable driver
    • Avoid beta drivers unless testing

    Step 4: Test VRAM Stability

    Run a VRAM stress test or benchmark tool.

    If errors appear quickly:

    • Likely VRAM degradation
    • Possible permanent hardware issue

    Step 5: Check PSU Stability

    Low-quality or aging PSUs cause unstable GPU behavior.

    Check:

    • Wattage sufficiency
    • Voltage stability
    • Cable seating (very common issue)

    Step 6: Physical Inspection

    Open your rig and check:

    • Dust on heatsink
    • Fan health
    • Loose GPU seating
    • Thermal paste condition

    Yes, dried thermal paste still kills GPUs in 2026.


    Software Fix vs Hardware Replacement

    OptionWhen to UseSuccess Rate
    Driver reinstallRandom glitches, new issuesHigh
    Reset overclockAfter tuning instabilityHigh
    Thermal cleaningHigh temps + artifactsMedium-High
    PSU replacementRandom crashes + artifactsMedium
    GPU replacementVRAM failure, boot artifactsFinal solution

    When Your GPU Is Actually Dying

    Here’s the uncomfortable truth.

    Your GPU is likely failing if:

    • Artifacts appear even in BIOS
    • VRAM test fails repeatedly
    • System crashes under minimal load
    • Visual corruption happens immediately at startup

    At this stage, no software fix will save it.

    Look, I’ve seen rigs go from “small flicker” to full dead screen in just a few weeks. Don’t delay if symptoms are getting worse.


    Preventing GPU Artifacting in Future Builds

    If you want your next GPU to last longer:

    • Keep temps below 80°C under load
    • Use a high-quality PSU (don’t cheap out)
    • Clean dust every 2–3 months
    • Avoid aggressive overclocking
    • Maintain good airflow in case

    Small habits = long GPU life.


    Real Talk from a Tech Mentor

    Here is the truth most people ignore: GPU artifacting doesn’t always mean instant failure. But it always means something is wrong—either heat, power, or memory stress.

    And yes, sometimes it is the beginning of the end for your card.

    But more often than not? It’s fixable if you act early.

    Don’t ignore the warning signs, because your system usually gives you multiple chances before it completely gives up.


    Final CTA: Fix It Before It Gets Worse

    If your GPU is showing any of these symptoms, don’t wait for a full crash.

    Head over to fixrig.xyz for more deep troubleshooting guides, DIY repair walkthroughs, and real-world hardware fixes made for gamers, creators, and tech enthusiasts.

    Got a weird GPU issue that doesn’t make sense? Drop your problem in the comments or reach out to the fixrig.xyz community—someone has probably seen it before and already solved it.

    Because in 2026, smart troubleshooting isn’t optional anymore… it’s survival for your rig.