H1: How to re-seat a CPU without bending pins and safely restore your PC performance
If your PC suddenly refuses to boot after maintenance, upgrade, or cleaning, there’s a good chance you’re dealing with a CPU seating issue.
And look, I’ve seen this situation a thousand times in repair benches—people open their PC, remove the CPU “just to check,” and suddenly end up with bent pins, no display, and a very expensive mistake.
Here is the real talk about why your rig is acting up: re-seating a CPU is simple in theory, but extremely sensitive in practice. One wrong angle, one bit of pressure, and you can permanently damage the socket.
So today, let’s break down how to re-seat a CPU without bending pins using proper 2026 hardware standards, safe handling techniques, and real-world engineering logic.
What Does Re-seating a CPU Mean?
Re-seating a CPU means removing the processor from the motherboard socket and installing it again correctly.
This is usually done when:
- The system is not booting
- Random crashes occur after upgrade
- Thermal paste needs reapplication
- CPU was improperly installed
Modern CPUs (Intel LGA and AMD AM5 platforms) are extremely delicate, especially pin-based or pad-contact designs.
Why CPU Pins Bend (Most Common Mistakes)
Let’s understand the root cause before fixing anything.
1. Incorrect Alignment
Forcing CPU into socket without proper alignment is the #1 killer.
2. Excess Pressure
CPU should drop in naturally, not be pushed.
3. Dust or Debris in Socket
Even tiny particles can misalign contact points.
4. Tilting During Installation
Installing at an angle damages pads or pins instantly.
5. Improper Cooling Pressure
Over-tightened CPU coolers can warp socket alignment.
Symptoms of Improper CPU Seating
If your CPU is not seated correctly, you may see:
Boot Symptoms
- No display on startup
- Motherboard debug LED stuck on CPU
- Continuous reboot loop
- Beep codes (CPU failure indication)
System Symptoms
- Random shutdowns
- No BIOS access
- Fans spinning but no POST
Advanced 2026 Symptoms
- AI BIOS recovery loop failure
- Smart motherboard “hardware mismatch” warning
- Voltage instability on startup
Tools You Need for Safe CPU Re-seating
Before touching anything, prepare properly:
Essential Tools Checklist
- Anti-static wrist strap
- High-quality thermal paste
- Isopropyl alcohol (90%+)
- Microfiber cloth
- Flashlight (for socket inspection)
- Precision screwdriver set
- Good lighting environment
💡 Tech Mentor Tip: I’ve seen people try CPU reseating on carpet floors with no grounding. That’s basically asking for trouble in 2026 hardware standards.
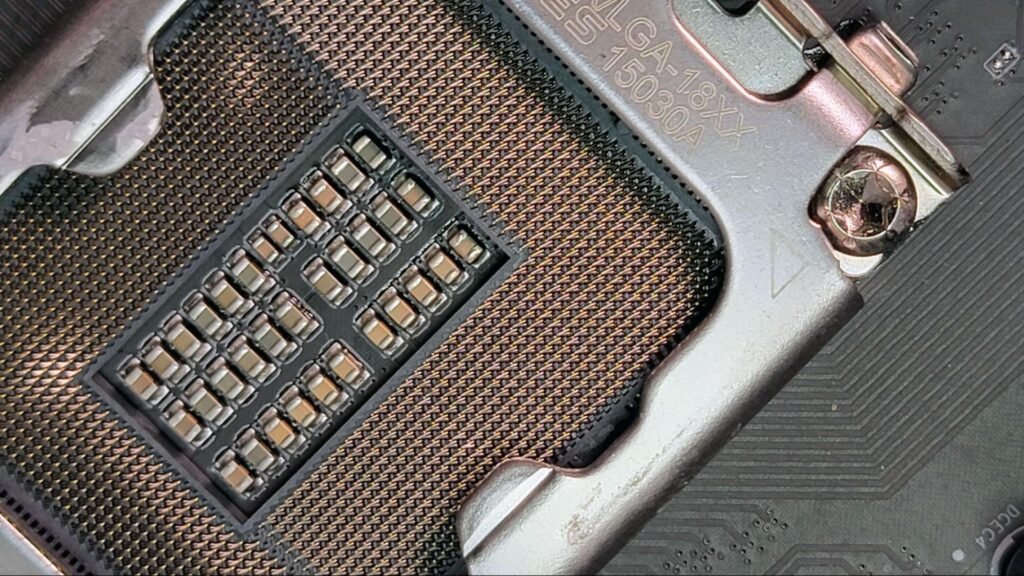
Intel vs AMD Socket Difference (Important!)
| Platform | Pin Location | Risk Level |
|---|---|---|
| Intel LGA | Pins on motherboard | High socket risk |
| AMD AM5 | Pins on motherboard | Very delicate |
| Older AMD PGA | Pins on CPU | High CPU risk |
Understanding this is critical because the damage risk changes depending on platform.
Step-by-Step Guide: How to re-seat a CPU without bending pins
Now let’s go step-by-step like a professional technician.
Step 1: Power Off and Discharge System
- Turn off PC completely
- Unplug PSU cable
- Press power button for 10–15 seconds
This clears residual power from motherboard circuits.
Step 2: Remove CPU Cooler Carefully
Unscrew cooler evenly in diagonal pattern.
Do NOT pull aggressively.
If stuck:
- Gently twist to break thermal paste seal
Step 3: Clean Old Thermal Paste
Use isopropyl alcohol and microfiber cloth.
Clean:
- CPU surface
- Cooler base
No residue should remain.
Step 4: Open CPU Socket Lock
Lift retention arm gently.
Never force it—modern sockets are precision-engineered.
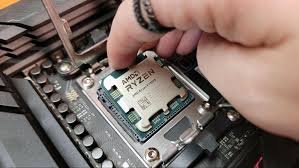
Step 5: Remove CPU Properly
Hold CPU from edges only.
Important rules:
- Never touch contact points
- Do not slide across socket
- Lift straight up
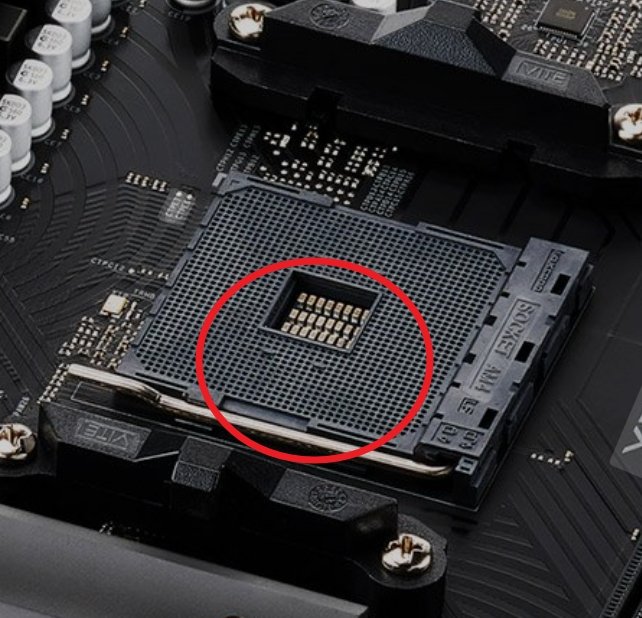
Step 6: Inspect CPU and Socket
Check for:
- Bent pins (Intel/AMD boards)
- Dust particles
- Burn marks (rare but critical)
💡 Tech Mentor Tip: I once fixed a “dead CPU” issue that turned out to be a single dust particle blocking contact. Small things matter.
Step 7: Align CPU Correctly
Look for:
- Triangle markers on CPU and socket
Align carefully before placing.
CPU should:
- Sit flat automatically
- Require zero force
If you feel pressure → STOP immediately.
Step 8: Lock CPU Socket
Close retention arm gently.
If resistance feels unnatural, reopen and recheck alignment.
Step 9: Apply Thermal Paste
Apply small pea-sized amount in center.
Do not overapply (common beginner mistake).
Step 10: Reinstall Cooler Evenly
Tighten screws in diagonal sequence:
- Top left
- Bottom right
- Top right
- Bottom left
This ensures even pressure distribution.
Software vs Hardware Issue Check
| Problem Type | Likely Cause | Fix Type |
|---|---|---|
| No boot after reseating | Misalignment | Hardware fix |
| Overheating | Bad thermal paste | Hardware fix |
| BIOS CPU error | Seating issue | Hardware fix |
| Random crashes | Voltage instability | BIOS/Software |
Common Mistakes Beginners Make
- Forcing CPU into socket
- Touching pins or pads
- Using too much thermal paste
- Uneven cooler tightening
- Ignoring motherboard socket inspection
Look, I’ve seen people bend pins just because they were in a hurry. Slow is fast in hardware repair.
When CPU Pins Are Already Bent
If damage has already occurred:
Minor Bend
- Can sometimes be carefully realigned using precision tools
Severe Bend
- Professional repair required
- Risk of permanent damage
Never power on system with suspected bent pins.
BIOS & Voltage Considerations After Re-seating
After installation:
- Reset BIOS (recommended)
- Check CPU voltage stability
- Ensure correct thermal readings
- Disable unstable overclock settings
Modern 2026 motherboards often auto-detect CPU changes, but manual verification is still important.
Real Tech Mentor Insight
Here is the truth most guides won’t tell you: CPU reseating is not about strength—it’s about precision and patience.
Most CPU damage doesn’t happen during failure… it happens during impatience.
Also, small but real-world note: people often type “motherbord” instead of motherboard when panicking during repair situations—don’t let that be your state of mind during installation 😄
Final Safety Tips for 2026 Builds
- Always work in static-safe environment
- Never rush CPU installation
- Double-check alignment marks
- Keep BIOS updated for compatibility
- Handle socket with extreme care
Final CTA: Fix it right the first time
If your system is not booting or you suspect CPU seating issues, don’t guess and don’t force anything.
Now you know exactly how to re-seat a CPU without bending pins using professional-level techniques used in real hardware labs.
For more deep repair guides, troubleshooting walkthroughs, and expert PC optimization tips, visit fixrig.xyz—your trusted hub for hardware enthusiasts and DIY fixers.
Got a tricky CPU or motherboard issue? Drop it in the comments or join the fixrig.xyz community. Someone there has probably already fixed the exact same problem.
Because in modern PC building, precision is everything—and one small mistake can cost a whole system.
Leave a Reply