Author: mumariqbal191@gmail.com

  • Best Internal Hard Drives for Long-Term Data Archiving in 2026 (Expert Guide to Secure Your Data for Decades)

    Look, I’ve seen this mistake a thousand times—people spend thousands on high-end rigs, GPUs, and blazing-fast SSDs… but when it comes to long-term data storage, they cheap out or choose the wrong drive. And then one day—boom—years of data gone.

    Here is the real talk about why your rig is acting up when it comes to data reliability: not all storage is built for longevity.

    In this deep technical guide from fixrig.xyz, I’ll walk you through the best internal hard drives for long-term data archiving in 2026, what actually matters (beyond marketing hype), and how to set them up properly so your data survives for years—even decades.


    Why HDDs Still Dominate Long-Term Archiving (Even in 2026)

    You might be thinking: “SSDs are faster, so they must be better, right?”

    Not for archiving.

    The Truth:

    • HDDs (Hard Disk Drives) are still the king of long-term storage
    • SSDs suffer from data degradation without power
    • HDDs offer better cost per TB
    • Proven reliability for cold storage environments

    Key Technical Factors:

    • Magnetic storage (less volatile than NAND flash)
    • Lower write amplification issues
    • Better suited for RAID archival systems

    What Makes a Hard Drive Good for Long-Term Archiving?

    Before we jump into recommendations, let’s break down the real criteria that matter:

    1. Workload Rating

    Measured in TB/year. Archival drives need:

    • 180TB/year minimum for reliability

    2. MTBF (Mean Time Between Failures)

    • Aim for 1 million+ hours

    3. RPM vs Longevity

    • 5400 RPM = cooler, longer lifespan
    • 7200 RPM = faster but slightly more wear

    4. Cache Size

    • Larger cache improves sustained writes

    5. Helium-Filled Drives

    • Less friction, lower temps, longer life

    Best Internal Hard Drives for Long-Term Data Archiving in 2026

    1. Western Digital Red Plus (Best Overall Reliability)

    • RPM: 5400
    • Designed for NAS systems
    • Excellent thermal stability
    • Optimized firmware for continuous operation

    Why it’s great:
    Balanced performance + longevity. Perfect for home servers and RAID setups.


    2. Seagate IronWolf (Best for NAS & RAID)

    • AgileArray firmware for RAID optimization
    • High workload rating
    • Built-in health monitoring

    Real talk:
    If you’re building a NAS, this is one of the safest bets. I’ve deployed this in dozens of systems—rarely fails if properly cooled.


    3. Toshiba N300 (Best Value Performance)

    • 7200 RPM
    • High durability
    • Strong vibration resistance

    Downside: Runs slightly hotter—cooling is critical.


    4. WD Gold Enterprise Drives (Best for Data Centers)

    • Enterprise-grade reliability
    • Helium-filled tech
    • High MTBF

    Use case:
    If your running serious archival infrastructure, this is your go-to.


    5. Seagate Exos Series (Maximum Capacity & Longevity)

    • Up to 20TB+ capacity
    • Enterprise-level firmware
    • Optimized for 24/7 operation

    Pro insight:
    These drives are beasts—but overkill for casual users.


    Comparison Table: Archival HDDs vs SSDs

    FeatureHDD (Archival Drives)SSD
    Longevity (offline)ExcellentPoor
    Cost per TBLowHigh
    SpeedModerateVery High
    Data RetentionYearsMonths (unpowered)
    Best Use CaseBackup & archiveOS & active files

    Tools Checklist for Proper Archival Setup

    Before you start, make sure you have:

    • SATA cables (high quality)
    • Stable PSU (clean voltage output)
    • Cooling fans (critical for longevity)
    • NAS enclosure or RAID controller
    • SMART monitoring software
    • Backup software (don’t skip this… seriously)

    Step-by-Step: How to Set Up a Long-Term Archival Drive

    Step 1: Install the Drive Properly

    • Mount securely in your case or NAS
    • Ensure vibration isolation (important!)

    Step 2: Check BIOS Settings

    • Enable AHCI mode
    • Confirm drive detection in BIOS

    Step 3: Initialize & Format

    • Use GPT partition style
    • Format as NTFS or exFAT (depending on use)

    Step 4: Optimize Power Settings

    • Disable aggressive sleep modes
    • Avoid frequent spin-ups (this kills drives faster than you think)

    Step 5: Enable SMART Monitoring

    • Use tools like CrystalDiskInfo
    • Watch for:
      • Reallocated sectors
      • Temperature spikes

    Step 6: Implement Backup Strategy

    • Follow 3-2-1 rule:
      • 3 copies of data
      • 2 different media types
      • 1 offsite backup

    Step 7: Temperature Management

    • Keep drives under 40°C
    • Add airflow if needed

    Common Mistakes That Kill Your Archival Drives

    1. Poor Cooling

    Heat = silent killer. Your drive might look fine… until it’s not.

    2. Cheap Power Supply

    Unstable voltage damages components over time.

    3. No Redundancy

    One drive = one point of failure. Always use RAID or backups.

    4. Ignoring Firmware Updates

    Yes, HDD firmware matters too.

    5. Overloading Drives

    Running archival drives like gaming SSDs? Bad idea.


    Advanced Optimization Tips (Pro Level)

    • Use RAID 1 or RAID 5 for redundancy
    • Combine HDD + SSD caching for hybrid performance
    • Schedule periodic data integrity checks
    • Avoid constant read/write cycles
    • Store critical drives in low-humidity environments

    Final Thoughts: What Should You Actually Buy?

    If you want a simple recommendation:

    • Beginner: WD Red Plus
    • Intermediate: Seagate IronWolf
    • Advanced: WD Gold or Seagate Exos

    Don’t overthink it—but also don’t ignore the fundamentals.

    Because here’s the truth:
    The best internal hard drives for long-term data archiving in 2026 are only as reliable as your setup.

    Even the best drive will fail if your ignoring cooling, power stability, or backup strategies.


    CTA: Build Smarter, Not Just Faster

    If you’re serious about protecting your data, don’t stop here.

    At fixrig.xyz, we break down real-world hardware problems, DIY fixes, and pro-level optimization strategies that actually work.

    Got a failing drive? Strange clicking noise? BIOS not detecting your storage?

    Drop your question in the comments—and let’s fix your rig the right way.
  • How to Overclock Your RAM Safely Using XMP Profiles (Step-by-Step 2026 Guide for Maximum Performance)

    Look, I’ve seen this error a thousand times—users buy high-speed RAM, install it, and then run it at default speeds without even realizing it. You’re literally leaving performance on the table.

    Here is the real talk about why your rig is acting up: your RAM is probably not running at its rated speed. And the fix? It’s easier than you think—if you do it right.

    In this expert-level guide from fixrig.xyz, I’ll walk you through how to overclock your RAM safely using XMP profiles, avoid common mistakes, and ensure your system stays stable under load.


    What is XMP and Why It Matters in 2026

    Understanding XMP (Extreme Memory Profile)

    XMP is a pre-configured overclocking profile stored inside your RAM module. It allows your system to automatically apply optimized settings like:

    • Frequency (MHz)
    • Voltage
    • Timings (CAS Latency)

    Instead of manually tweaking everything, XMP does the heavy lifting.

    Why Your RAM Isn’t Running at Full Speed

    By default, most systems run RAM at JEDEC base speeds (e.g., 2133MHz or 2400MHz), even if your kit supports 3200MHz or higher.

    That’s because:

    • BIOS defaults to safe compatibility settings
    • XMP is usually disabled out of the box
    • Motherboard may not auto-detect optimal profile

    Benefits of Overclocking RAM Using XMP

    • Increased system responsiveness
    • Better gaming performance (especially CPU-bound games)
    • Improved multitasking for remote workers
    • Faster data handling in creative apps

    If you’re working with heavy workloads or gaming rigs, enabling XMP is basically free performance.


    Tools Checklist Before You Start

    Make sure you have the following ready:

    • Compatible motherboard (supports XMP/DOCP/EXPO)
    • Updated BIOS firmware
    • Stable power supply (clean voltage delivery)
    • Monitoring software (HWMonitor, CPU-Z)
    • Stress testing tools (MemTest86, Prime95)

    Pro tip: Always update your BIOS before enabling XMP. I’ve seen outdated firmware cause instability even on high-end systems.


    XMP vs Manual RAM Overclocking (Quick Comparison)

    FeatureXMP ProfileManual Overclocking
    Ease of UseVery EasyAdvanced
    StabilityHigh (pre-tested)Depends on user
    PerformanceGoodMaximum
    Risk LevelLowMedium-High
    Time Required2 minutesHours

    Step-by-Step: How to Overclock Your RAM Safely Using XMP Profiles

    Step 1: Enter BIOS

    • Restart your PC
    • Press DEL or F2 during boot
    • This will open your BIOS/UEFI interface

    Step 2: Locate XMP Setting

    Depending on your motherbord brand:

    • ASUS: AI Tweaker → XMP
    • MSI: OC Tab → XMP
    • Gigabyte: M.I.T → Extreme Memory Profile

    Step 3: Enable XMP Profile

    • Select XMP Profile 1 (recommended)
    • This applies rated frequency, timings, and voltage

    Some RAM kits offer multiple profiles—stick with Profile 1 unless you know what you’re doing.

    Step 4: Save and Exit

    • Press F10
    • Confirm changes
    • System will reboot automatically

    Step 5: Verify RAM Speed

    Once you’re in Windows:

    • Open CPU-Z
    • Check Memory Tab
    • Multiply DRAM Frequency by 2 (DDR = Double Data Rate)

    Example: 1600MHz = 3200MHz effective speed


    Step 6: Stress Test for Stability

    This is where most users mess up—they skip testing.

    Run:

    • MemTest86 (bootable test)
    • Prime95 (Blend test)

    Let it run for at least 30–60 minutes.

    If no crashes or errors occur, your setup is stable.


    Common Symptoms After Enabling XMP

    1. System Won’t Boot

    • RAM not compatible with motherboard
    • BIOS needs update

    2. Random Crashes or Blue Screens

    • Insufficient voltage
    • Memory controller instability

    3. Performance Drops

    • Thermal throttling
    • Incorrect timings applied

    Troubleshooting XMP Issues (Real-World Fixes)

    Fix 1: Reset BIOS

    • Remove CMOS battery or use reset jumper

    Fix 2: Lower Frequency

    • Try stepping down from 3600MHz → 3200MHz

    Fix 3: Increase DRAM Voltage Slightly

    • Example: 1.35V → 1.37V

    Don’t go crazy here—small increments only.

    Fix 4: Update BIOS

    Manufacturers release updates that improve memory compatibility.


    Advanced Tweaks (Optional but Powerful)

    If you want to go beyond XMP:

    • Manually adjust CAS latency (CL)
    • Fine-tune tRCD, tRP, tRAS
    • Optimize Infinity Fabric (AMD systems)

    But honestly? For most users, XMP is more than enough.


    Thermal & Voltage Considerations

    RAM doesn’t get as hot as CPUs or GPUs, but:

    • Poor airflow can cause instability
    • High voltage reduces lifespan over time

    Keep DRAM voltage within safe limits (usually ≤1.4V for DDR4/DDR5)


    Pro Tips from a Hardware Engineer

    • Always check your motherboard QVL list
    • Mix-matching RAM kits = trouble
    • Dual-channel setup improves performance
    • Keep BIOS updated regularly

    And here’s something most guides won’t tell you:
    Sometimes your CPU’s memory controller is the bottleneck—not the RAM.


    Final Thoughts: Is XMP Worth It?

    Absolutely.

    If you’re not using XMP, your system is basically underperforming for no reason.

    The best part? It takes less than 5 minutes.

    But remember—overclocking is still overclocking. Even if it’s “automatic,” your system stability depends on proper setup.

    Don’t just enable it and forget it—test it.


    CTA: Unlock Your System’s True Power

    At fixrig.xyz, we don’t just tell you what buttons to press—we teach you why your system behaves the way it does.

    So if your still confused, stuck in BIOS, or facing crashes after enabling XMP…

    Drop your exact specs in the comments and let’s troubleshoot your rig like a pro.

    Because your hardware deserves better than default settings.

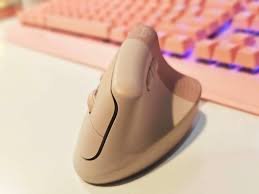
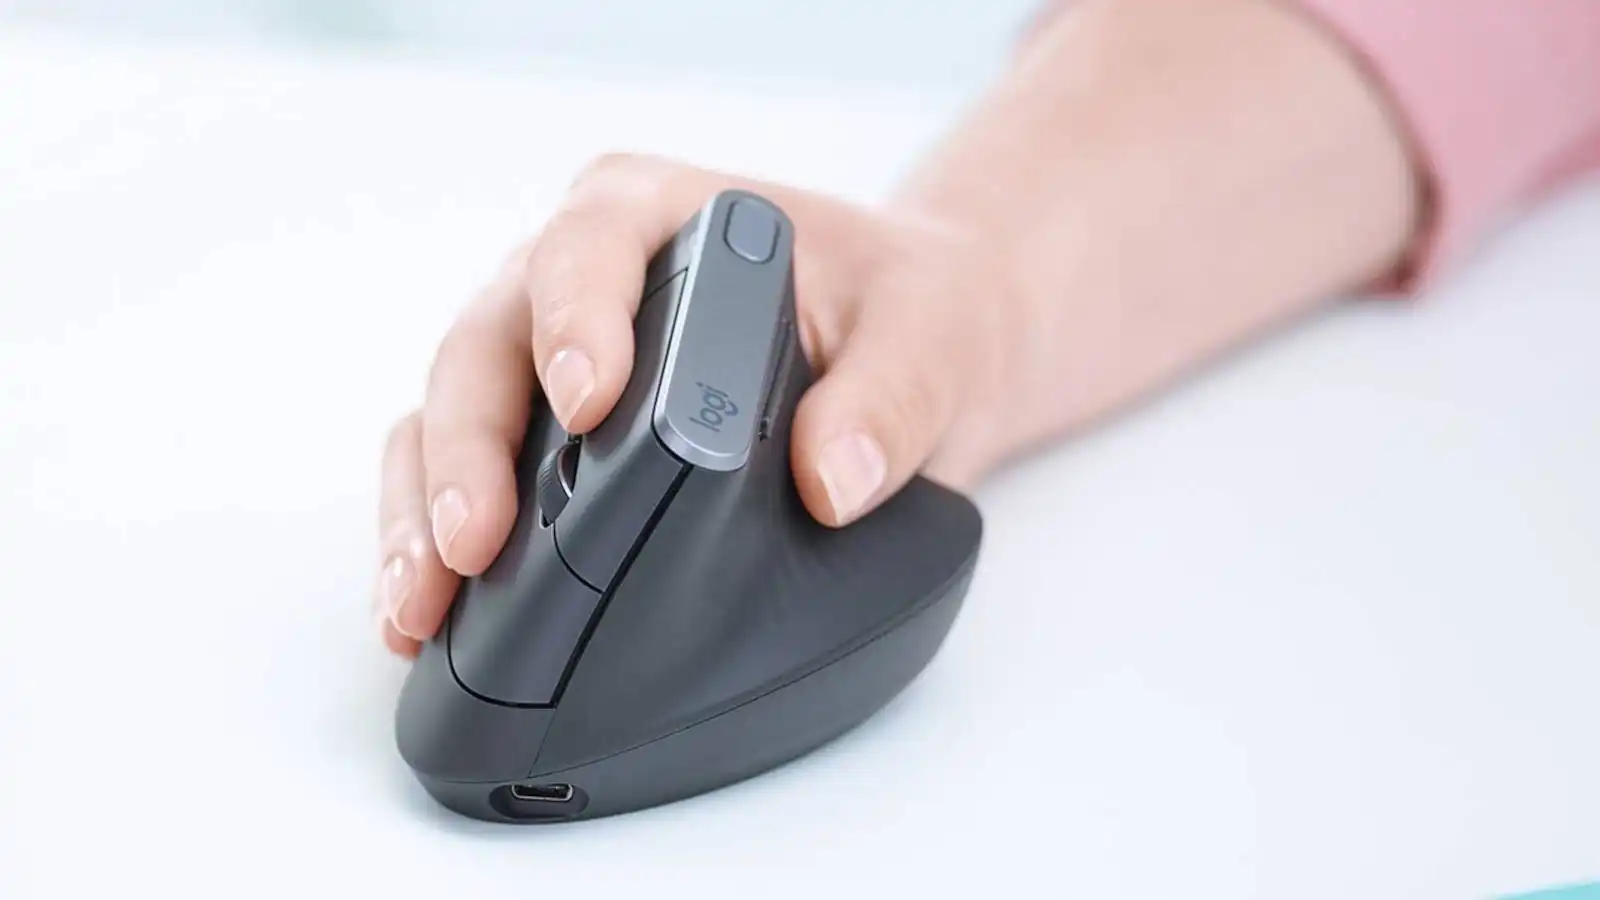
  • Best Vertical Mouse for Wrist Pain: A Hardware Review (2026 Ergonomic Fix Guide)

    Best Vertical Mouse for Wrist Pain: A Hardware Review (2026 Ergonomic Fix Guide)

    Look, I’ve seen this problem a thousand times—people upgrade their CPUs, GPUs, even RAM… but ignore the one device they touch all day: the mouse.

    Then wrist pain starts.

    Here is the real talk about why your rig is acting up: your traditional mouse forces your wrist into an unnatural pronation angle. Over time, that leads to strain, fatigue, and even repetitive stress injuries.

    In this expert-level guide from fixrig.xyz, I’ll break down the best vertical mouse for wrist pain, explain the hardware science behind it, and help you choose the right one based on your setup.


    Why Wrist Pain Happens (Hardware Perspective)

    The Problem with Traditional Mice

    Standard mice force your wrist into a flat position:

    • Palm facing downward
    • Radius and ulna bones twisted
    • Constant tension on tendons

    This creates long-term strain.


    How Vertical Mice Fix It

    Vertical mice rotate your hand into a natural handshake position:

    • Neutral wrist posture
    • Reduced muscle tension
    • Better long-term comfort

    It’s not hype—it’s biomechanics.


    Common Symptoms of Wrist Strain

    If you’re dealing with:

    • Wrist pain after long sessions
    • Tingling or numbness
    • Reduced grip strength
    • Fatigue during clicking

    Then your current mouse is part of the problem.


    Tools Checklist for Ergonomic Upgrade

    Before switching, consider:

    • Desk height alignment
    • Proper chair support
    • Mouse pad with wrist rest
    • DPI adjustment capability

    Pro tip: Hardware alone won’t fix posture—but it’s a major step.


    Best Vertical Mouse for Wrist Pain (2026 Hardware Review)

    1. Logitech MX Vertical Advanced Ergonomic Mouse

    https://images.openai.com/static-rsc-4/csBtaQZsripAEBwmiXdpmIfdLVSwL8_kkYRa0SX33kHrQxuebY-q8aCDRea51f2F3gyBjkDBEVPD2PZSoZPBuBKRjnFOt-wCIwDKsCnXyYUHE5c4iktwg524MGcNRkF-TjVWr6fGugjxPmvVJB7qR3h9FkufcWNw6pf0WSbitcUARCzSL6XuQdCmqJeiqFnW?purpose=fullsize
    https://images.openai.com/static-rsc-4/DEzObFn3Lf1ypL5ExV-F5f75AcVO68w9jqaIWM1j-uxMJd3dBwEhsigQGzVDuEwtjuM0WUIvGULE-q5iUSNqmesRJXDA1KJ0GcHCRzFam-h3lZwRXj68u8qZeoHI16sZG7v55LleCuw_rMvcPwSzmOKPBU1oBNS2S60Y4UqscU8tDHys5TrNl18xCr9s8UNK?purpose=fullsize
    https://images.openai.com/static-rsc-4/zv_HkngIlTS-MGHlTiJZt7PDHrPlQN7O3lzofepUwwZ5EuXUzwkWGNr6WeyaKFuuav1owLj3-gNz365Yn8H9ecWXar7B5qdj63MjKrGc8LPNKJBD9OL-0mcdLFHczEi7bqRf-xyyKTuidBwTEwer_kxLvzNfEUZljlXOJrbOy8nyI5kTE9dtPbOfDFL3hLAp?purpose=fullsize

    7

    Key Features:

    • 57-degree vertical angle
    • High-precision sensor (4000 DPI)
    • Wireless + Bluetooth support
    • Premium build quality

    Best For: Professionals & remote workers

    Expert Take:
    This is the gold standard. Excellent sensor performance, minimal latency, and solid ergonomics.


    2. Anker 2.4G Wireless Vertical Ergonomic Optical Mouse

    https://images.openai.com/static-rsc-4/c4RCXLZkjN7fK8W1x0bYcn2bJe9PT7bYkJlJu7A6HQFdL-ccSt6fLsID0DcVjwsC8Y4mzbd0oWsHjiDXmiVVKR2KAgsutNXTiZSXxP-QrSH0uc14wZ3bBh-TIlBERDQ-BtZDNtsejE4FIGSCSBRHHqPBZ_zGKiZpbUUt8JqNdke0M86O0RZUoDBdqVEBdoHC?purpose=fullsize
    https://images.openai.com/static-rsc-4/HmRJX7BFgbmBt_edz4mkRkGFb3nuZ1nX2ydBjtEf3eTZQ3ssSZ7w5FojT7svfly_I7G5WFJHM8BRuZWC0146enQbQ0wi76sl_OnXxyS4FFsJQSlmGn0T74E85M201wAk-hQtSSMrHnUg4eCpzCDb4ABRpvfs8K4ASpYwunu5ZcRJzgesPVNXqDKlOe_s_KX_?purpose=fullsize
    https://images.openai.com/static-rsc-4/PEGMIkWCvPw8ZztylWUiYQFhU-gZ77cGkDXz-NcgtieOczV72nMe08OPTx9Jw44k1snaQf6VDQSqnrLANvvqxvDxOQ3nvdgpgB12c74_Gs6nivW3Oq44PKBc_D5x9FNyvE20SJHUcieAf9ggrlSZ4NCXQlT4DjPjvMXgnxjBapcauxC7W8EYqGvfh52poWKR?purpose=fullsize

    6

    Key Features:

    • Budget-friendly
    • 800–1600 DPI settings
    • Comfortable grip

    Best For: Beginners

    Expert Take:
    Affordable and effective—but build quality is average.


    3. Evoluent VerticalMouse D

    https://images.openai.com/static-rsc-4/Mp9N7dbEXP_l1V29f6QgBmdCEtJVzeuSIhodLIRmwpWhh6lWtYv5EZc4wz6Eb6fPv3MaUe9xZFn_oEzz6zO60EUQOhsJCEmOvQd9VAqL9cQF1UIG4oT2sykaUVUghqao-jOPGZToCgz-9ERyrtuODaC3lKCJmcZnpX5YSerkMkWUwGbbfihnp2zj_tE6z5Xe?purpose=fullsize
    https://images.openai.com/static-rsc-4/DqkRuEFAijjEYGAKeiUPVPvaAdDq5k6e2NMsWcT82qga5aLdjGWMJDoBH16WbmEShQFcUCyhFGijvpCzkd1Lf9RnmPbrbvQMGqdVesFXuxfpGeIAXr9mQcVjvALTy7hwXr8931q7f-qAdd1h67lGhsYPSpq6V1CO_DXQcjt2-VqpVgc2pzrtr7_sSMOi-O3b?purpose=fullsize
    https://images.openai.com/static-rsc-4/Sd8CzqisrwRvJB7dHK2h8zxlMawA6imTLfE-yksO-5mlXRRhmpmjfDlILlBiGyAbghLlRyhO3NHujs3x3-hzkuqQYne_xXEL_cUtp4pCz9I5wqo-wr3IEZn-Vii5c1mavFdALDnFG3400m-5VNJOmodY4DUsBbd-WQLiuc0_QgN1Wu3EE8uCD2CDVgxEIh40?purpose=fullsize

    6

    Key Features:

    • True vertical design
    • Adjustable pointer speed
    • Wired & wireless options

    Best For: Long working hours

    Expert Take:
    Pure ergonomics-focused design. Slight learning curve, but worth it.


    4. J-Tech Digital Scroll Endurance Vertical Mouse

    https://images.openai.com/static-rsc-4/mb7MGvfPfVlv6YSkAbhkDkpgyNblQLH3EOcjSYGc9vfZ5b0pyjmDk_g2cF3DZBQohvgjKXXfzEh1G7VdMfENEuB6aN3Ypf82CcTs5b9-MJSK_v8K9BWQ7xs_X4LFcaBlucA6UnjqiJ7PqRIXJfHATi8aFh1GnjCz9Qrr4lVdQU_n_uD_38m1Q_aeInbD1cra?purpose=fullsize
    https://images.openai.com/static-rsc-4/mQ6sZYWUUfdnFvHj2Sb4LUM9ViIKzmmWUS9kOdeUmBkRTzzUrL9OQzTz_C79G2RJWyvF5hEDoGfVbJXOpXFuqRR5jtyCO178s-cKPI_ZGiEDTixessMrjNf2aqu6N30wnW_cljUL3MQY8od7slKXj-GxY563I7aqZ37-T59_9g8NKGvX7pjoXvS7UVTlpOfY?purpose=fullsize
    https://images.openai.com/static-rsc-4/lPUg2Gbh7TpRBwY-Es8dANvmF4JLQvjsbGA_ValM4ftuIA8cmBPnITjrbZYxvI5SSFCbq70Vv5wTaYVI36VdRPH01UhwW7XB5pqhrbMB9Kn732Oh8beIjdFy7KOlMlWh0KzVTw-SvM6u5U8r2VS417-I-2-EDTxrYRirik-_JVynqDdbVcXTzMvmMsA_zcu-?purpose=fullsize

    5

    Key Features:

    • Detachable palm rest
    • Adjustable DPI
    • Unique design

    Best For: Maximum wrist support

    Expert Take:
    Great for users with severe wrist pain.


    Comparison Table: Best Vertical Mice (2026)

    MouseDPIConnectivityComfortPrice Tier
    Logitech MX Vertical4000Bluetooth/USBExcellentPremium
    Anker Vertical Mouse1600USBGoodBudget
    Evoluent VerticalMouse D3200Wired/WirelessExcellentPremium
    J-Tech Digital2000USBVery GoodMid-range

    Step-by-Step: How to Transition to a Vertical Mouse

    Step 1: Adjust Desk Ergonomics

    • Keep elbow at 90° angle
    • Align mouse with shoulder

    Step 2: Set Proper DPI

    • Start with medium sensitivity
    • Adjust based on comfort

    Step 3: Practice Grip Technique

    • Don’t squeeze the mouse
    • Keep relaxed hand position

    Step 4: Take Breaks

    • Every 30–60 minutes
    • Stretch wrist and fingers

    Step 5: Monitor Improvement

    • Track pain reduction
    • Adjust setup if needed

    This proccess takes time—don’t expect instant perfection.


    Advanced Optimization (2026 Setup Standards)

    Combine with Ergonomic Keyboard

    Vertical mouse + split keyboard = best results.


    Monitor Arm Position

    Your arm should not hover or stretch.


    Reduce Clicking Force

    Heavy clicking increases strain over time.


    Common Mistakes to Avoid

    Switching Overnight

    Your muscles need time to adapt.

    Ignoring Posture

    Mouse alone won’t fix bad sitting habits.

    Buying Cheap Clones

    Low-quality sensors reduce productivity.

    Using Wrong DPI

    Too high or too low causes strain.


    Real-World Scenarios

    Problem: Wrist pain after long work hours

    Solution: Logitech MX Vertical

    Problem: Budget constraint

    Solution: Anker Vertical Mouse

    Problem: Severe wrist strain

    Solution: J-Tech with palm support


    Pro Tips from a Hardware Engineer

    • Invest in ergonomics before performance upgrades
    • Keep firmware and drivers updated
    • Use smooth mouse pads
    • Maintain neutral wrist alignment

    And here’s something most guides won’t tell you:
    Your desk height matters just as much as your mouse—bad alignment cancels ergonomic benefits.


    When to Upgrade Your Setup

    Upgrade if:

    • Pain persists despite adjustments
    • Current mouse feels unnatural
    • You work long hours daily

    At that point, your ignoring the root cause.


    Final Thoughts: Small Change, Big Impact

    Switching to the best vertical mouse for wrist pain isn’t just a comfort upgrade—it’s a long-term health investment.

    Better posture.
    Less strain.
    Higher productivity.


    CTA: Upgrade Smart with fixrig.xyz

    At fixrig.xyz, we help you optimize your entire setup—not just fix problems.

    Still confused about which vertical mouse fits your workflow? Or your setup still causing wrist pain?

    Drop your desk setup and usage details in the comments—and let’s fix your rig the right way.
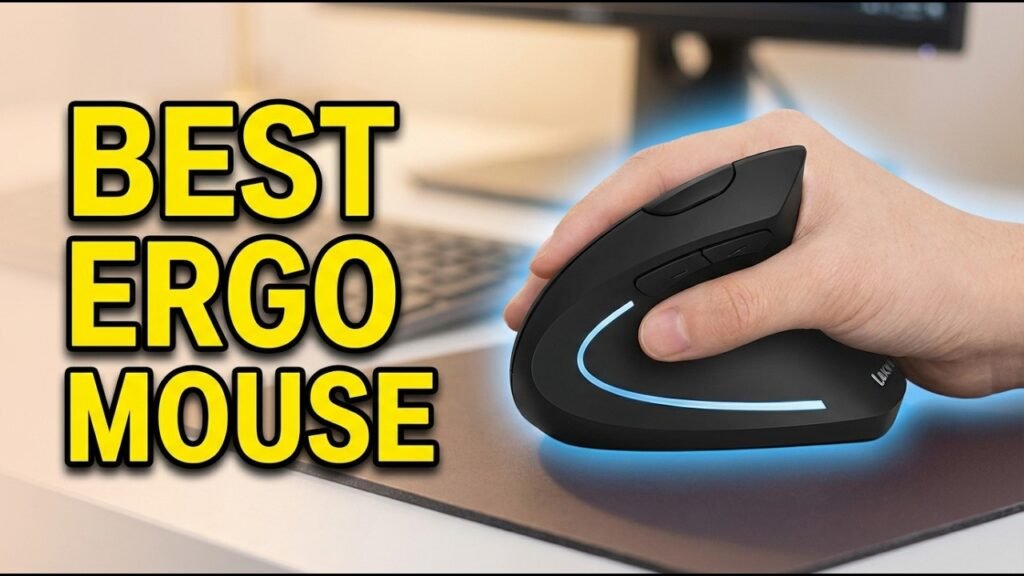
    Because performance isn’t just about speed… it’s about comfort too.

  • Fixing Dead Pixels on an LED Monitor at Home (Complete 2026 DIY Repair Guide That Actually Works)

    Fixing Dead Pixels on an LED Monitor at Home (Complete 2026 DIY Repair Guide That Actually Works)

    Look, I’ve seen this issue a thousand times—you buy a brand new LED monitor, everything looks perfect… and then you notice it.

    That tiny black or stuck pixel right in the middle of your screen.

    Once you see it, you can’t unsee it.

    Here is the real talk about why your rig is acting up: not all “dead pixels” are truly dead. Some are just stuck pixels, and those can actually be fixed at home—if you know what you’re doing.

    In this expert-level guide from fixrig.xyz, I’ll walk you through fixing dead pixels on an LED monitor at home, step-by-step, using proven techniques used by technicians—not random internet myths.


    Dead Pixel vs Stuck Pixel (Critical Difference)

    Before you try to fix anything, you need to know what you’re dealing with.

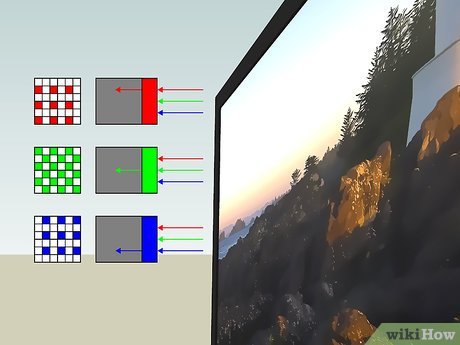
    Dead Pixel

    • Completely black
    • No light output
    • Usually permanent

    Stuck Pixel

    • Red, green, or blue dot
    • Subpixel stuck in ON state
    • Often fixable

    If your pixel is black, chances of repair are low. If it’s colored—you’ve got a good shot.


    Common Symptoms

    Single Black Dot

    • Likely dead pixel

    Bright Colored Dot

    • Stuck pixel

    Pixel Flickering

    • Signal or panel issue

    Cluster of Dead Pixels

    • Panel damage

    If your seeing multiple pixels, this may not be a DIY fix.


    Root Causes (2026 Display Technology Insight)

    Manufacturing Defects

    Even premium panels can have pixel defects.

    Voltage Imbalance

    Pixels rely on precise voltage control.

    Transistor Failure

    Each pixel has a tiny transistor—if it fails, pixel dies.

    Pressure or Impact Damage

    Physical stress can damage pixels permanently.


    Tools Checklist Before You Start

    Prepare these:

    • Soft microfiber cloth
    • Pixel fixing software/tool
    • Stylus or soft object (no sharp tools)
    • Patience (seriously)

    Pro tip: Never press directly with your finger—too much pressure can damage the panel.


    Comparison Table: Software Fix vs Hardware Fix

    MethodDifficultyCostEffectiveness
    Pixel Fixing SoftwareEasyFreeMedium
    Gentle Pressure MethodEasyFreeMedium
    Heat + Massage MethodMediumLowMedium
    Panel ReplacementHard$$$Maximum

    Step-by-Step: Fixing Dead Pixels on an LED Monitor at Home

    Step 1: Confirm the Pixel Type

    • Use a solid color test (black, white, red, green, blue)
    • Identify if pixel is stuck or dead

    This determines your strategy.


    Step 2: Try Pixel Fixing Software

    These tools rapidly change colors to “unstick” pixels.

    • Run software for 10–30 minutes
    • Focus on affected area

    This works by stimulating pixel voltage changes.


    Step 3: Use Gentle Pressure Technique

    This is a classic hardware hack.

    • Turn off monitor
    • Place soft cloth over pixel
    • Apply very gentle pressure with stylus
    • Turn monitor back on

    The goal is to re-align liquid crystals.

    Be careful—too much pressure can cause permanent damage.


    Step 4: Heat + Massage Method

    • Turn monitor on
    • Display black screen
    • Warm area slightly (not hot!)
    • Gently massage pixel area

    Heat can help restore pixel responsiveness.


    Step 5: Repeat Cycles

    Sometimes fixes don’t work instantly.

    • Alternate between software and pressure method
    • Test after each attempt

    Patience is key here.


    Advanced Troubleshooting (Pro Level)

    Check Cable & Signal Integrity

    • Use high-quality HDMI/DisplayPort cable
    • Try different port

    Signal issues can mimic pixel problems.


    GPU Output Check

    • Test monitor with another PC
    • Rule out GPU artifacting

    Sometimes the issue isn’t the monitor.


    BIOS-Level Test

    Boot into BIOS:

    • If pixel still visible → hardware issue
    • If not → GPU/driver issue

    Common Mistakes That Make It Worse

    Pressing Too Hard

    This can create more dead pixels.

    Using Sharp Objects

    Never use anything that can scratch the panel.

    Expecting Instant Results

    Some fixes take time.

    Ignoring True Dead Pixels

    Not all pixels are fixable—accept reality when needed.


    Real-World Scenarios

    Problem: Bright green dot

    Cause: Stuck pixel
    Fix: Software + pressure method

    Problem: Black dot

    Cause: Dead pixel
    Fix: Usually not repairable

    Problem: Pixel disappears temporarily

    Cause: Voltage fluctuation
    Fix: Repeat fix cycles


    Pro Tips from a Hardware Engineer

    • Always check warranty before DIY repair
    • Use pixel testing tools regularly
    • Avoid pressing screen during cleaning
    • Invest in high-quality monitors

    And here’s something most guides won’t tell you:
    Dead pixels can increase over time if caused by panel stress or manufacturing defects.


    When to Replace Instead of Fix

    Replace your monitor if:

    • Multiple dead pixels appear
    • Pixel cluster spreads
    • Panel damage is visible

    At that point, your just delaying the inevitable.


    Final Thoughts: Know What Can Be Fixed

    Fixing dead pixels on an LED monitor at home is possible—but only in specific cases.

    Stuck pixels? Fixable.
    Dead pixels? Usually permanent.

    The key is correct diagnosis and careful handling.


    CTA: Fix Your Display Like a Pro

    At fixrig.xyz, we don’t just give surface-level advice—we teach you how hardware actually works.

    Still stuck with a dead pixel? Not sure if it’s fixable or not?

    Drop your monitor model and issue in the comments—and let’s troubleshoot your rig step-by-step.

    Because your display should be flawless… not distracting.

  • Troubleshooting Slow Wi-Fi on PC Despite High-Speed Internet (Complete 2026 Performance Fix Guide)

    Troubleshooting Slow Wi-Fi on PC Despite High-Speed Internet (Complete 2026 Performance Fix Guide)

    Look, I’ve seen this problem a thousand times—you pay for high-speed internet, your phone flies at 300 Mbps… but your PC? It’s crawling at 20 Mbps like it’s stuck in 2012.

    Here is the real talk about why your rig is acting up: slow Wi-Fi on a PC is almost never about your internet plan. It’s usually your drivers, adapter, interference, BIOS settings, or hardware limitations holding you back.

    In this deep technical guide from fixrig.xyz, I’ll show you exactly how to handle troubleshooting slow Wi-Fi on PC despite high-speed internet, step-by-step, using real-world diagnostics—not guesswork.


    Common Symptoms of Slow Wi-Fi on PC

    Before fixing anything, identify the exact issue:

    1. Speed Much Lower Than Other Devices

    • Phone: 200+ Mbps
    • PC: 10–50 Mbps

    2. High Ping / Latency Spikes

    • Gaming lag
    • Video calls stuttering

    3. Intermittent Speed Drops

    • Fast → slow → fast again

    4. Strong Signal but Poor Performance

    • Full bars, but slow downloads

    5. Only One PC Affected

    • Other devices work perfectly

    If your seeing this, your PC is the bottleneck—not your internet.


    Root Causes (2026 Network Reality)

    Outdated or Incorrect Drivers

    Wi-Fi drivers directly control performance and stability.

    Weak or Old Wi-Fi Adapter

    Older adapters can’t handle modern Wi-Fi 6/6E speeds.

    Signal Interference

    Walls, devices, and even USB 3.0 ports interfere.

    Power Management Settings

    Windows limits performance to save energy.

    Router Band Issues (2.4GHz vs 5GHz)

    Wrong band = slower speeds.

    Thermal Throttling of Network Chip

    Yes—even Wi-Fi chips can throttle under heat.


    Tools Checklist Before You Start

    Prepare these tools:

    • Speed test website (for comparison)
    • Device Manager access
    • Latest Wi-Fi drivers
    • Optional USB Wi-Fi adapter
    • Router admin access

    Pro tip: Always compare speeds with another device on the same network.


    Comparison Table: Software Fix vs Hardware Upgrade

    Fix TypeDifficultyCostEffectiveness
    Update DriversEasyFreeHigh
    Change Power SettingsEasyFreeMedium
    Switch Wi-Fi BandEasyFreeHigh
    Reposition AntennaEasyFreeMedium
    Upgrade Wi-Fi AdapterMedium$$Very High

    Step-by-Step: Troubleshooting Slow Wi-Fi on PC Despite High-Speed Internet

    Step 1: Run a Baseline Speed Test

    • Test speed on your PC
    • Test speed on phone (same network)

    If there’s a big difference → PC issue confirmed.


    Step 2: Update Wi-Fi Drivers (Critical)

    • Open Device Manager
    • Locate Network Adapters
    • Update Wi-Fi driver

    Better yet—download from manufacturer website.

    Generic Windows drivers often limit performance.


    Step 3: Switch to 5GHz Band

    • Connect to 5GHz Wi-Fi instead of 2.4GHz

    Why?

    • Less interference
    • Higher speeds

    If your router supports Wi-Fi 6 or 6E, use it.


    Step 4: Disable Power Saving for Wi-Fi

    • Device Manager → Wi-Fi adapter
    • Power Management tab
    • Uncheck:
      • “Allow the computer to turn off this device”

    This prevents performance throttling.


    Step 5: Adjust Advanced Adapter Settings

    In adapter properties:

    • Set Preferred Band → 5GHz
    • Set Channel Width → Auto/Max
    • Set Roaming Aggressiveness → Medium

    These settings optimize connection quality.


    Step 6: Check Antenna Placement

    For desktop PCs:

    • Ensure antennas are connected
    • Position them vertically
    • Keep away from walls

    Bad antenna placement = weak signal.


    Step 7: Reduce Interference

    Keep your PC away from:

    • Routers placed behind walls
    • Microwaves
    • USB 3.0 hubs

    Yes—USB 3.0 interference is real.


    Step 8: Reset Network Settings

    • Settings → Network & Internet
    • Network Reset

    This clears corrupted configurations.


    Step 9: Check Background Processes

    • Open Task Manager
    • Look for heavy network usage

    Some proccesses can silently consume bandwidth.


    Step 10: Update BIOS & Chipset Drivers

    This is advanced—but powerful.

    • Update motherboard BIOS
    • Install latest chipset drivers

    These affect how your system communicates with network hardware.


    Advanced Optimization (Pro Level)

    Enable QoS on Router

    Prioritize your PC traffic for better performance.


    Use External Wi-Fi Adapter

    If internal card is weak:

    • Use USB Wi-Fi 6 adapter
    • Or PCIe Wi-Fi card

    Huge upgrade in many cases.


    Monitor Thermal Conditions

    Overheating can cause throttling:

    • Improve airflow
    • Check internal temps

    Common Mistakes That Kill Wi-Fi Performance

    Using Old Adapters

    Wi-Fi 4/5 cards can’t handle modern speeds.

    Ignoring Drivers

    Drivers are everything for network performance.

    Staying on 2.4GHz

    This band is overcrowded and slow.

    Poor Router Placement

    Even the best setup fails with bad positioning.


    Real-World Troubleshooting Scenarios

    Problem: PC slow but phone fast

    Cause: Driver or adapter issue
    Fix: Update driver or upgrade adapter

    Problem: Strong signal but low speed

    Cause: Interference or wrong band
    Fix: Switch to 5GHz

    Problem: Speed drops randomly

    Cause: Power saving or thermal issue
    Fix: Disable power saving


    Pro Tips from a Hardware Engineer

    • Always match your adapter to your router capability
    • Keep drivers updated regularly
    • Invest in Wi-Fi 6/6E hardware for future-proofing
    • Use wired Ethernet for critical tasks

    And here’s something most guides won’t tell you:
    Your PC case itself can block Wi-Fi signals—especially metal cases with internal antennas.


    When to Upgrade Hardware

    Upgrade if:

    • Adapter is older than Wi-Fi 5
    • Speeds remain low after all fixes
    • Frequent disconnects occur

    At that point, your just bottlenecking your own internet.


    Final Thoughts: Your PC Should Match Your Internet Speed

    Troubleshooting slow Wi-Fi on PC despite high-speed internet comes down to one thing: removing bottlenecks.

    Your internet isn’t slow.
    Your PC is.

    Fix the drivers, optimize settings, and upgrade hardware if needed—and your speeds will match your plan.


    CTA: Fix Your Network Like a Pro

    At fixrig.xyz, we don’t just fix problems—we help you unlock full system performance.

    Still getting slow Wi-Fi? Not sure if it’s your adapter, drivers, or router setup?

    Drop your PC specs and network details in the comments—and let’s troubleshoot your rig step-by-step.

    Because your internet should work at full speed… not half.

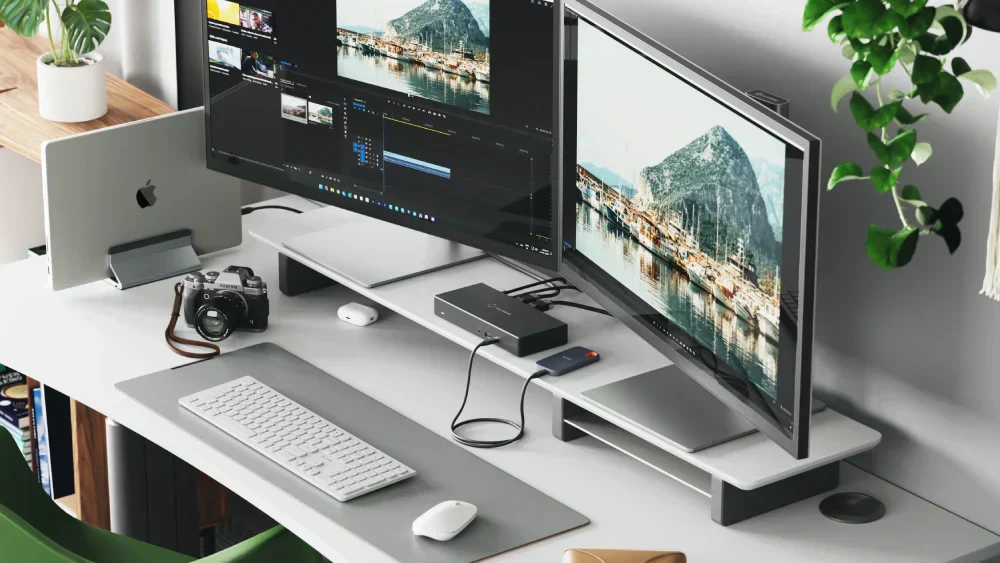
  • How to Set Up a Dual Monitor Setup on a Laptop with One HDMI (Complete 2026 Workstation Guide)

    How to Set Up a Dual Monitor Setup on a Laptop with One HDMI (Complete 2026 Workstation Guide)

    Look, I’ve seen this setup confusion a thousand times—someone buys an extra monitor for productivity, plugs it into their laptop… and then realizes there’s only one HDMI port.

    Panic starts.

    Here is the real talk about why your rig is acting up: laptops are not designed like desktops. You can’t just “split” HDMI and expect two independent displays. That’s not how signal architecture works.

    But don’t worry—in this expert guide from fixrig.xyz, I’ll show you exactly how to set up a dual monitor setup on a laptop with one HDMI, using real hardware solutions, modern 2026 standards, and zero guesswork.


    Why One HDMI Port Isn’t Enough (The Technical Reality)

    HDMI Splitter Myth (Big Mistake)

    A lot of users try this:

    • Buy an HDMI splitter
    • Expect two separate screens

    What actually happens?

    • Both monitors show the SAME display (mirroring)

    Because:

    • HDMI carries a single video signal
    • It cannot output two independent streams

    If your doing this—stop. It won’t work for extended displays.


    Common Symptoms Users Face

    Only One External Monitor Works

    Second screen not detected at all

    Both Screens Show Same Content

    Mirror mode instead of extend

    Monitor Not Detected

    Driver or port limitation

    Lag or Low Resolution

    Wrong adapter or bandwidth limitation


    Tools & Hardware You May Need

    To properly set up dual monitors, prepare:

    • HDMI cable
    • USB to HDMI adapter (DisplayLink recommended)
    • USB-C hub (if supported)
    • Docking station (optional but best solution)
    • Updated graphics drivers

    Pro tip: Always check your laptop’s GPU capabilities before buying adapters.


    Comparison Table: Best Ways to Add a Second Monitor

    MethodCostPerformanceEaseBest For
    HDMI SplitterLowPoorEasyMirroring only
    USB to HDMI AdapterMediumGoodEasyMost users
    USB-C Hub (Alt Mode)MediumExcellentEasyModern laptops
    Docking StationHighBestVery EasyProfessionals

    Step-by-Step: How to Set Up Dual Monitors on a Laptop with One HDMI

    Step 1: Check Your Laptop Ports

    Look for:

    • HDMI
    • USB-C (with DisplayPort Alt Mode)
    • USB 3.0 ports

    This determines your available options.


    Step 2: Choose the Right Method

    Option A: USB to HDMI Adapter (Most Reliable)

    • Plug adapter into USB port
    • Install DisplayLink drivers
    • Connect second monitor

    This creates a virtual GPU output.


    Option B: USB-C Hub (Best for Modern Laptops)

    If your laptop supports it:

    • Connect USB-C hub
    • Use HDMI/DisplayPort outputs

    You can run multiple monitors easily.


    Option C: Docking Station (Pro Setup)

    • Connect dock to laptop
    • Attach multiple monitors

    Best for remote workers and office setups.


    Step 3: Install Required Drivers

    This is where most users mess up.

    • Install DisplayLink drivers (for USB adapters)
    • Update GPU drivers (Intel/AMD/NVIDIA)

    Without proper drivers, your system won’t detect displays correctly.


    Step 4: Configure Display Settings in Windows 11

    • Right-click desktop → Display Settings
    • Click Detect
    • Select Extend these displays

    Arrange monitors based on your setup.


    Step 5: Adjust Resolution & Refresh Rate

    • Set native resolution for each monitor
    • Adjust scaling if needed

    Avoid mismatched settings—it causes lag and blurry output.


    Advanced Optimization (2026 Setup Standards)

    GPU Load Management

    Multiple displays increase GPU usage.

    • Close unnecessary apps
    • Monitor GPU usage

    Avoid Thermal Throttling

    Laptops can overheat with dual displays.

    • Use cooling pad
    • Ensure airflow

    Thermal throttling reduces performance and display smoothness.


    Power Settings Optimization

    • Set power mode to Balanced or High Performance
    • Avoid aggressive power saving

    Troubleshooting Dual Monitor Issues

    Problem: Second Monitor Not Detected

    Cause: Missing drivers
    Fix: Install DisplayLink or update GPU drivers


    Problem: Only Mirror Mode Available

    Cause: HDMI splitter used
    Fix: Use USB adapter or dock


    Problem: Laggy Display

    Cause: USB bandwidth limitation
    Fix: Use USB 3.0 or USB-C


    Problem: Random Disconnects

    Cause: Power instability or cable issue
    Fix: Replace cable or use powered hub


    BIOS & Hardware Considerations

    Yes—BIOS matters here too.

    • Ensure integrated GPU is enabled
    • Check display settings in BIOS

    Some systems disable multi-display support at firmware level.


    Common Mistakes to Avoid

    Using Cheap Adapters

    Low-quality adapters = poor signal + lag

    Ignoring Driver Installation

    Drivers are essential for multi-display support

    Overloading USB Ports

    Too many devices reduce bandwidth

    Not Checking Laptop Specs

    Not all laptops support multiple external displays


    Real-World Setup Example

    Let’s say you have:

    • 1 HDMI port
    • 2 monitors

    Best setup:

    • Monitor 1 → HDMI
    • Monitor 2 → USB to HDMI adapter

    Configure in Windows → Extend display

    Done.


    Pro Tips from a Hardware Engineer

    • Always prefer wired connections over wireless display
    • Use high-quality cables
    • Keep drivers updated regularly
    • Invest in a docking station if you work daily on multi-monitor setup

    And here’s something most guides won’t tell you:
    Your laptop’s internal GPU bandwidth is the real bottleneck—not just the ports.


    When You Need a Hardware Upgrade

    Upgrade if:

    • Laptop doesn’t support multiple displays
    • GPU is too weak
    • Ports are outdated

    Sometimes, no software fix can overcome hardware limitations.


    Final Thoughts: Work Smarter, Not Harder

    Setting up a dual monitor setup on a laptop with one HDMI isn’t complicated—but it does require the right approach.

    Forget splitters.
    Focus on proper signal expansion using adapters or docks.

    Once done right, your productivity can literally double.


    CTA: Upgrade Your Setup with fixrig.xyz

    At fixrig.xyz, we help you turn basic setups into pro-level workstations.

    Still stuck with your dual monitor setup? Not sure which adapter to buy or why your screens aren’t working?

    Drop your laptop model and setup in the comments—and let’s fix your rig step-by-step.

    Because your workspace should empower you… not limit you.

  • How to Build a Silent PC for Home Office Work (Complete 2026 Low-Noise Build Guide)

    How to Build a Silent PC for Home Office Work (Complete 2026 Low-Noise Build Guide)

    Look, I’ve seen this mistake a thousand times—people build powerful PCs for work, install everything perfectly… and then end up with a system that sounds like a server rack under their desk.

    Here is the real talk about why your rig is acting up: noise isn’t just about “loud fans.” It’s a combination of airflow design, component quality, BIOS tuning, and even how your case resonates with vibrations.

    In this complete guide from fixrig.xyz, I’ll show you exactly how to build a silent PC for home office work, step-by-step, using modern 2026 hardware standards and real-world engineering practices.


    Why Silent PCs Matter More in 2026

    With remote work, Zoom calls, content creation, and long work hours, noise becomes a real productivity killer.

    Common Problems with Noisy Office PCs

    • Fan noise during meetings
    • Sudden RPM spikes under light load
    • HDD vibration hum
    • PSU coil whine

    A silent PC isn’t just luxury—it’s essential for focus and professionalism.


    What Actually Makes a PC Silent?

    Before building, you need to understand the fundamentals:

    1. Low Thermal Output

    Less heat = less fan speed

    2. Efficient Airflow

    Balanced airflow reduces fan workload

    3. Quality Components

    Cheap hardware = more noise over time

    4. Smart BIOS Tuning

    Fan curves and voltage control are critical


    Tools Checklist for Building a Silent PC

    Before you start, get these ready:

    • Anti-static wrist strap
    • Thermal paste (high quality)
    • Screwdriver kit
    • Cable ties for management
    • Rubber anti-vibration mounts
    • Fan splitter or hub

    Pro tip: Don’t rush the build. Noise optimization requires patience.


    Silent PC Components Breakdown (2026 Standard)

    CPU: Go Efficient, Not Extreme

    Choose CPUs with:

    • Lower TDP (65W–105W ideal)
    • Strong efficiency cores

    Why? Less heat means less cooling noise.


    CPU Cooler: Air vs Liquid

    • Air Coolers (Large Heatsinks):
      • More reliable
      • Lower noise long-term
    • AIO Liquid Coolers:
      • Better peak cooling
      • Pump noise risk

    For silent builds, high-end air coolers usually win.


    Case: The Foundation of Silence

    Look for:

    • Sound-dampening panels
    • Rubber mounts
    • Optimized airflow design

    Bad case = noisy system no matter what you install.


    Fans: The Heart of Silence

    Use:

    • 120mm or 140mm fans
    • PWM-controlled fans
    • Fluid Dynamic Bearing (FDB)

    Avoid cheap fans—they’re loud even at low RPM.


    Storage: SSD Over HDD

    • SSD = zero noise
    • HDD = vibration + spinning noise

    If you must use HDD, isolate it with dampeners.


    Power Supply (PSU)

    Choose:

    • 80+ Gold or higher
    • Zero RPM fan mode

    Cheap PSU = hidden noise source.


    Comparison Table: Silent Build vs Regular PC

    FeatureSilent PC BuildStandard Build
    Noise LevelVery LowMedium-High
    Cooling StrategyOptimized airflowAggressive fans
    Component QualityPremiumMixed
    Fan ControlCustom BIOS curvesDefault
    User ExperienceSmooth & quietDistracting

    Step-by-Step: How to Build a Silent PC for Home Office Work

    Step 1: Choose the Right Case Layout

    • Front intake fans
    • Rear/top exhaust
    • Avoid airflow blockage

    Airflow direction matters more than fan count.


    Step 2: Install CPU & Cooler Properly

    • Apply thermal paste evenly
    • Mount cooler securely

    Bad mounting = higher temps = louder fans


    Step 3: Install Low-Noise Fans

    • Use 2–3 intake + 1 exhaust
    • Avoid overloading with too many fans

    More fans ≠ quieter system


    Step 4: Cable Management

    Messy cables block airflow.

    • Route cables behind motherboard tray
    • Keep airflow path clean

    This step alone reduces fan workload significantly.


    Step 5: Configure BIOS Fan Curves

    This is where most builds fail.

    • Enter BIOS (DEL/F2)
    • Set custom fan curves:

    Example:

    • 30°C → 20% speed
    • 50°C → 40% speed
    • 70°C → 65% speed

    Don’t let your system run fans at full speed unnecessarily.


    Step 6: Optimize Voltage Settings

    Lower voltage = less heat

    • Enable CPU undervolting (if supported)
    • Adjust RAM XMP carefully

    Watch stability—don’t push too far.


    Step 7: Install OS & Drivers Properly

    Outdated drivers can cause:

    • CPU spikes
    • Thermal throttling
    • Fan ramp issues

    Always install latest stable drivers.


    Step 8: Test Under Real Workload

    • Run office apps
    • Join video calls
    • Monitor temps

    Your goal: stable temps with minimal noise.


    Advanced Noise Reduction Techniques

    Anti-Vibration Solutions

    • Rubber mounts for fans
    • Foam padding inside case

    Acoustic Optimization

    • Place PC on soft surface
    • Avoid hollow desks (they amplify noise)

    Undervolting for Silence

    Reducing CPU/GPU voltage:

    • Lowers heat output
    • Reduces fan speed

    But test stability carefully.


    Fan Curve Software Control

    Use advanced tools to fine-tune fan response dynamically.


    Common Mistakes That Ruin Silent Builds

    Using High-TDP Components

    More heat = more noise

    Ignoring BIOS Settings

    Default settings are rarely optimized

    Cheap Fans

    They sound bad even at low RPM

    Poor Airflow Design

    Hot air trapped = fans go crazy

    No Thermal Monitoring

    You can’t fix what you don’t measure


    Real-World Troubleshooting Scenarios

    Problem: PC is quiet at idle but loud under light load

    Cause: Aggressive fan curve
    Fix: Smooth out RPM ramping in BIOS

    Problem: Constant humming noise

    Cause: Case vibration
    Fix: Add rubber mounts

    Problem: Random noise spikes

    Cause: Background proccess load
    Fix: Check drivers and CPU usage


    Pro Tips from a Hardware Engineer

    • Bigger fans = quieter airflow
    • Keep temps under control, not ultra-low
    • Silence is about balance, not extremes
    • Invest in quality once, not replacements later

    And here’s something most people ignore:
    Even the desk your PC sits on can amplify noise. Seriously.


    Final Thoughts: Silence is Engineered, Not Bought

    Building a silent PC for home office work isn’t about one magical component—it’s about system harmony.

    Every part matters:

    • Airflow
    • Voltage
    • Cooling
    • Build quality

    If one thing is off, the whole system becomes noisy.

    And remember—your system doesn’t need to be freezing cold. It just needs to be efficient.


    CTA: Build Smart, Work Quiet

    At fixrig.xyz, we help you go beyond basic builds and into real hardware mastery.

    If your PC is still noisy, overheating, or behaving weirdly…

    Drop your full specs in the comments and let’s fix your rig step-by-step.

    Because your setup should work for you—not distract you.

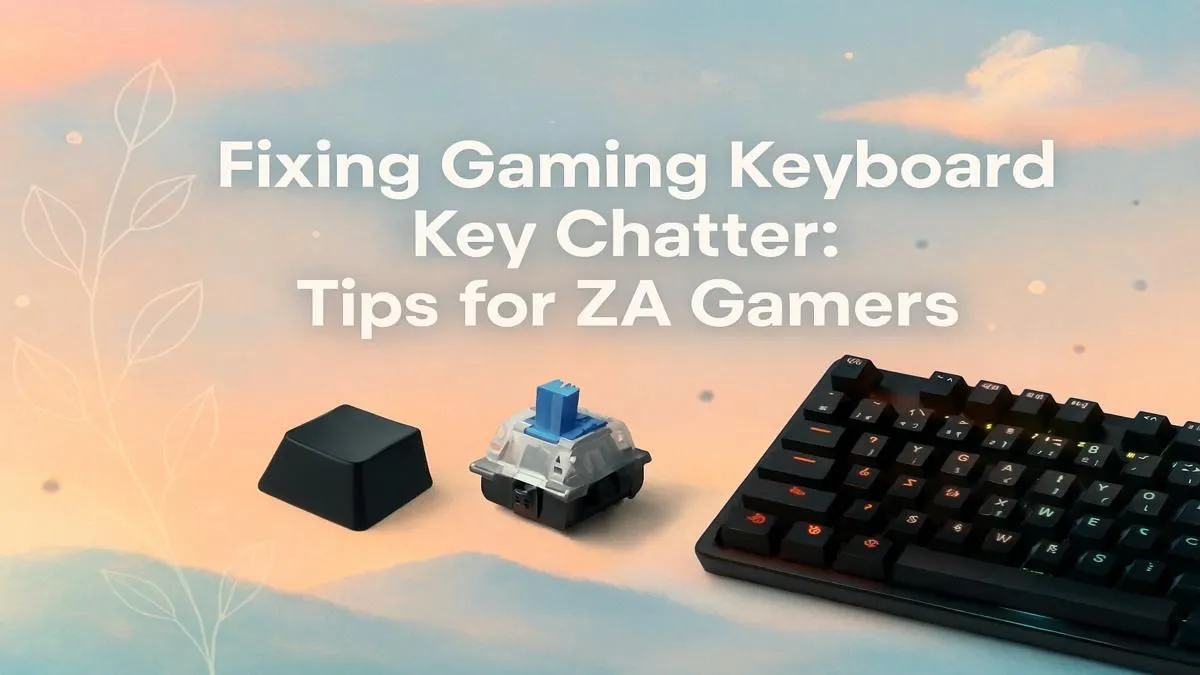
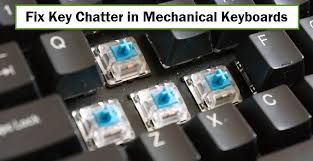
  • How to Troubleshoot Mechanical Keyboard Key Chatter at Home (Complete 2026 Fix Guide)

    How to Troubleshoot Mechanical Keyboard Key Chatter at Home (Complete 2026 Fix Guide)

    Look, I’ve seen this issue a thousand times—your mechanical keyboard starts double typing, skipping letters, or randomly repeating keystrokes. One minute you’re typing normally, next minute your doc looks like this: “heelloo woorlld”.

    Here is the real talk about why your rig is acting up: key chatter isn’t random. It’s a signal—either your switches are wearing out, there’s debris interfering with contact points, or your software/firmware isn’t filtering inputs correctly.

    In this deep technical guide from fixrig.xyz, I’ll show you exactly how to troubleshoot mechanical keyboard key chatter at home, step-by-step, using real hardware repair techniques and smart diagnostics.


    What is Key Chatter?

    Key chatter happens when a single keypress registers multiple times.

    Common Symptoms

    • Double typing (e.g., “tt” instead of “t”)
    • Random repeated characters
    • Missed keystrokes followed by duplicates
    • Inconsistent typing behavior

    This issue can affect productivity, gaming, and even coding accuracy.


    Root Causes of Key Chatter (2026 Hardware Perspective)

    1. Worn-Out Mechanical Switches

    Mechanical switches degrade over time—especially budget ones.

    2. Dust & Debris Inside Switch

    Tiny particles can interfere with electrical contact.

    3. Faulty Debounce Settings (Firmware)

    Keyboard firmware controls how keystrokes are registered.

    4. USB Signal Noise or Voltage Instability

    Unstable power can cause erratic input signals.

    5. Outdated Drivers or OS Conflicts

    Yes, software can cause hardware-like issues.


    Tools Checklist for DIY Fix

    Before you start, gather:

    • Keycap puller
    • Switch puller (if hot-swappable)
    • Isopropyl alcohol (90%+)
    • Soft brush or cotton swabs
    • Compressed air
    • Tweezers
    • Spare switches (optional)

    Pro tip: Work on a clean, well-lit surface. You don’t want to lose tiny components.


    Comparison Table: Software Fix vs Hardware Repair

    Fix TypeDifficultyCostEffectiveness
    Update DriversEasyFreeMedium
    Adjust Debounce SoftwareEasyFreeHigh
    Clean SwitchesMediumLowHigh
    Replace SwitchMedium$$Very High
    Replace KeyboardEasy$$$Maximum

    Step-by-Step: How to Troubleshoot Mechanical Keyboard Key Chatter at Home

    Step 1: Identify the Problem Key

    • Open a keyboard tester tool
    • Press each key slowly
    • Look for duplicate inputs

    This helps isolate whether it’s one key or multiple.


    Step 2: Rule Out Software Issues

    Before opening hardware, always check software:

    • Update keyboard drivers
    • Try a different USB port
    • Test on another PC

    If the issue disappears, it’s not hardware.


    Step 3: Adjust Debounce Settings

    Modern keyboards (especially gaming ones) allow debounce control.

    • Increase debounce delay slightly
    • This prevents rapid duplicate signals

    Some software tools let you tune this precisely.


    Step 4: Clean the Switch (Basic Method)

    Dust is a silent killer.

    • Remove keycap
    • Blow compressed air into switch
    • Lightly clean around it

    This fixes a surprising number of cases.


    Step 5: Deep Clean with Isopropyl Alcohol

    If basic cleaning fails:

    • Apply small amount of alcohol
    • Press key repeatedly to distribute
    • Let it dry completely

    This helps remove internal residue affecting контакts.


    Step 6: Test Again

    Reconnect keyboard and test:

    • If chatter is gone → problem solved
    • If still present → move to hardware fix

    Step 7: Replace the Switch (Hot-Swappable Keyboards)

    If your keyboard supports it:

    • Use switch puller
    • Remove faulty switch
    • Install new one

    This is the most reliable fix.


    Step 8: Soldered Keyboard? Advanced Repair

    If switches are soldered:

    • You’ll need a soldering kit
    • Desolder faulty switch
    • Replace with new one

    If your not experienced, don’t risk damaging the motherbord PCB.


    Advanced Troubleshooting (Pro Level)

    Check USB Voltage Stability

    Unstable voltage can cause signal issues:

    • Use powered USB hub
    • Avoid low-quality cables

    Firmware Update

    Manufacturers release updates that fix debounce issues.


    OS-Level Input Filtering

    Some advanced users use software filters to ignore duplicate keystrokes.


    Common Mistakes That Make Key Chatter Worse

    Ignoring Early Signs

    Chatter gets worse over time—not better.

    Overusing Cleaning Liquids

    Too much liquid can damage switches.

    Forcing Switch Removal

    This can damage sockets or PCB.

    Cheap Replacement Switches

    Low-quality switches fail quickly.


    Real-World Scenarios

    Problem: Only one key double types

    Cause: Worn switch
    Fix: Replace switch

    Problem: Multiple keys chattering

    Cause: Firmware or voltage issue
    Fix: Update firmware + check USB

    Problem: Issue disappears on another PC

    Cause: Driver conflict
    Fix: Update or reinstall drivers


    Pro Tips from a Hardware Engineer

    • Invest in hot-swappable keyboards for easier repairs
    • Clean your keyboard monthly
    • Avoid eating over your keyboard (seriously)
    • Use quality switches for longevity

    And here’s something most guides won’t tell you:
    Sometimes the problem isn’t the switch—it’s microscopic oxidation on contact points.


    When to Replace Instead of Repair

    Replace your keyboard if:

    • Multiple switches fail simultaneously
    • PCB is damaged
    • Repair cost exceeds keyboard value

    At that point, your just wasting time.


    Final Thoughts: Precision Matters

    Mechanical keyboards are precision devices. Even a tiny issue can cause major typing problems.

    The good news? Most key chatter issues are fixable at home—if you follow the right proccess.

    The bad news? Ignoring it will only make things worse.


    CTA: Fix Your Keyboard Like a Pro

    At fixrig.xyz, we go beyond basic fixes—we teach you real hardware mastery.

    Still facing key chatter? Not sure if it’s your switch, firmware, or drivers?

    Drop your keyboard model and issue in the comments—and let’s troubleshoot your rig step-by-step.

    Because your typing experience should be smooth… not frustrating.

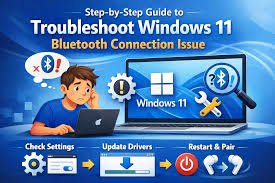
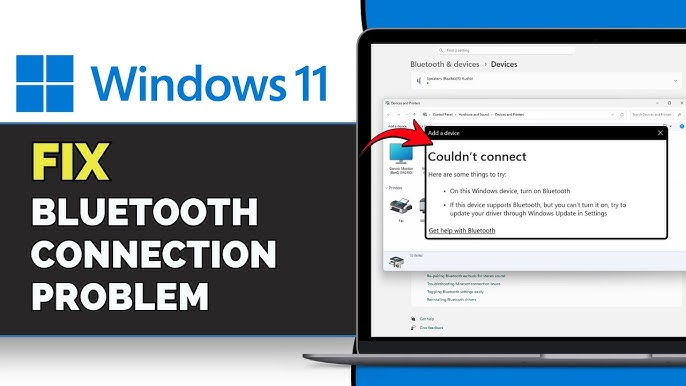
  • Troubleshooting Bluetooth Connectivity Issues in Windows 11 (2026) – Complete Fix Guide for Stable Connections

    Troubleshooting Bluetooth Connectivity Issues in Windows 11 (2026) – Complete Fix Guide for Stable Connections

    Look, I’ve seen this error a thousand times—Bluetooth just randomly stops working. Your headphones won’t connect, your mouse lags, or your device disappears completely from the list.

    Here is the real talk about why your rig is acting up: Bluetooth issues in Windows 11 aren’t just “software bugs.” They’re usually a mix of driver conflicts, power management settings, BIOS misconfigurations, or even hardware-level interference.

    In this expert-level guide from fixrig.xyz, I’ll walk you through troubleshooting Bluetooth connectivity issues in Windows 11 (2026) step-by-step, so you can fix it properly—not just temporarily.


    Common Symptoms of Bluetooth Issues

    Before jumping into fixes, identify what you’re dealing with:

    1. Bluetooth Not Showing in Settings

    • Toggle missing completely
    • Device Manager doesn’t list Bluetooth

    2. Devices Won’t Pair

    • “Couldn’t connect” errors
    • Pairing fails instantly

    3. Frequent Disconnects

    • Devices connect but drop randomly
    • Especially common with wireless headphones

    4. Input Lag (Mouse/Keyboard)

    • Delayed response
    • Stuttering movement

    5. Audio Issues

    • Crackling sound
    • Audio cutting out

    If your experiencing any of these, you’re in the right place.


    Root Causes (2026 System-Level Analysis)

    Driver Conflicts or Corruption

    Outdated or broken drivers are the #1 cause.

    Windows Update Bugs

    New updates sometimes break Bluetooth stacks.

    Power Management Settings

    Windows may disable Bluetooth to save power.

    BIOS Configuration Issues

    Bluetooth module may be disabled at firmware level.

    Hardware Interference

    Wi-Fi signals, USB 3.0 ports, and other devices interfere.

    Faulty Bluetooth Module

    Especially in older laptops or budget motherbord designs.


    Tools Checklist for Troubleshooting

    Before starting, prepare:

    • Internet connection (for driver downloads)
    • Device Manager access
    • Optional USB Bluetooth adapter
    • Latest motherboard/laptop drivers
    • BIOS access

    Pro tip: Always create a restore point before major driver changes.


    Comparison Table: Software Fix vs Hardware Fix

    Fix TypeDifficultyCostEffectiveness
    Update DriversEasyFreeHigh
    Restart Bluetooth ServicesEasyFreeMedium
    Adjust Power SettingsEasyFreeHigh
    BIOS EnablementMediumFreeHigh
    Replace Bluetooth AdapterMedium$$Very High

    Step-by-Step: Troubleshooting Bluetooth Connectivity Issues in Windows 11 (2026)

    Step 1: Restart Bluetooth Services

    • Press Win + R → type services.msc
    • Find:
      • Bluetooth Support Service
    • Restart it

    Sometimes the simplest fix works.


    Step 2: Toggle Bluetooth Properly

    • Go to Settings → Bluetooth & Devices
    • Turn Bluetooth OFF → wait 10 seconds → turn ON

    This resets the connection stack.


    Step 3: Check Device Manager

    • Press Win + X → Device Manager
    • Expand Bluetooth

    Look for:

    • Yellow warning icons
    • Missing devices

    If Bluetooth is missing completely, this is a deeper issue.


    Step 4: Update or Reinstall Drivers

    This is critical.

    • Right-click Bluetooth device
    • Select Uninstall device
    • Restart PC

    Then install latest drivers from manufacturer.

    Outdated drivers break compatibility with modern Windows builds.


    Step 5: Disable Power Saving Mode

    Windows loves to cut power silently.

    • Device Manager → Bluetooth adapter
    • Properties → Power Management
    • Uncheck:
      • “Allow the computer to turn off this device”

    This alone fixes random disconnects in many cases.


    Step 6: Run Windows Troubleshooter

    • Settings → System → Troubleshoot
    • Run Bluetooth troubleshooter

    Not always perfect—but worth trying.


    Step 7: Check BIOS Settings

    This is where most users never look.

    • Enter BIOS (DEL/F2)
    • Look for:
      • Wireless settings
      • Bluetooth enable/disable

    Make sure it’s enabled.


    Step 8: Reset Network Settings

    • Settings → Network & Internet
    • Advanced network settings → Network reset

    This resets all wireless configurations.


    Step 9: Test with Another Device

    • Try connecting different Bluetooth device
    • Helps determine if issue is PC or accessory

    Step 10: Use USB Bluetooth Adapter (Fallback Fix)

    If internal module is faulty:

    • Plug in external Bluetooth dongle
    • Install drivers

    This bypasses internal hardware completely.


    Advanced Troubleshooting (Pro Level)

    Fix Driver Conflicts

    Sometimes Windows installs generic drivers.

    • Use manufacturer-specific drivers
    • Avoid relying on Windows Update alone

    Check for USB Interference

    USB 3.0 ports can interfere with Bluetooth signals.

    • Move dongle to USB 2.0 port
    • Use extension cable

    Monitor Background Processes

    High CPU usage can cause:

    • Input lag
    • Audio dropouts

    Check Task Manager for abnormal proccess spikes.


    Firmware Updates

    Update:

    • Motherboard BIOS
    • Laptop firmware

    New updates often fix wireless stability issues.


    Common Mistakes That Make It Worse

    Constantly Re-Pairing Devices

    This doesn’t fix root problems.

    Ignoring Driver Sources

    Wrong drivers = more instability.

    Skipping BIOS Checks

    Bluetooth might be disabled at hardware level.

    Using Cheap USB Adapters

    Low-quality adapters cause more problems.


    Real-World Troubleshooting Scenarios

    Problem: Bluetooth disappeared after Windows update

    Cause: Driver corruption
    Fix: Reinstall drivers manually

    Problem: Headphones connect but audio stutters

    Cause: Interference or power saving
    Fix: Disable power management + move adapter

    Problem: Mouse lagging randomly

    Cause: CPU spikes or signal interference
    Fix: Check background tasks + USB placement


    Pro Tips from a Hardware Engineer

    • Always install drivers from official manufacturer sites
    • Keep BIOS updated—but don’t rush unstable releases
    • Use high-quality Bluetooth devices
    • Maintain distance from interference sources

    And here’s something most guides won’t tell you:
    Bluetooth stability depends heavily on antenna placement inside your system—especially in compact builds.


    When to Replace Hardware

    Replace your Bluetooth module if:

    • Device not detected even in BIOS
    • Constant disconnects despite fixes
    • Adapter overheating or failing

    At that point, your just wasting time troubleshooting.


    Final Thoughts: Stability Comes from System Balance

    Bluetooth issues in Windows 11 (2026) are rarely caused by one thing. It’s usually a chain reaction:

    Drivers + Power Settings + Hardware + Interference

    Fix all of them—and your system becomes rock solid.

    Ignore one—and problems come back.


    CTA: Fix It Right with fixrig.xyz

    At fixrig.xyz, we don’t believe in temporary fixes—we help you master your system.

    Still facing Bluetooth issues? Devices not connecting? Random disconnects driving you crazy?

    Drop your exact system specs and issue in the comments—and let’s troubleshoot your rig like a pro.

    Because your setup should just work… not fight you every day.

  • Fixing USB Port Not Working on PC: Hardware vs Software (Complete 2026 Troubleshooting Guide)

    Fixing USB Port Not Working on PC: Hardware vs Software (Complete 2026 Troubleshooting Guide)

    Look, I’ve seen this error a thousand times—your USB port suddenly stops working, your mouse disconnects, your keyboard won’t respond, or your flash drive just isn’t detected.

    Here is the real talk about why your rig is acting up: a dead USB port is rarely just “dead.” It’s usually either a software-level conflict (drivers, power settings, BIOS) or a hardware-level failure (port damage, voltage issues, motherboard faults).

    In this deep technical guide from fixrig.xyz, I’ll walk you through fixing USB port not working on PC: hardware vs software, step-by-step—so you can diagnose the real cause and fix it properly.


    Common Symptoms of USB Port Failure

    Before fixing anything, identify the exact behavior:

    1. USB Device Not Recognized

    • Error message in Windows
    • Device doesn’t show in File Explorer

    2. Intermittent Connection

    • Device connects/disconnects randomly
    • Especially when cable moves

    3. No Power from USB Port

    • Phone not charging
    • USB light not turning on

    4. Only Certain Ports Not Working

    • Front panel ports fail
    • Rear motherboard ports work fine

    5. All USB Ports Dead

    • System-wide issue
    • Likely BIOS or power-related

    If your seeing one of these, you’re already halfway to diagnosing the problem.


    Hardware vs Software: The Core Difference

    This is where most people get confused.

    Software Issues

    • Driver corruption
    • Windows update bugs
    • Power management settings
    • BIOS misconfiguration

    Hardware Issues

    • Physical port damage
    • Broken motherboard traces
    • Faulty USB controller
    • Insufficient voltage supply

    Understanding this difference saves hours of guesswork.


    Quick Comparison Table: Software Fix vs Hardware Repair

    CategorySoftware FixHardware Fix
    DifficultyEasyMedium-Hard
    CostFree$$–$$$
    RiskLowMedium
    Time RequiredMinutesHours
    Success RateHigh (if software issue)High (if hardware replaced)

    Tools Checklist Before Troubleshooting

    Prepare these tools:

    • Flash drive or USB device (for testing)
    • Screwdriver set
    • Device Manager access
    • Latest motherboard drivers
    • Optional USB hub or adapter
    • BIOS access

    Pro tip: Always test with multiple USB devices—don’t assume your device isn’t the problem.


    Step-by-Step: Fixing USB Port Not Working on PC

    Step 1: Test the USB Device First

    • Plug into another PC
    • Try a different cable

    If it doesn’t work anywhere, your device—not the port—is faulty.


    Step 2: Try Different USB Ports

    • Test front vs rear ports
    • Test USB 2.0 vs USB 3.0

    This helps isolate whether the issue is localized.


    Step 3: Restart Your System (Yes, Seriously)

    Temporary glitches happen.

    • Full shutdown (not restart)
    • Power on again

    Simple—but surprisingly effective.


    Step 4: Check Device Manager

    • Press Win + X → Device Manager
    • Expand Universal Serial Bus controllers

    Look for:

    • Yellow warning icons
    • Unknown devices

    Step 5: Reinstall USB Drivers

    This is critical.

    • Right-click each USB controller
    • Select Uninstall device
    • Restart PC

    Windows will reinstall drivers automatically.

    Outdated drivers are a major cause in 2026 systems.


    Step 6: Disable USB Power Saving

    Windows can disable ports silently.

    • Device Manager → USB Root Hub
    • Properties → Power Management
    • Uncheck:
      • “Allow the computer to turn off this device”

    This fixes random disconnect issues.


    Step 7: Check BIOS Settings

    Most users skip this—and regret it.

    • Enter BIOS (DEL/F2)
    • Look for:
      • USB Configuration
      • Legacy USB Support

    Ensure everything is enabled.

    If USB is disabled here, Windows won’t detect it at all.


    Step 8: Update Chipset Drivers

    USB controllers rely on chipset drivers.

    • Download from motherboard manufacturer
    • Install latest version

    This step alone solves many compatibility issues.


    Step 9: Inspect Physical Ports

    Now we move into hardware territory.

    Check for:

    • Bent pins
    • Dust buildup
    • Loose connectors

    Clean gently using compressed air.


    Step 10: Check Front Panel Connections

    If front USB ports don’t work:

    • Open case
    • Check USB header cable connected to motherbord

    Loose cables are a very common issue.


    Step 11: Test with External USB Hub

    • Plug hub into working port
    • Connect devices through hub

    If hub works, your port may have power limitations.


    Step 12: Advanced Hardware Diagnosis

    If all else fails:

    • Test motherboard USB controller
    • Check PSU voltage stability
    • Inspect for burn marks or damage

    At this stage, hardware replacement may be required.


    Advanced Troubleshooting (Pro Level)

    Check Voltage Output

    USB ports require stable 5V output.

    • Weak PSU = unstable USB behavior
    • Especially in older systems

    Monitor System Load

    High CPU load or thermal throttling can affect USB stability.

    • Check Task Manager
    • Look for abnormal proccess spikes

    BIOS Firmware Update

    Manufacturers release fixes for USB compatibility.

    Update carefully—don’t interrupt the proccess.


    Common Mistakes That Make It Worse

    Ignoring BIOS Settings

    USB might be disabled at firmware level.

    Using Cheap USB Devices

    Low-quality devices cause connection issues.

    Forcing Damaged Ports

    This can permanently damage your motherboard.

    Skipping Driver Updates

    Drivers are critical for USB functionality.


    Real-World Scenarios

    Problem: Only front USB ports not working

    Cause: Loose internal cable
    Fix: Reconnect USB header

    Problem: USB works but disconnects randomly

    Cause: Power saving or voltage issue
    Fix: Disable power management

    Problem: No USB ports working

    Cause: BIOS disabled or chipset failure
    Fix: Enable BIOS or update drivers


    Pro Tips from a Hardware Engineer

    • Always use rear motherboard USB ports for critical devices
    • Keep ports clean and dust-free
    • Avoid overloading USB hubs
    • Invest in a reliable PSU

    And here’s something most guides won’t tell you:
    USB issues can sometimes be caused by electromagnetic interference inside your case—especially with poor cable shielding.


    When to Replace Hardware

    Replace components if:

    • Ports are physically damaged
    • USB controller fails completely
    • Motherboard shows burn marks

    At that point, your just delaying the inevitable.


    Final Thoughts: Diagnose Before You Replace

    Fixing USB port not working on PC comes down to one thing: correct diagnosis.

    Software issues are quick wins.
    Hardware issues require careful inspection.

    But if you follow this guide step-by-step, you’ll know exactly what’s wrong—and how to fix it.


    CTA: Fix It Right with fixrig.xyz

    At fixrig.xyz, we don’t just give quick fixes—we teach you how to master your hardware.

    Still dealing with dead USB ports? Not sure if it’s drivers, BIOS, or your motherboard?

    Drop your system specs and issue in the comments—and let’s troubleshoot your rig like a pro.

    Because your PC should work for you… not against you.