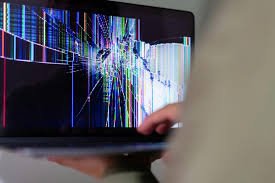
Look, I’ve seen this issue a thousand times—you buy a brand new LED monitor, everything looks perfect… and then you notice it.
That tiny black or stuck pixel right in the middle of your screen.
Once you see it, you can’t unsee it.
Here is the real talk about why your rig is acting up: not all “dead pixels” are truly dead. Some are just stuck pixels, and those can actually be fixed at home—if you know what you’re doing.
In this expert-level guide from fixrig.xyz, I’ll walk you through fixing dead pixels on an LED monitor at home, step-by-step, using proven techniques used by technicians—not random internet myths.
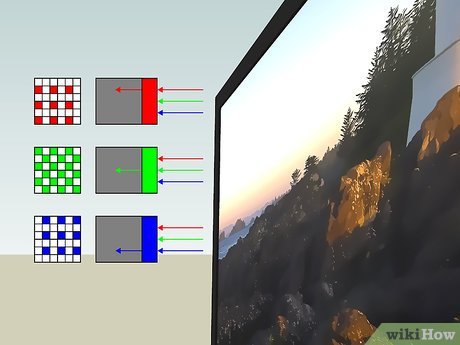
Dead Pixel vs Stuck Pixel (Critical Difference)
Before you try to fix anything, you need to know what you’re dealing with.
Dead Pixel
- Completely black
- No light output
- Usually permanent
Stuck Pixel
- Red, green, or blue dot
- Subpixel stuck in ON state
- Often fixable
If your pixel is black, chances of repair are low. If it’s colored—you’ve got a good shot.

Common Symptoms
Single Black Dot
- Likely dead pixel
Bright Colored Dot
- Stuck pixel
Pixel Flickering
- Signal or panel issue
Cluster of Dead Pixels
- Panel damage
If your seeing multiple pixels, this may not be a DIY fix.
Root Causes (2026 Display Technology Insight)
Manufacturing Defects
Even premium panels can have pixel defects.
Voltage Imbalance
Pixels rely on precise voltage control.
Transistor Failure
Each pixel has a tiny transistor—if it fails, pixel dies.
Pressure or Impact Damage
Physical stress can damage pixels permanently.
Tools Checklist Before You Start
Prepare these:
- Soft microfiber cloth
- Pixel fixing software/tool
- Stylus or soft object (no sharp tools)
- Patience (seriously)
Pro tip: Never press directly with your finger—too much pressure can damage the panel.
Comparison Table: Software Fix vs Hardware Fix
| Method | Difficulty | Cost | Effectiveness |
|---|---|---|---|
| Pixel Fixing Software | Easy | Free | Medium |
| Gentle Pressure Method | Easy | Free | Medium |
| Heat + Massage Method | Medium | Low | Medium |
| Panel Replacement | Hard | $$$ | Maximum |
Step-by-Step: Fixing Dead Pixels on an LED Monitor at Home
Step 1: Confirm the Pixel Type
- Use a solid color test (black, white, red, green, blue)
- Identify if pixel is stuck or dead
This determines your strategy.
Step 2: Try Pixel Fixing Software
These tools rapidly change colors to “unstick” pixels.
- Run software for 10–30 minutes
- Focus on affected area
This works by stimulating pixel voltage changes.
Step 3: Use Gentle Pressure Technique
This is a classic hardware hack.
- Turn off monitor
- Place soft cloth over pixel
- Apply very gentle pressure with stylus
- Turn monitor back on
The goal is to re-align liquid crystals.
Be careful—too much pressure can cause permanent damage.
Step 4: Heat + Massage Method
- Turn monitor on
- Display black screen
- Warm area slightly (not hot!)
- Gently massage pixel area
Heat can help restore pixel responsiveness.
Step 5: Repeat Cycles
Sometimes fixes don’t work instantly.
- Alternate between software and pressure method
- Test after each attempt
Patience is key here.
Advanced Troubleshooting (Pro Level)
Check Cable & Signal Integrity
- Use high-quality HDMI/DisplayPort cable
- Try different port
Signal issues can mimic pixel problems.
GPU Output Check
- Test monitor with another PC
- Rule out GPU artifacting
Sometimes the issue isn’t the monitor.
BIOS-Level Test
Boot into BIOS:
- If pixel still visible → hardware issue
- If not → GPU/driver issue
Common Mistakes That Make It Worse
Pressing Too Hard
This can create more dead pixels.
Using Sharp Objects
Never use anything that can scratch the panel.
Expecting Instant Results
Some fixes take time.
Ignoring True Dead Pixels
Not all pixels are fixable—accept reality when needed.
Real-World Scenarios
Problem: Bright green dot
Cause: Stuck pixel
Fix: Software + pressure method
Problem: Black dot
Cause: Dead pixel
Fix: Usually not repairable
Problem: Pixel disappears temporarily
Cause: Voltage fluctuation
Fix: Repeat fix cycles
Pro Tips from a Hardware Engineer
- Always check warranty before DIY repair
- Use pixel testing tools regularly
- Avoid pressing screen during cleaning
- Invest in high-quality monitors
And here’s something most guides won’t tell you:
Dead pixels can increase over time if caused by panel stress or manufacturing defects.
When to Replace Instead of Fix
Replace your monitor if:
- Multiple dead pixels appear
- Pixel cluster spreads
- Panel damage is visible
At that point, your just delaying the inevitable.
Final Thoughts: Know What Can Be Fixed
Fixing dead pixels on an LED monitor at home is possible—but only in specific cases.
Stuck pixels? Fixable.
Dead pixels? Usually permanent.
The key is correct diagnosis and careful handling.
CTA: Fix Your Display Like a Pro
At fixrig.xyz, we don’t just give surface-level advice—we teach you how hardware actually works.
Still stuck with a dead pixel? Not sure if it’s fixable or not?
Drop your monitor model and issue in the comments—and let’s troubleshoot your rig step-by-step.
Because your display should be flawless… not distracting.
Leave a Reply