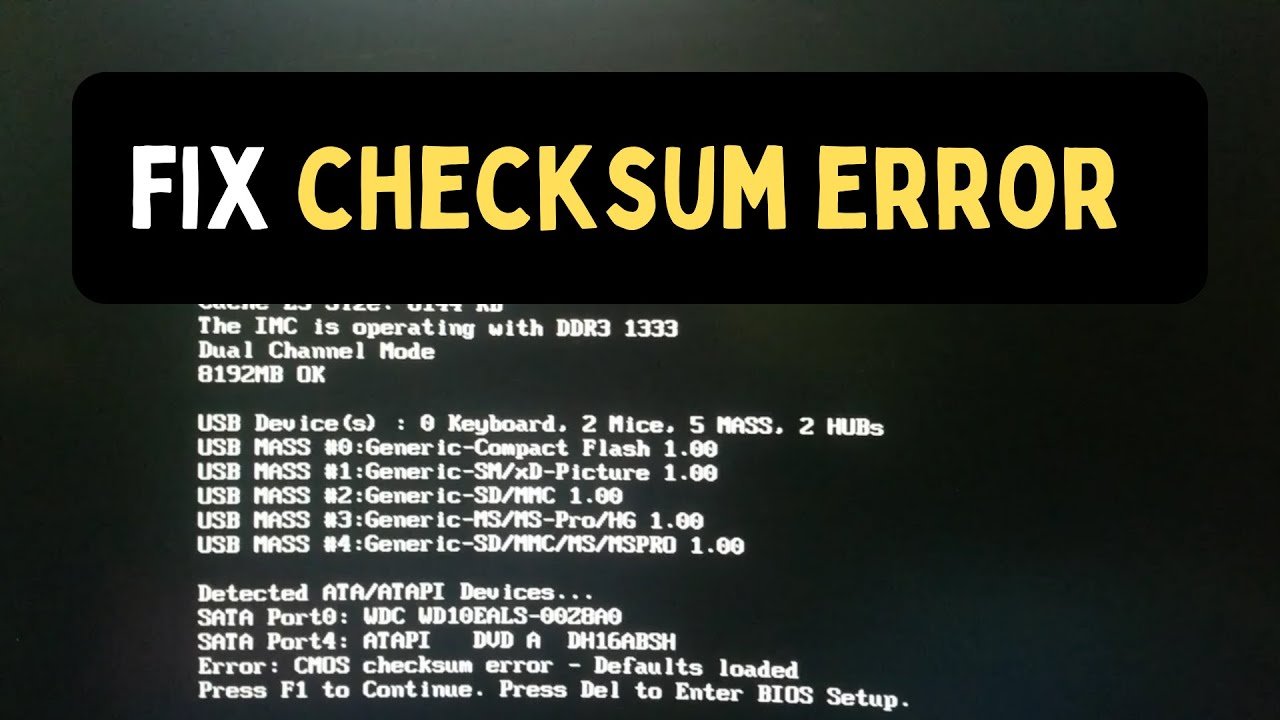
Look, I’ve seen this error a thousand times, especially on older systems. And here is the real talk about why your rig is acting up: your motherboard is losing its memory—literally. The BIOS settings stored in CMOS are either corrupted or not being saved properly.
In this expert-level guide from fixrig.xyz, I’ll walk you through exactly how to diagnose and fix CMOS Checksum Error on older motherboards using simple, practical steps.
What is a CMOS Checksum Error?
Before fixing it, let’s understand it.
CMOS (Complementary Metal-Oxide Semiconductor) stores BIOS settings like:
- Date and time
- Boot order
- Hardware configuration
- Voltage and fan settings
A checksum is a verification value. When your system boots, BIOS checks this value. If it doesn’t match, you get the error.
In simple words: your system is saying, “Something is wrong with my saved settings.”
Common Symptoms You Will Notice
Typical Warning Signs
- Error message: “CMOS Checksum Error – Defaults Loaded”
- Date and time resetting on every boot
- BIOS settings not saving
- System asking to press F1 to continue
- Random boot issues
If your seeing these, your CMOS system is failing.
Root Causes of CMOS Checksum Error
Let’s break this down like a real hardware guru.
1. Dead CMOS Battery (Most Common)
This is the #1 cause. Older motherboards rely on a small coin-cell battery (CR2032).
When it dies, BIOS loses power and resets.
2. BIOS Corruption
Improper shutdowns, power loss, or failed updates can corrupt BIOS data.
3. Incorrect BIOS Settings
Manual changes in voltage, RAM timing, or CPU settings can trigger checksum mismatch.
4. Motherboard Aging
Old capacitors and circuits degrade over time, especially in legacy systems.
5. Power Supply Instability
Unstable voltage from PSU can cause BIOS memory issues.
Tools Checklist
Before starting, gather these:
- New CR2032 CMOS battery
- Screwdriver
- Anti-static protection (optional)
- Clean workspace
This repair proccess is simple, but preparation matters.
Quick Comparison: Easy Fix vs Hardware Issue
| Problem Cause | Fix Type | Difficulty | Cost |
|---|---|---|---|
| Dead battery | Replace battery | Easy | Low |
| BIOS glitch | Reset BIOS | Easy | Free |
| Wrong settings | Load defaults | Easy | Free |
| BIOS corruption | Update BIOS | Medium | Free |
| Motherboard failure | Replace motherbord | Hard | High |
Step-by-Step Fix: CMOS Checksum Error
Now let’s fix it properly.
Step 1: Replace the CMOS Battery (Most Effective Fix)
This solves the problem in 80% of cases.
- Turn off your PC and unplug it
- Open the case
- Locate the coin-cell battery on the motherboard
- Remove it carefully
- Insert a new CR2032 battery
- Power on your system
If your issue was battery-related, it should be fixed instantly.
Step 2: Reset BIOS to Default Settings
After replacing the battery:
- Enter BIOS (press DEL or F2)
- Select “Load Default Settings”
- Save and exit
This ensures clean configuration.
Step 3: Manually Set Date and Time
If date/time resets:
- Set correct date and time in BIOS
- Save settings
If it resets again, battery or motherboard is still the issue.
Step 4: Clear CMOS Using Jumper
If error persists:
- Locate CMOS jumper on motherboard
- Move jumper to reset position (refer to manual)
- Wait 10–15 seconds
- Move it back
- Boot system
This clears corrupted BIOS data.
Step 5: Update BIOS Firmware
If BIOS is corrupted:
- Visit manufacturer website
- Download latest BIOS
- Follow update instructions carefully
Warning: Incorrect BIOS update can permanently damage your system.
Step 6: Check Power Supply Stability
Here’s something most people miss.
If your PSU is unstable:
- BIOS may not retain settings
- CMOS may reset randomly
Try using a stable PSU if problem continues.
Step 7: Inspect Motherboard Physically
Look for:
- Bulging capacitors
- Burn marks
- Corrosion
If you see damage, repair may not be worth it.
Step 8: Advanced Fix – BIOS Chip Reprogramming
This is rare but possible.
- BIOS chip may need reflashing
- Requires specialized tools
At this point, replacing the board is often easier.
Why Older Motherboards Face This Issue More
Let’s be honest—time is not kind to hardware.
Older systems:
- Use aging CMOS batteries
- Have less stable BIOS firmware
- Lack modern power regulation
- Are more sensitive to voltage fluctuations
That’s why this error is so common.
Pro Tips from a Hardware Expert
- Always replace CMOS battery every 3–5 years
- Avoid sudden power shutdowns
- Use a good quality PSU
- Don’t overclock aggressively on old systems
- Keep BIOS updated (when possible)
And yes, sometimes your system just needs a simple battery—not a full upgrade.
Final Thoughts
Fixing CMOS Checksum Error on older motherboards is one of the easiest hardware fixes—if you know what you’re doing.
Start with the battery, reset BIOS, and move step by step.
At fixrig.xyz, we believe in fixing old hardware instead of throwing it away. Because smart repairs save money and reduce tech waste.
Call to Action
Now it’s your turn.
Open your system, replace that battery, and bring your PC back to life.
If your still facing issues or your system is behaving strangely, drop your question on fixrig.xyz—we’ll help you fix it like a true hardware expert.
Leave a Reply