
Look, I’ve seen this mistake a thousand times—people build powerful PCs for work, install everything perfectly… and then end up with a system that sounds like a server rack under their desk.
Here is the real talk about why your rig is acting up: noise isn’t just about “loud fans.” It’s a combination of airflow design, component quality, BIOS tuning, and even how your case resonates with vibrations.
In this complete guide from fixrig.xyz, I’ll show you exactly how to build a silent PC for home office work, step-by-step, using modern 2026 hardware standards and real-world engineering practices.
Why Silent PCs Matter More in 2026
With remote work, Zoom calls, content creation, and long work hours, noise becomes a real productivity killer.
Common Problems with Noisy Office PCs
- Fan noise during meetings
- Sudden RPM spikes under light load
- HDD vibration hum
- PSU coil whine
A silent PC isn’t just luxury—it’s essential for focus and professionalism.

What Actually Makes a PC Silent?
Before building, you need to understand the fundamentals:
1. Low Thermal Output
Less heat = less fan speed
2. Efficient Airflow
Balanced airflow reduces fan workload
3. Quality Components
Cheap hardware = more noise over time
4. Smart BIOS Tuning
Fan curves and voltage control are critical
Tools Checklist for Building a Silent PC
Before you start, get these ready:
- Anti-static wrist strap
- Thermal paste (high quality)
- Screwdriver kit
- Cable ties for management
- Rubber anti-vibration mounts
- Fan splitter or hub
Pro tip: Don’t rush the build. Noise optimization requires patience.
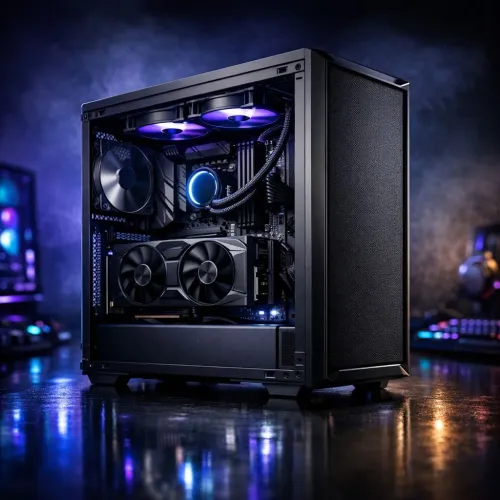
Silent PC Components Breakdown (2026 Standard)
CPU: Go Efficient, Not Extreme
Choose CPUs with:
- Lower TDP (65W–105W ideal)
- Strong efficiency cores
Why? Less heat means less cooling noise.
CPU Cooler: Air vs Liquid
- Air Coolers (Large Heatsinks):
- More reliable
- Lower noise long-term
- AIO Liquid Coolers:
- Better peak cooling
- Pump noise risk
For silent builds, high-end air coolers usually win.
Case: The Foundation of Silence
Look for:
- Sound-dampening panels
- Rubber mounts
- Optimized airflow design
Bad case = noisy system no matter what you install.
Fans: The Heart of Silence
Use:
- 120mm or 140mm fans
- PWM-controlled fans
- Fluid Dynamic Bearing (FDB)
Avoid cheap fans—they’re loud even at low RPM.
Storage: SSD Over HDD
- SSD = zero noise
- HDD = vibration + spinning noise
If you must use HDD, isolate it with dampeners.
Power Supply (PSU)
Choose:
- 80+ Gold or higher
- Zero RPM fan mode
Cheap PSU = hidden noise source.
Comparison Table: Silent Build vs Regular PC
| Feature | Silent PC Build | Standard Build |
|---|---|---|
| Noise Level | Very Low | Medium-High |
| Cooling Strategy | Optimized airflow | Aggressive fans |
| Component Quality | Premium | Mixed |
| Fan Control | Custom BIOS curves | Default |
| User Experience | Smooth & quiet | Distracting |
Step-by-Step: How to Build a Silent PC for Home Office Work
Step 1: Choose the Right Case Layout
- Front intake fans
- Rear/top exhaust
- Avoid airflow blockage
Airflow direction matters more than fan count.
Step 2: Install CPU & Cooler Properly
- Apply thermal paste evenly
- Mount cooler securely
Bad mounting = higher temps = louder fans
Step 3: Install Low-Noise Fans
- Use 2–3 intake + 1 exhaust
- Avoid overloading with too many fans
More fans ≠ quieter system
Step 4: Cable Management
Messy cables block airflow.
- Route cables behind motherboard tray
- Keep airflow path clean
This step alone reduces fan workload significantly.
Step 5: Configure BIOS Fan Curves
This is where most builds fail.
- Enter BIOS (DEL/F2)
- Set custom fan curves:
Example:
- 30°C → 20% speed
- 50°C → 40% speed
- 70°C → 65% speed
Don’t let your system run fans at full speed unnecessarily.
Step 6: Optimize Voltage Settings
Lower voltage = less heat
- Enable CPU undervolting (if supported)
- Adjust RAM XMP carefully
Watch stability—don’t push too far.
Step 7: Install OS & Drivers Properly
Outdated drivers can cause:
- CPU spikes
- Thermal throttling
- Fan ramp issues
Always install latest stable drivers.
Step 8: Test Under Real Workload
- Run office apps
- Join video calls
- Monitor temps
Your goal: stable temps with minimal noise.
Advanced Noise Reduction Techniques
Anti-Vibration Solutions
- Rubber mounts for fans
- Foam padding inside case
Acoustic Optimization
- Place PC on soft surface
- Avoid hollow desks (they amplify noise)
Undervolting for Silence
Reducing CPU/GPU voltage:
- Lowers heat output
- Reduces fan speed
But test stability carefully.
Fan Curve Software Control
Use advanced tools to fine-tune fan response dynamically.
Common Mistakes That Ruin Silent Builds
Using High-TDP Components
More heat = more noise
Ignoring BIOS Settings
Default settings are rarely optimized
Cheap Fans
They sound bad even at low RPM
Poor Airflow Design
Hot air trapped = fans go crazy
No Thermal Monitoring
You can’t fix what you don’t measure
Real-World Troubleshooting Scenarios
Problem: PC is quiet at idle but loud under light load
Cause: Aggressive fan curve
Fix: Smooth out RPM ramping in BIOS
Problem: Constant humming noise
Cause: Case vibration
Fix: Add rubber mounts
Problem: Random noise spikes
Cause: Background proccess load
Fix: Check drivers and CPU usage
Pro Tips from a Hardware Engineer
- Bigger fans = quieter airflow
- Keep temps under control, not ultra-low
- Silence is about balance, not extremes
- Invest in quality once, not replacements later
And here’s something most people ignore:
Even the desk your PC sits on can amplify noise. Seriously.
Final Thoughts: Silence is Engineered, Not Bought
Building a silent PC for home office work isn’t about one magical component—it’s about system harmony.
Every part matters:
- Airflow
- Voltage
- Cooling
- Build quality
If one thing is off, the whole system becomes noisy.
And remember—your system doesn’t need to be freezing cold. It just needs to be efficient.
CTA: Build Smart, Work Quiet
At fixrig.xyz, we help you go beyond basic builds and into real hardware mastery.
If your PC is still noisy, overheating, or behaving weirdly…
Drop your full specs in the comments and let’s fix your rig step-by-step.
Because your setup should work for you—not distract you.